contact

Use the form on the right to contact Wesley regarding lessons or performances.


123 Street Avenue, City Town, 99999

(123) 555-6789

email@address.com


You can set your address, phone number, email and site description in the settings tab.
Link to read me page with more information.

Trumpet On Your Own

Learn to play the trumpet!

Care and Maintenance

Wesley Campbell

Now that you’ve been playing your trumpet for a while, it’s a good idea to learn how to maintain it. Fortunately, the trumpet is pretty resilient, so oiling the valves and a thorough cleaning are most of the maintenance you should need to do. Before jumping into that, let’s look at some preventive measures to help you not have to clean quite so much, or as often.

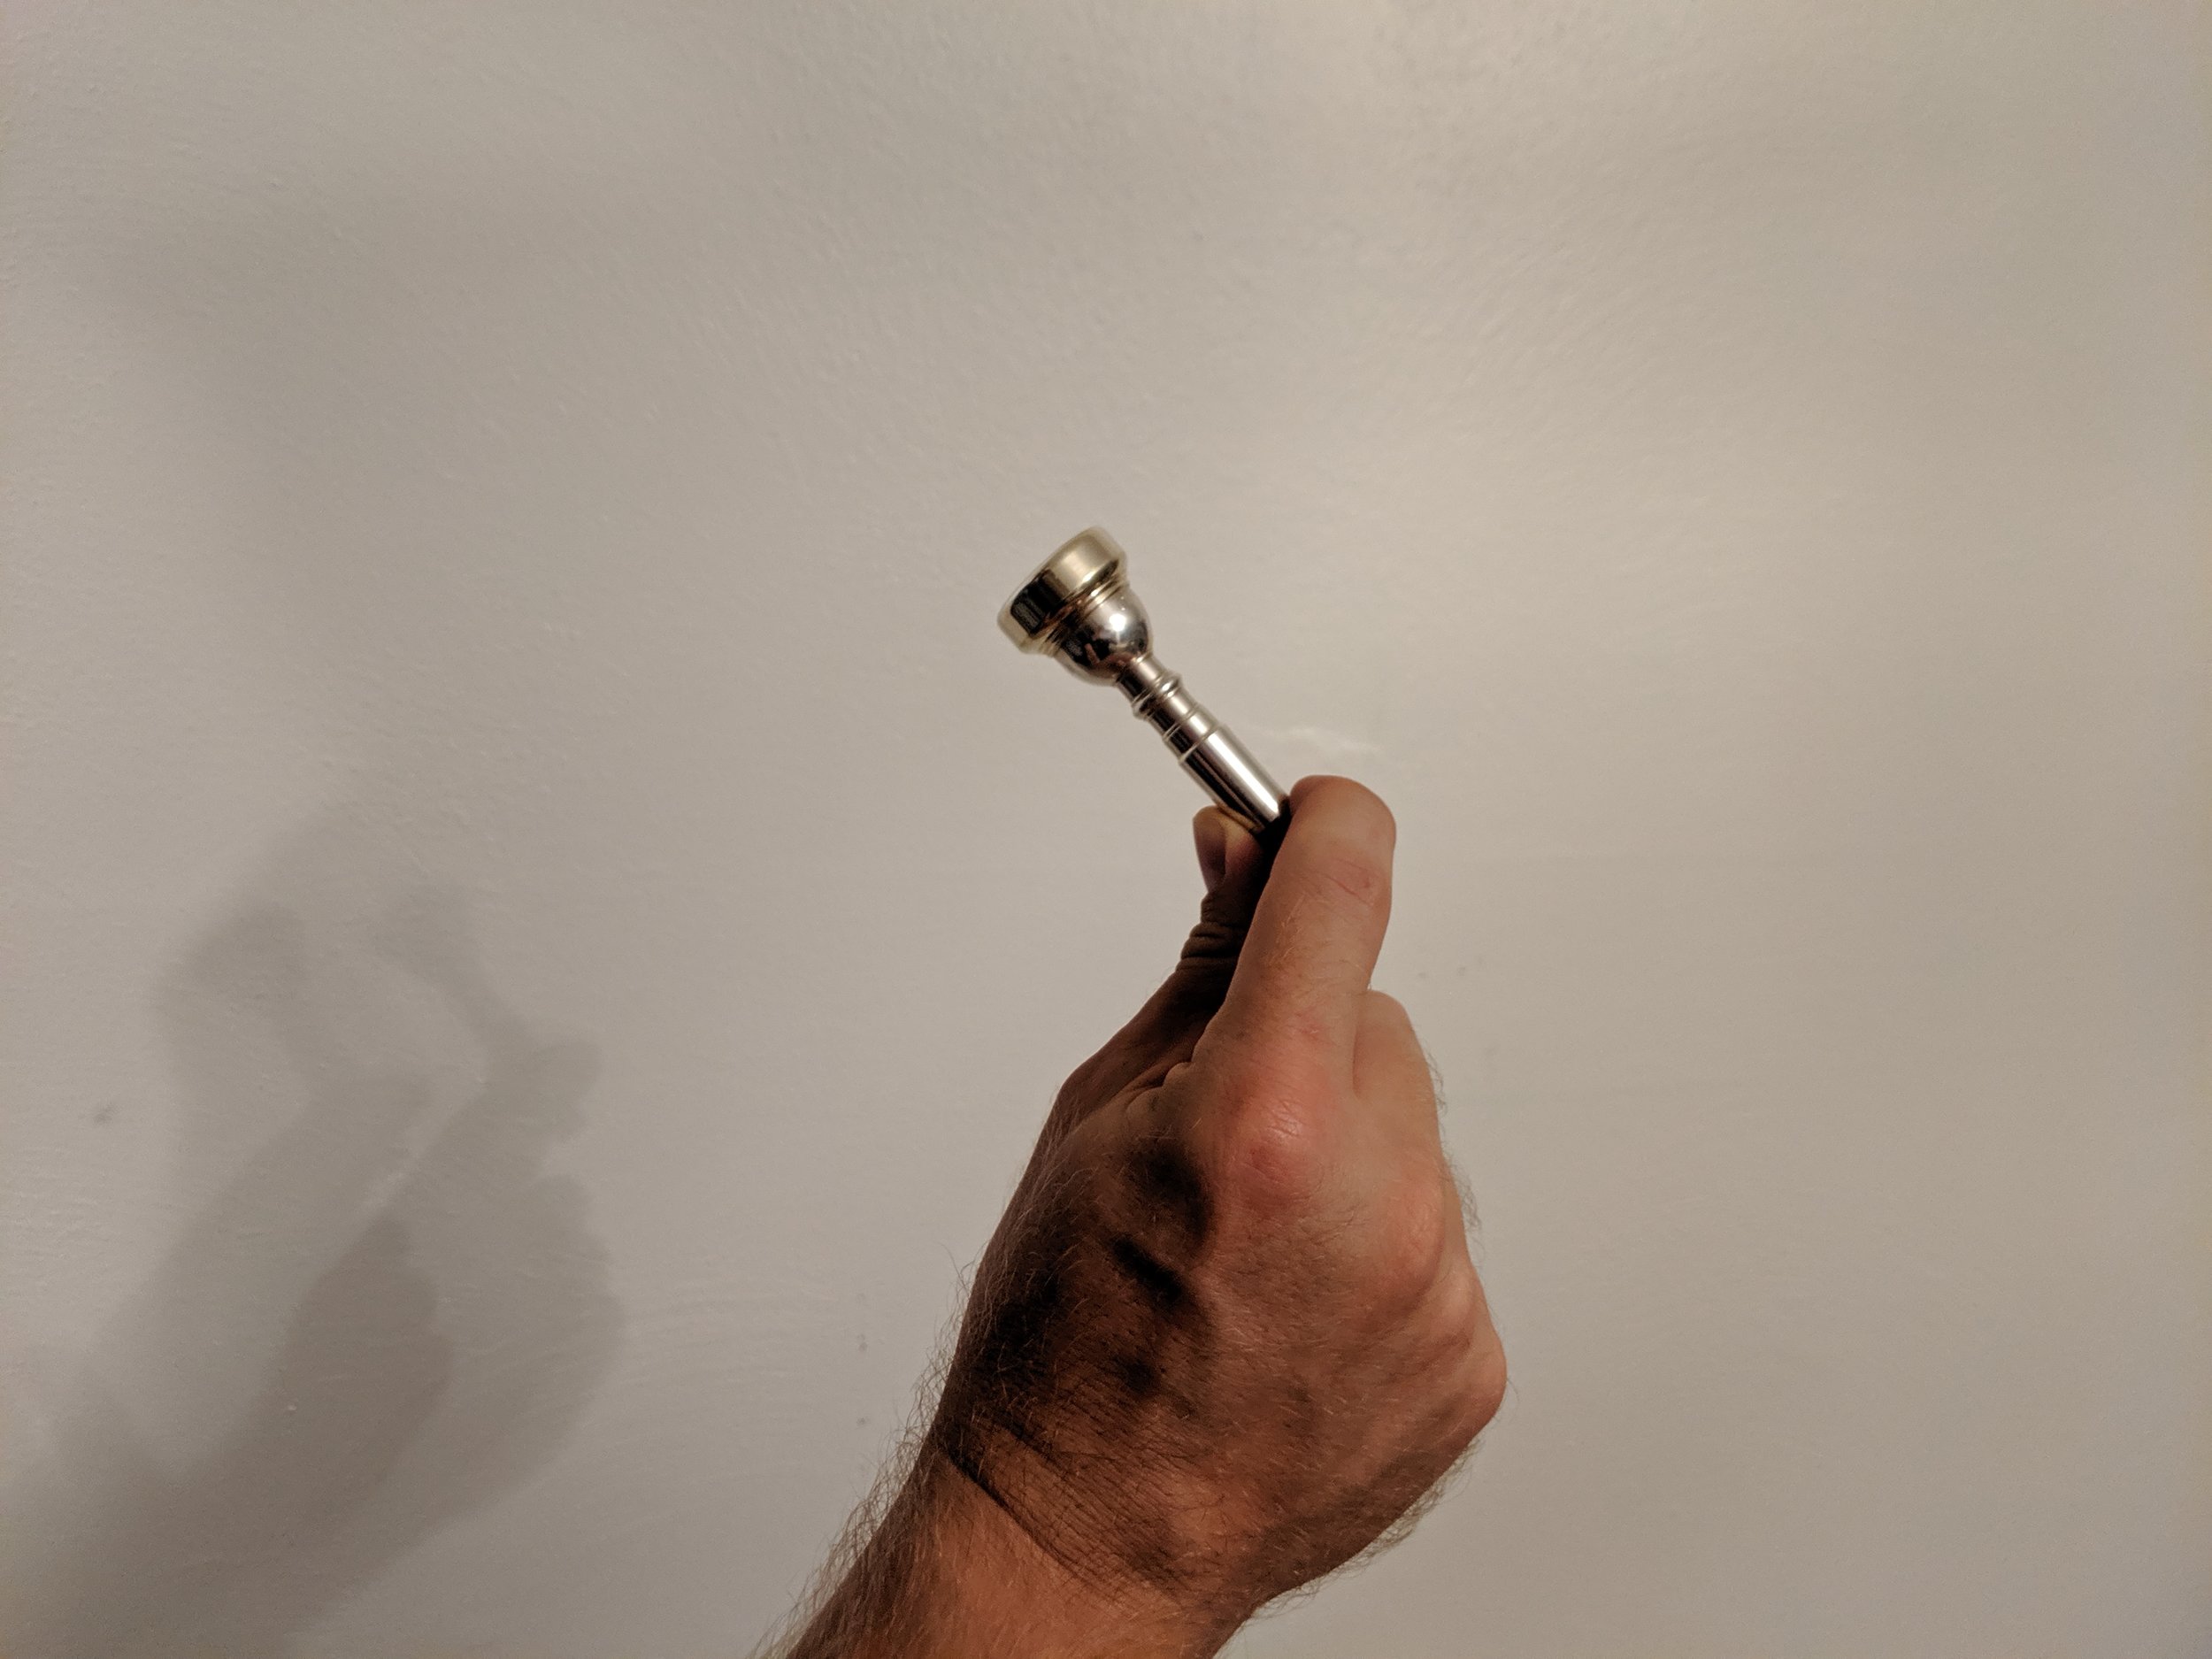
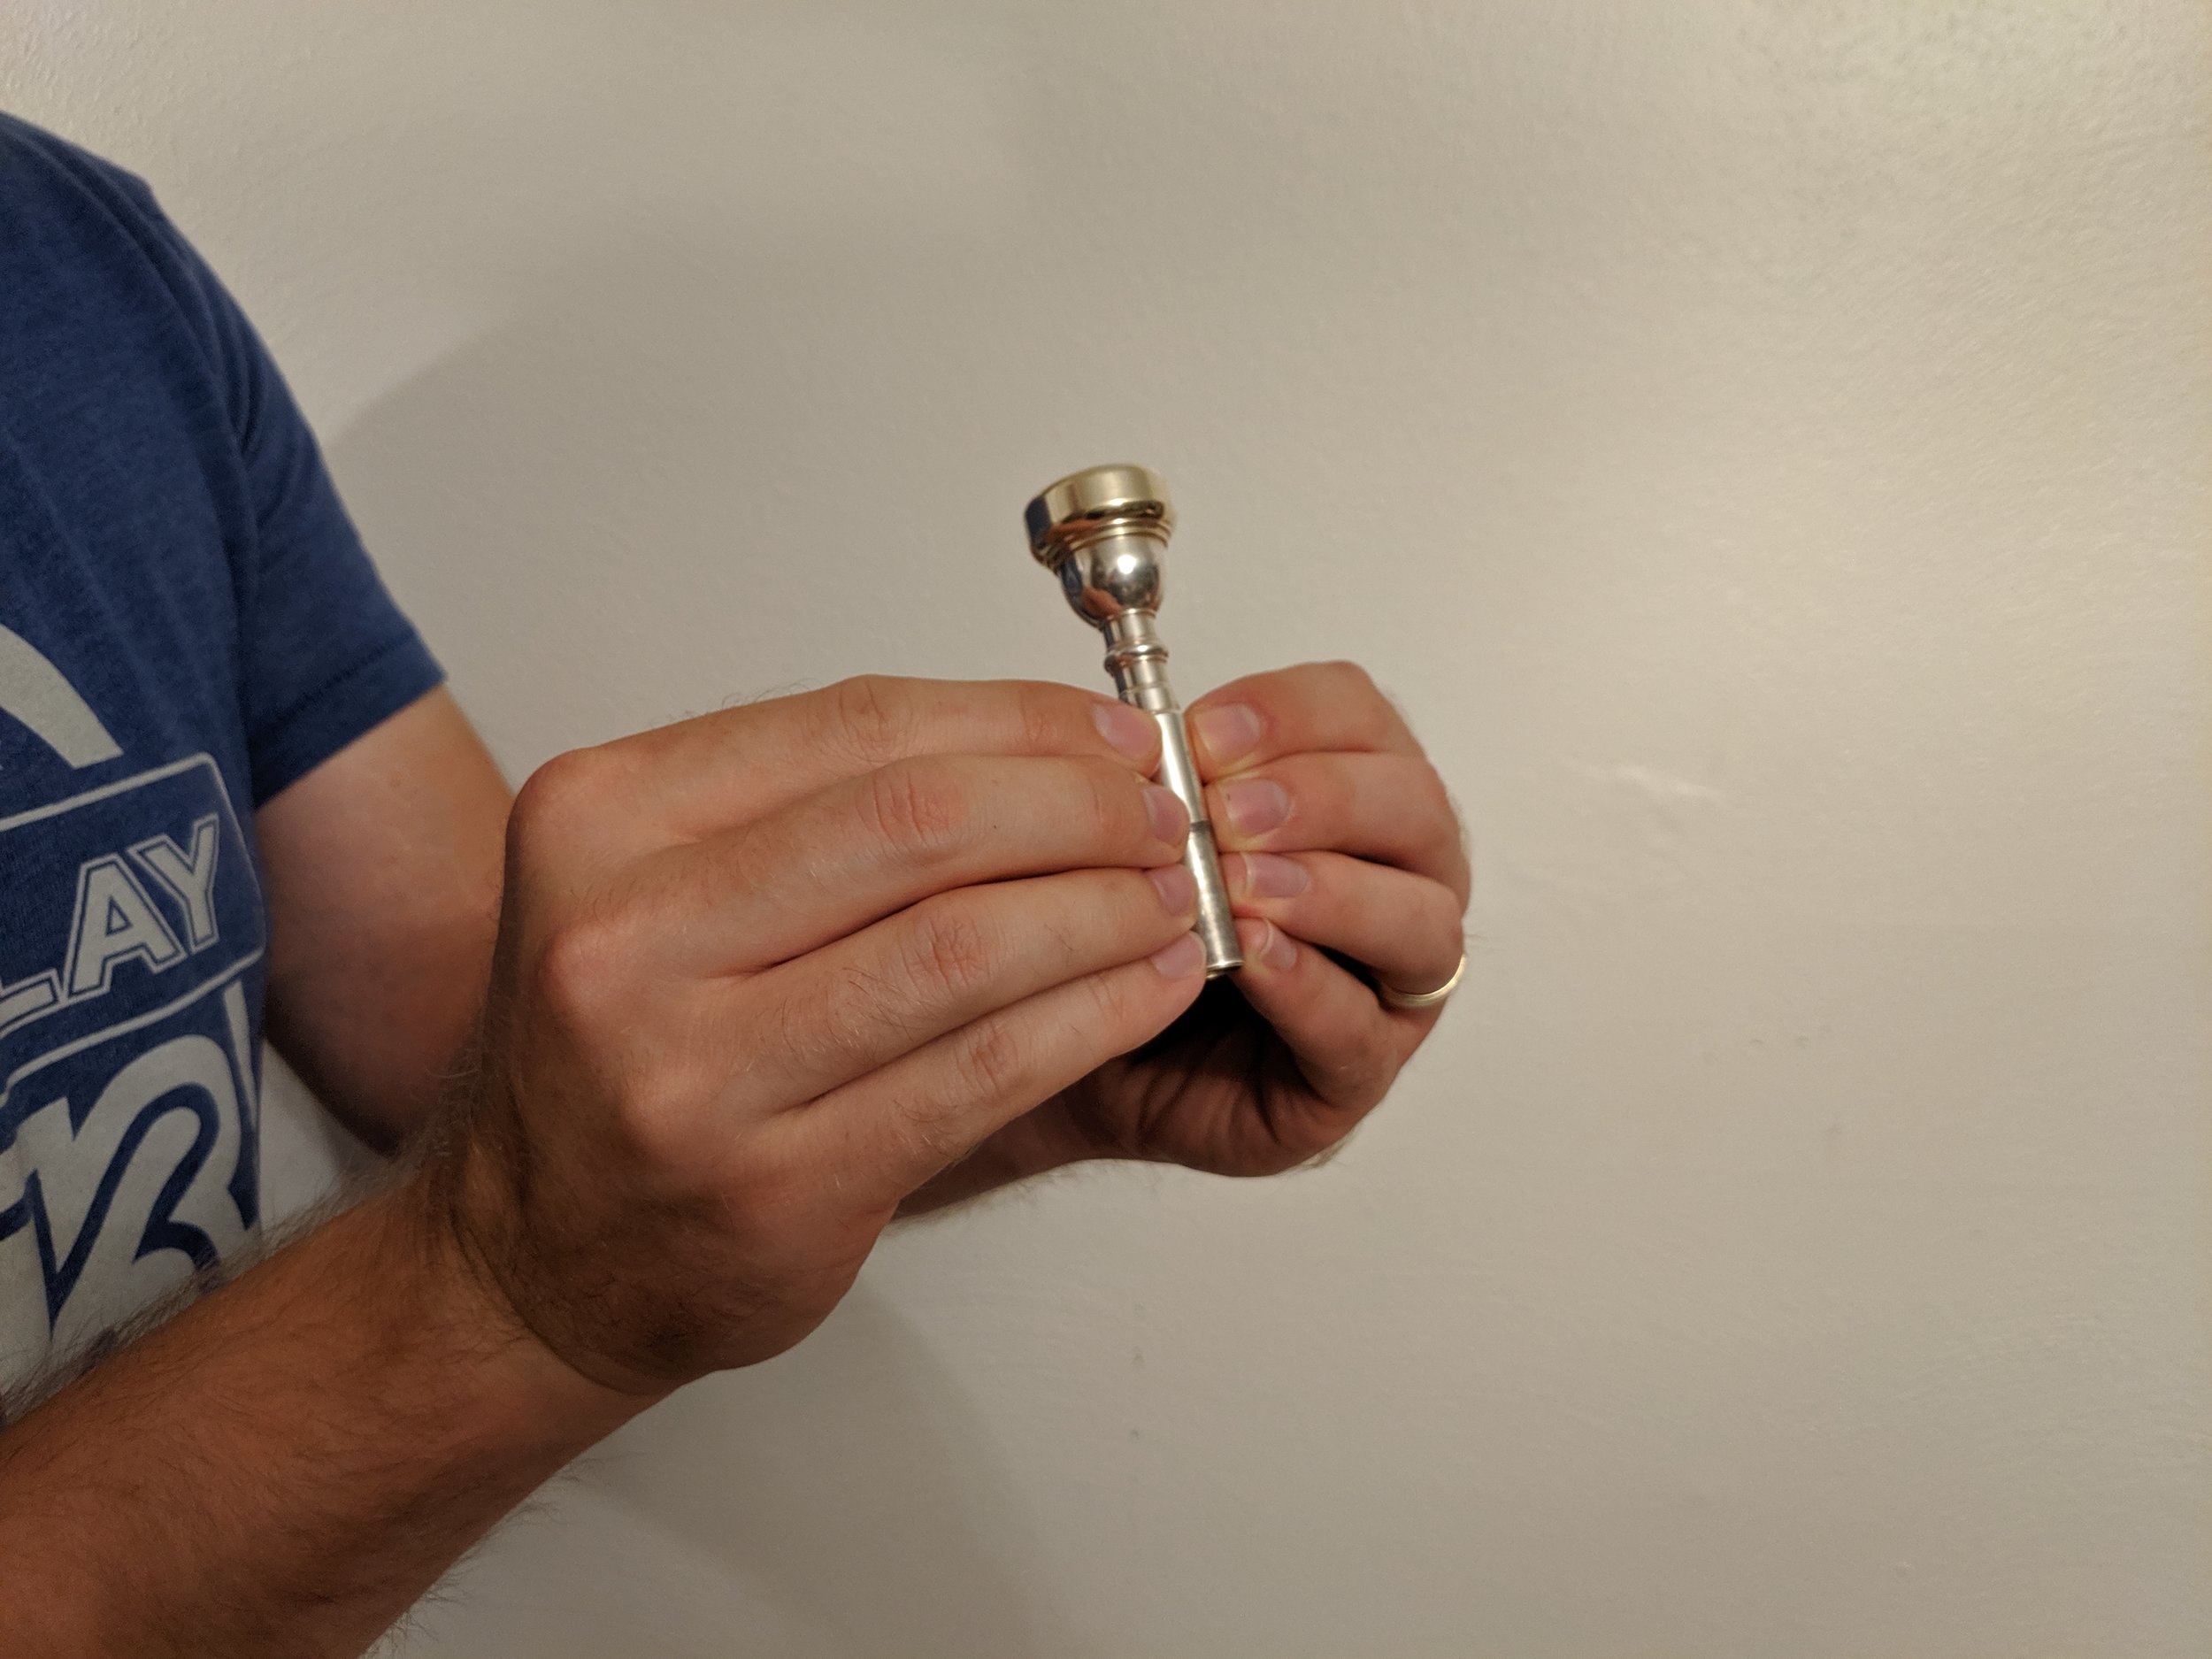
One of the best things you can do for the cleanliness and workability of your trumpet is to limit what goes inside it. You should generally aim for only air and water to go into your horn. Water in this case being from your breath. Fun fact: the “spit valve” on you trumpet is actually called a water key because what comes out of your trumpet is almost entirely condensation from warm moist air hitting the colder interior brass. That said, anything in your mouth will likely travel along with your air (assuming you use adequate breath support), so if you just had a drink of something sugary (Coke, Dr. Pepper, Pepsi, etc.) you’re blowing a bit of sugar and acid (yep, there’s acid in there) into your trumpet as well. In small bits, that’s not really a big deal, but over time it can accumulate and start to eat through the brass… Seriously. So if you’re going to drink something before or during a playing session, try to limit it to water, or something very close to it, like an unsweetened tea or black coffee.

Likewise, food and trumpets don’t mix. The most obvious drawback is of an accidentally blown-in food chunk getting stuck somewhere and blocking airflow or valve motion. Additionally, smaller particles, even if they don’t “gum up the works” will break down over time and, you guessed it, start to corrode the brass from the inside out. There are two easy solutions here. First, don’t eat right before you play the trumpet. Second, if you’re in a time crunch and absolutely must eat right before, make sure you brush your teeth before you play. Your trumpet and your dentist will thank you.

Lubrication

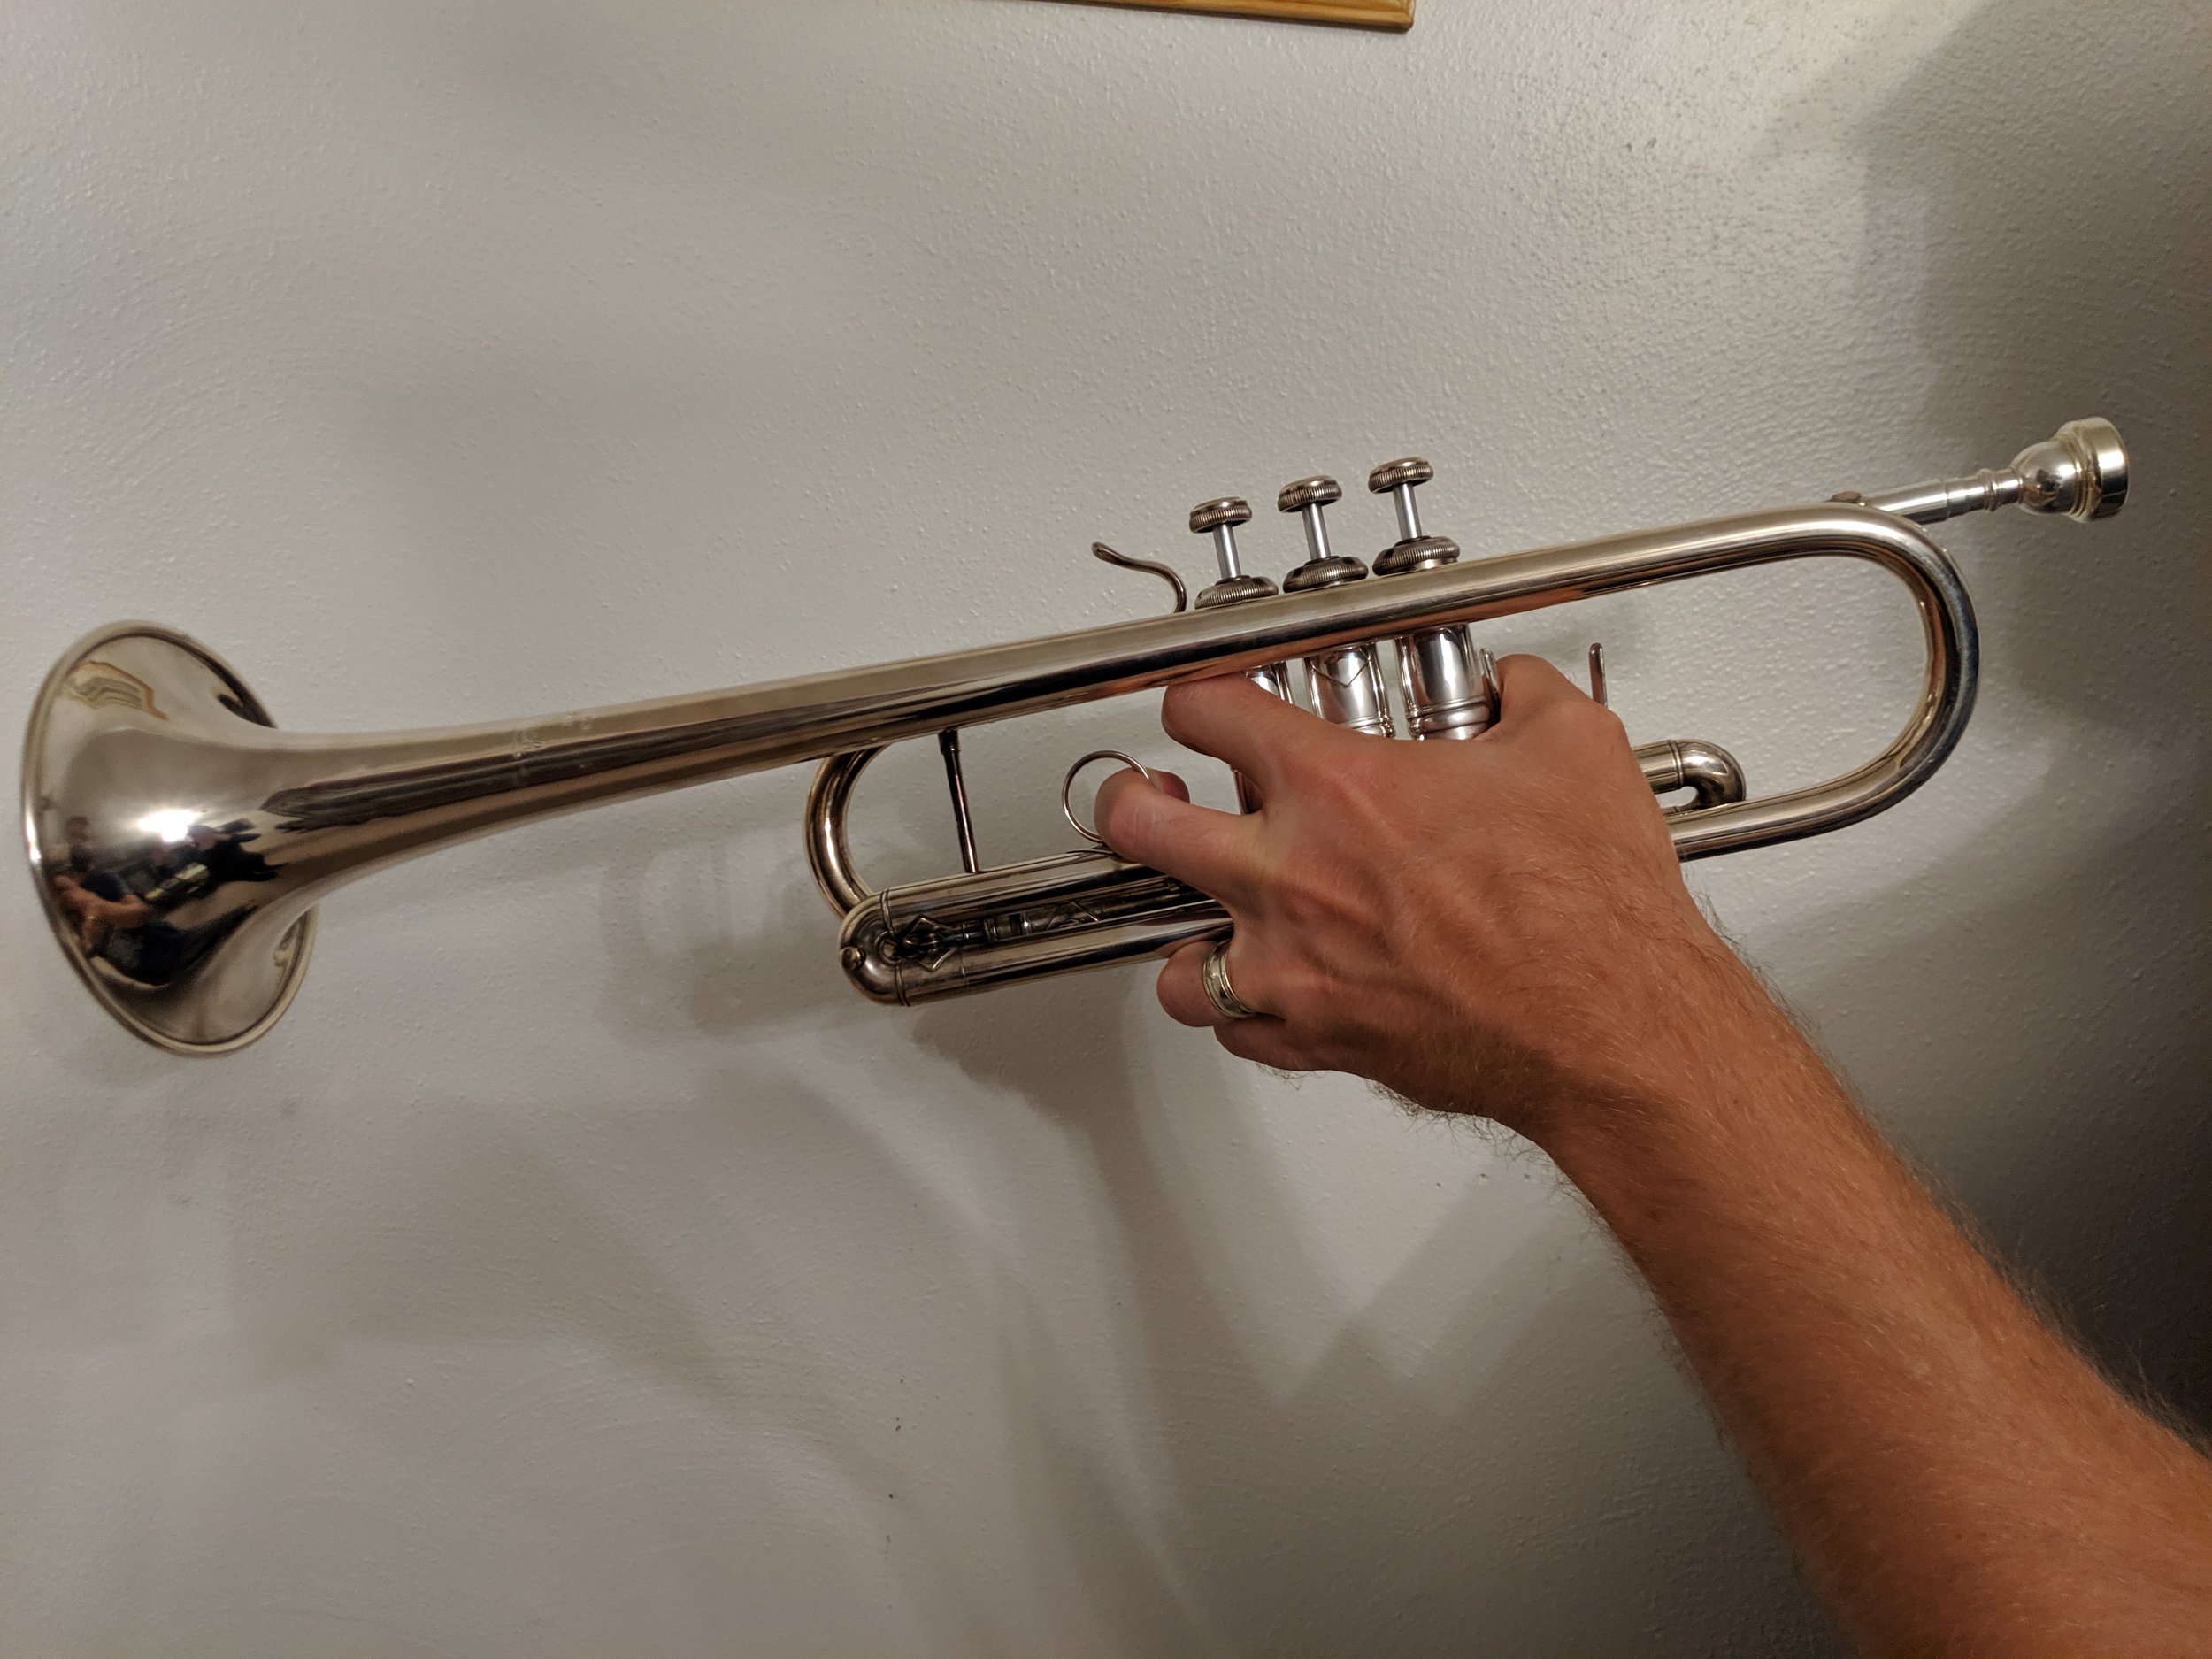
The primary maintenance a trumpet will need is keeping it adequately lubricated. This means keeping all the valves and slides moving smoothly. The valves are your primary movers, so we’ll start there. First things first, you will need valve oil. There are dozens of manufacturers of valve oil at this point. The fact of the matter is that most oils will work about the same as each other. A small warning, though, some combinations of different oils will actually congeal and make your valves slower. Pick an oil and stick to it. If you decide (or need) to change oils, make sure to clean your valves first, just in case. So, how do we oil our valves? First, unscrew the upper valve cap where it meets the casing.

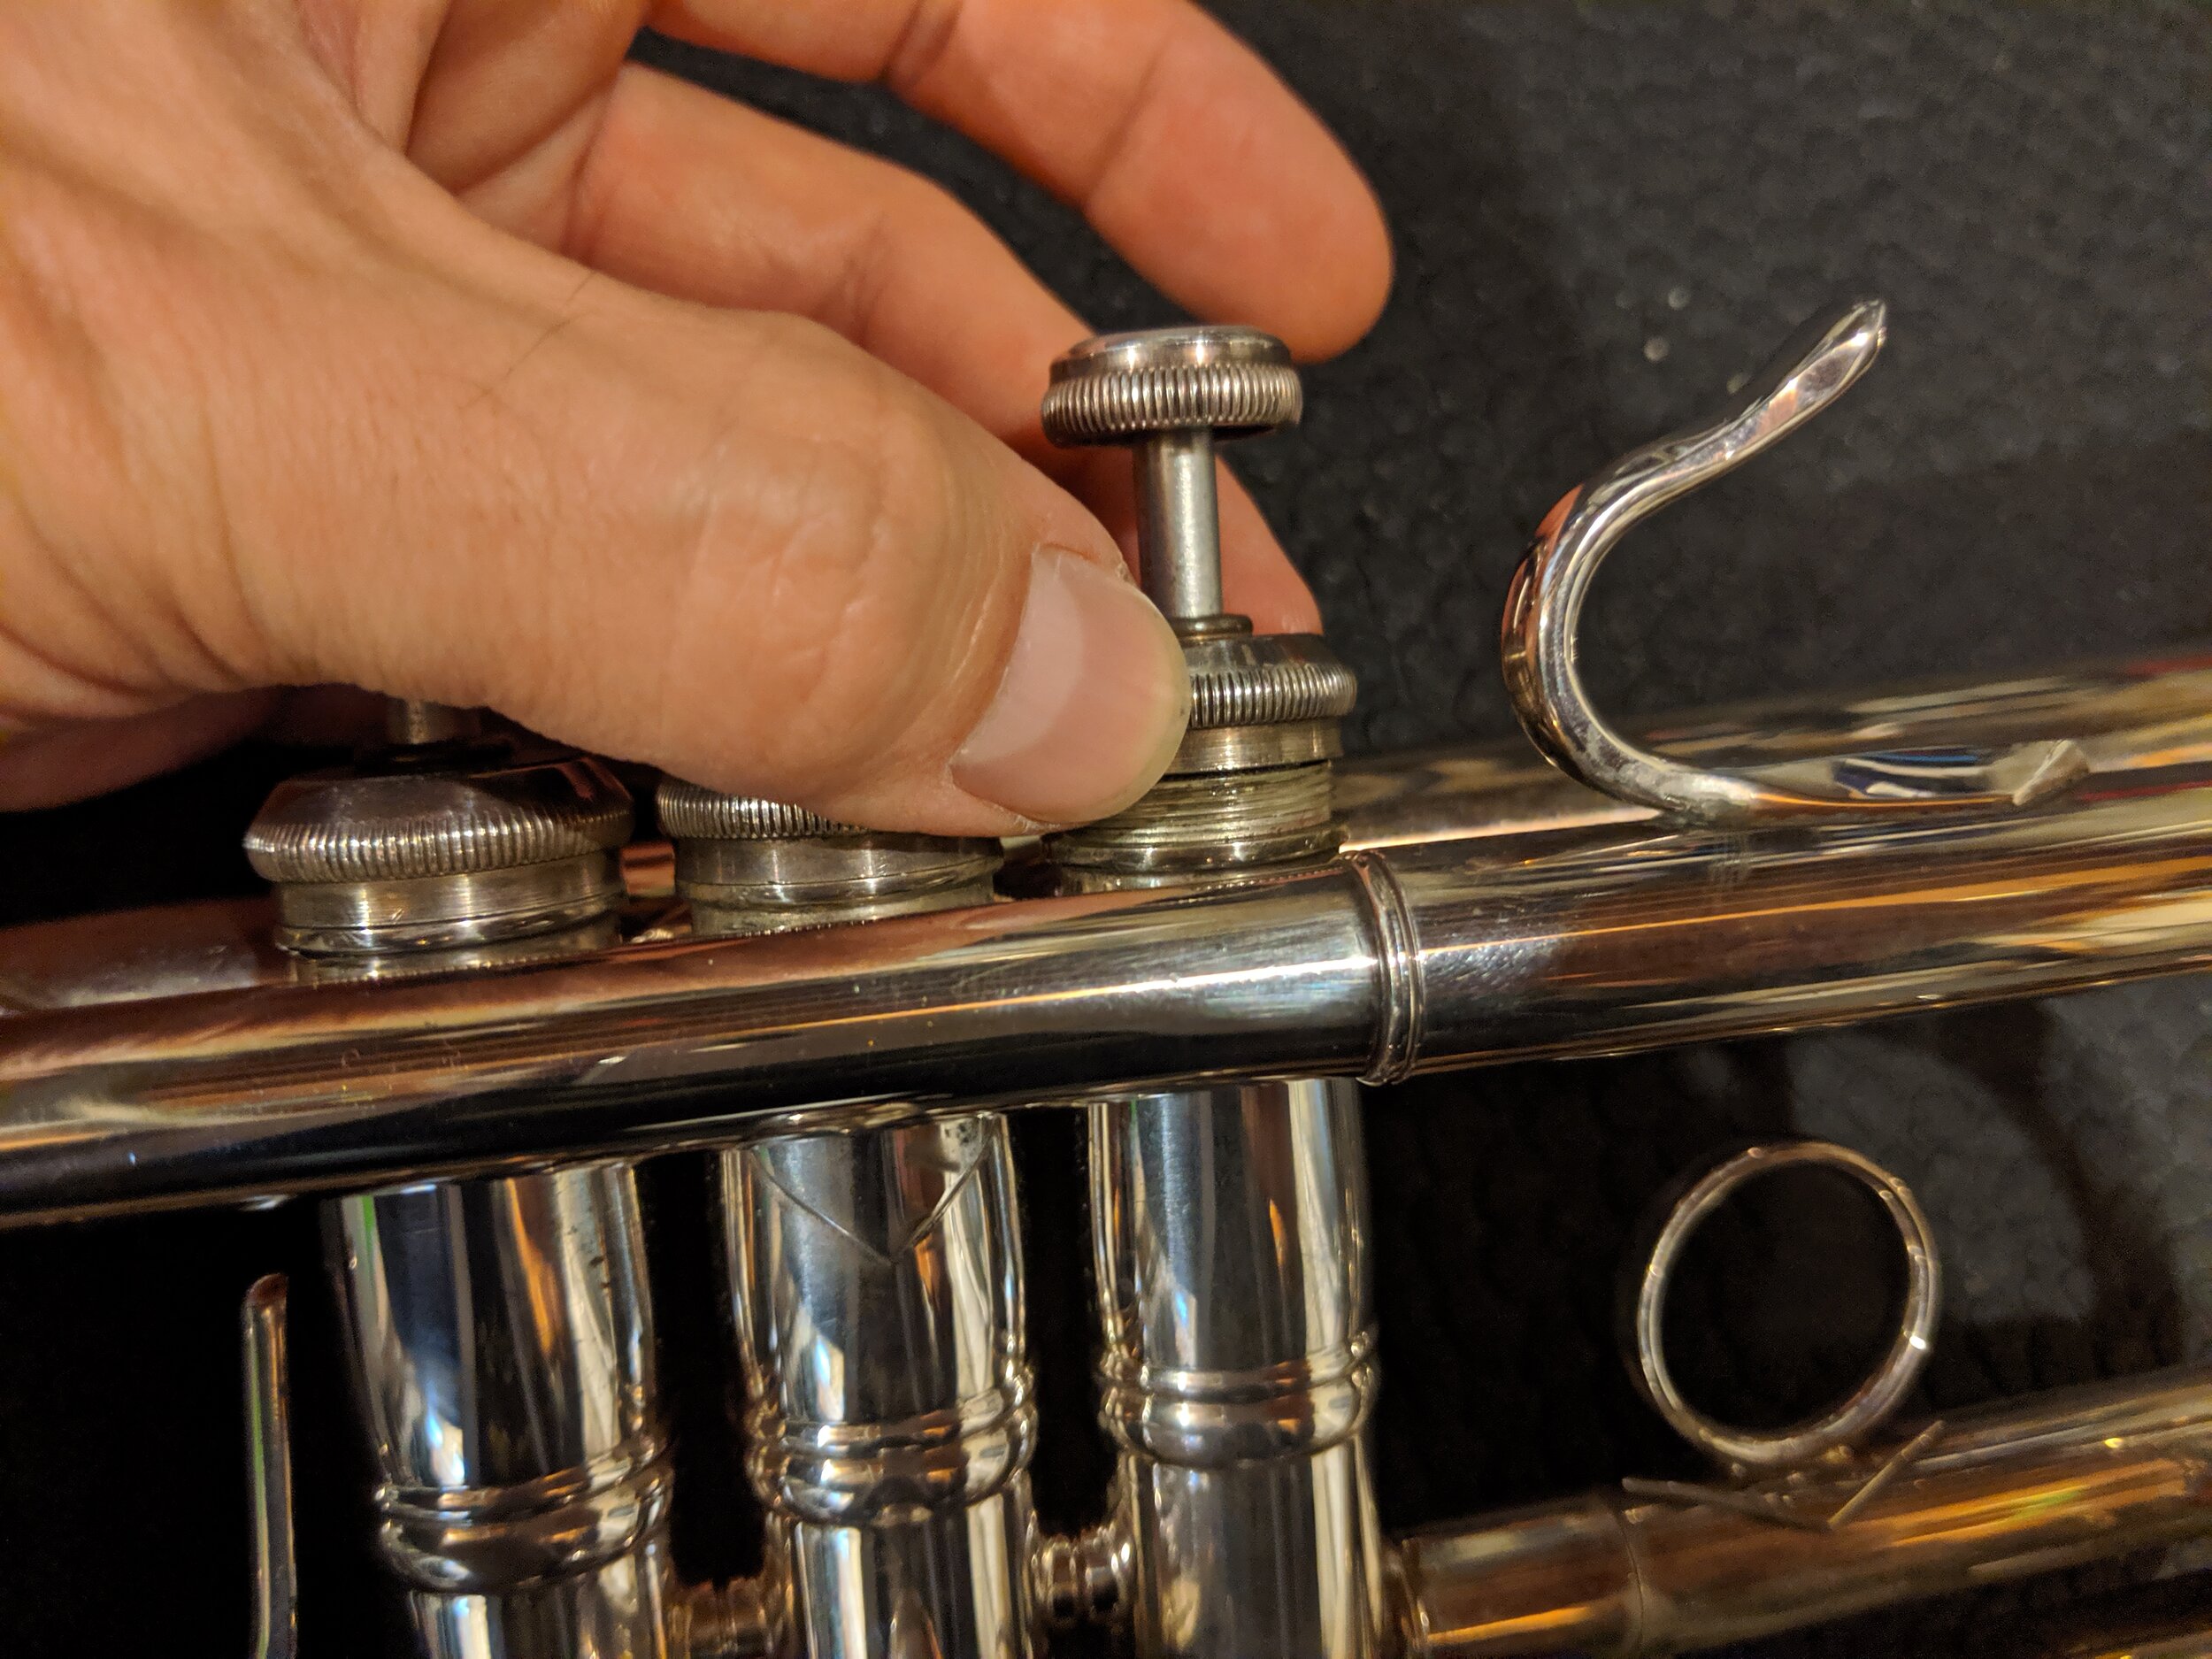
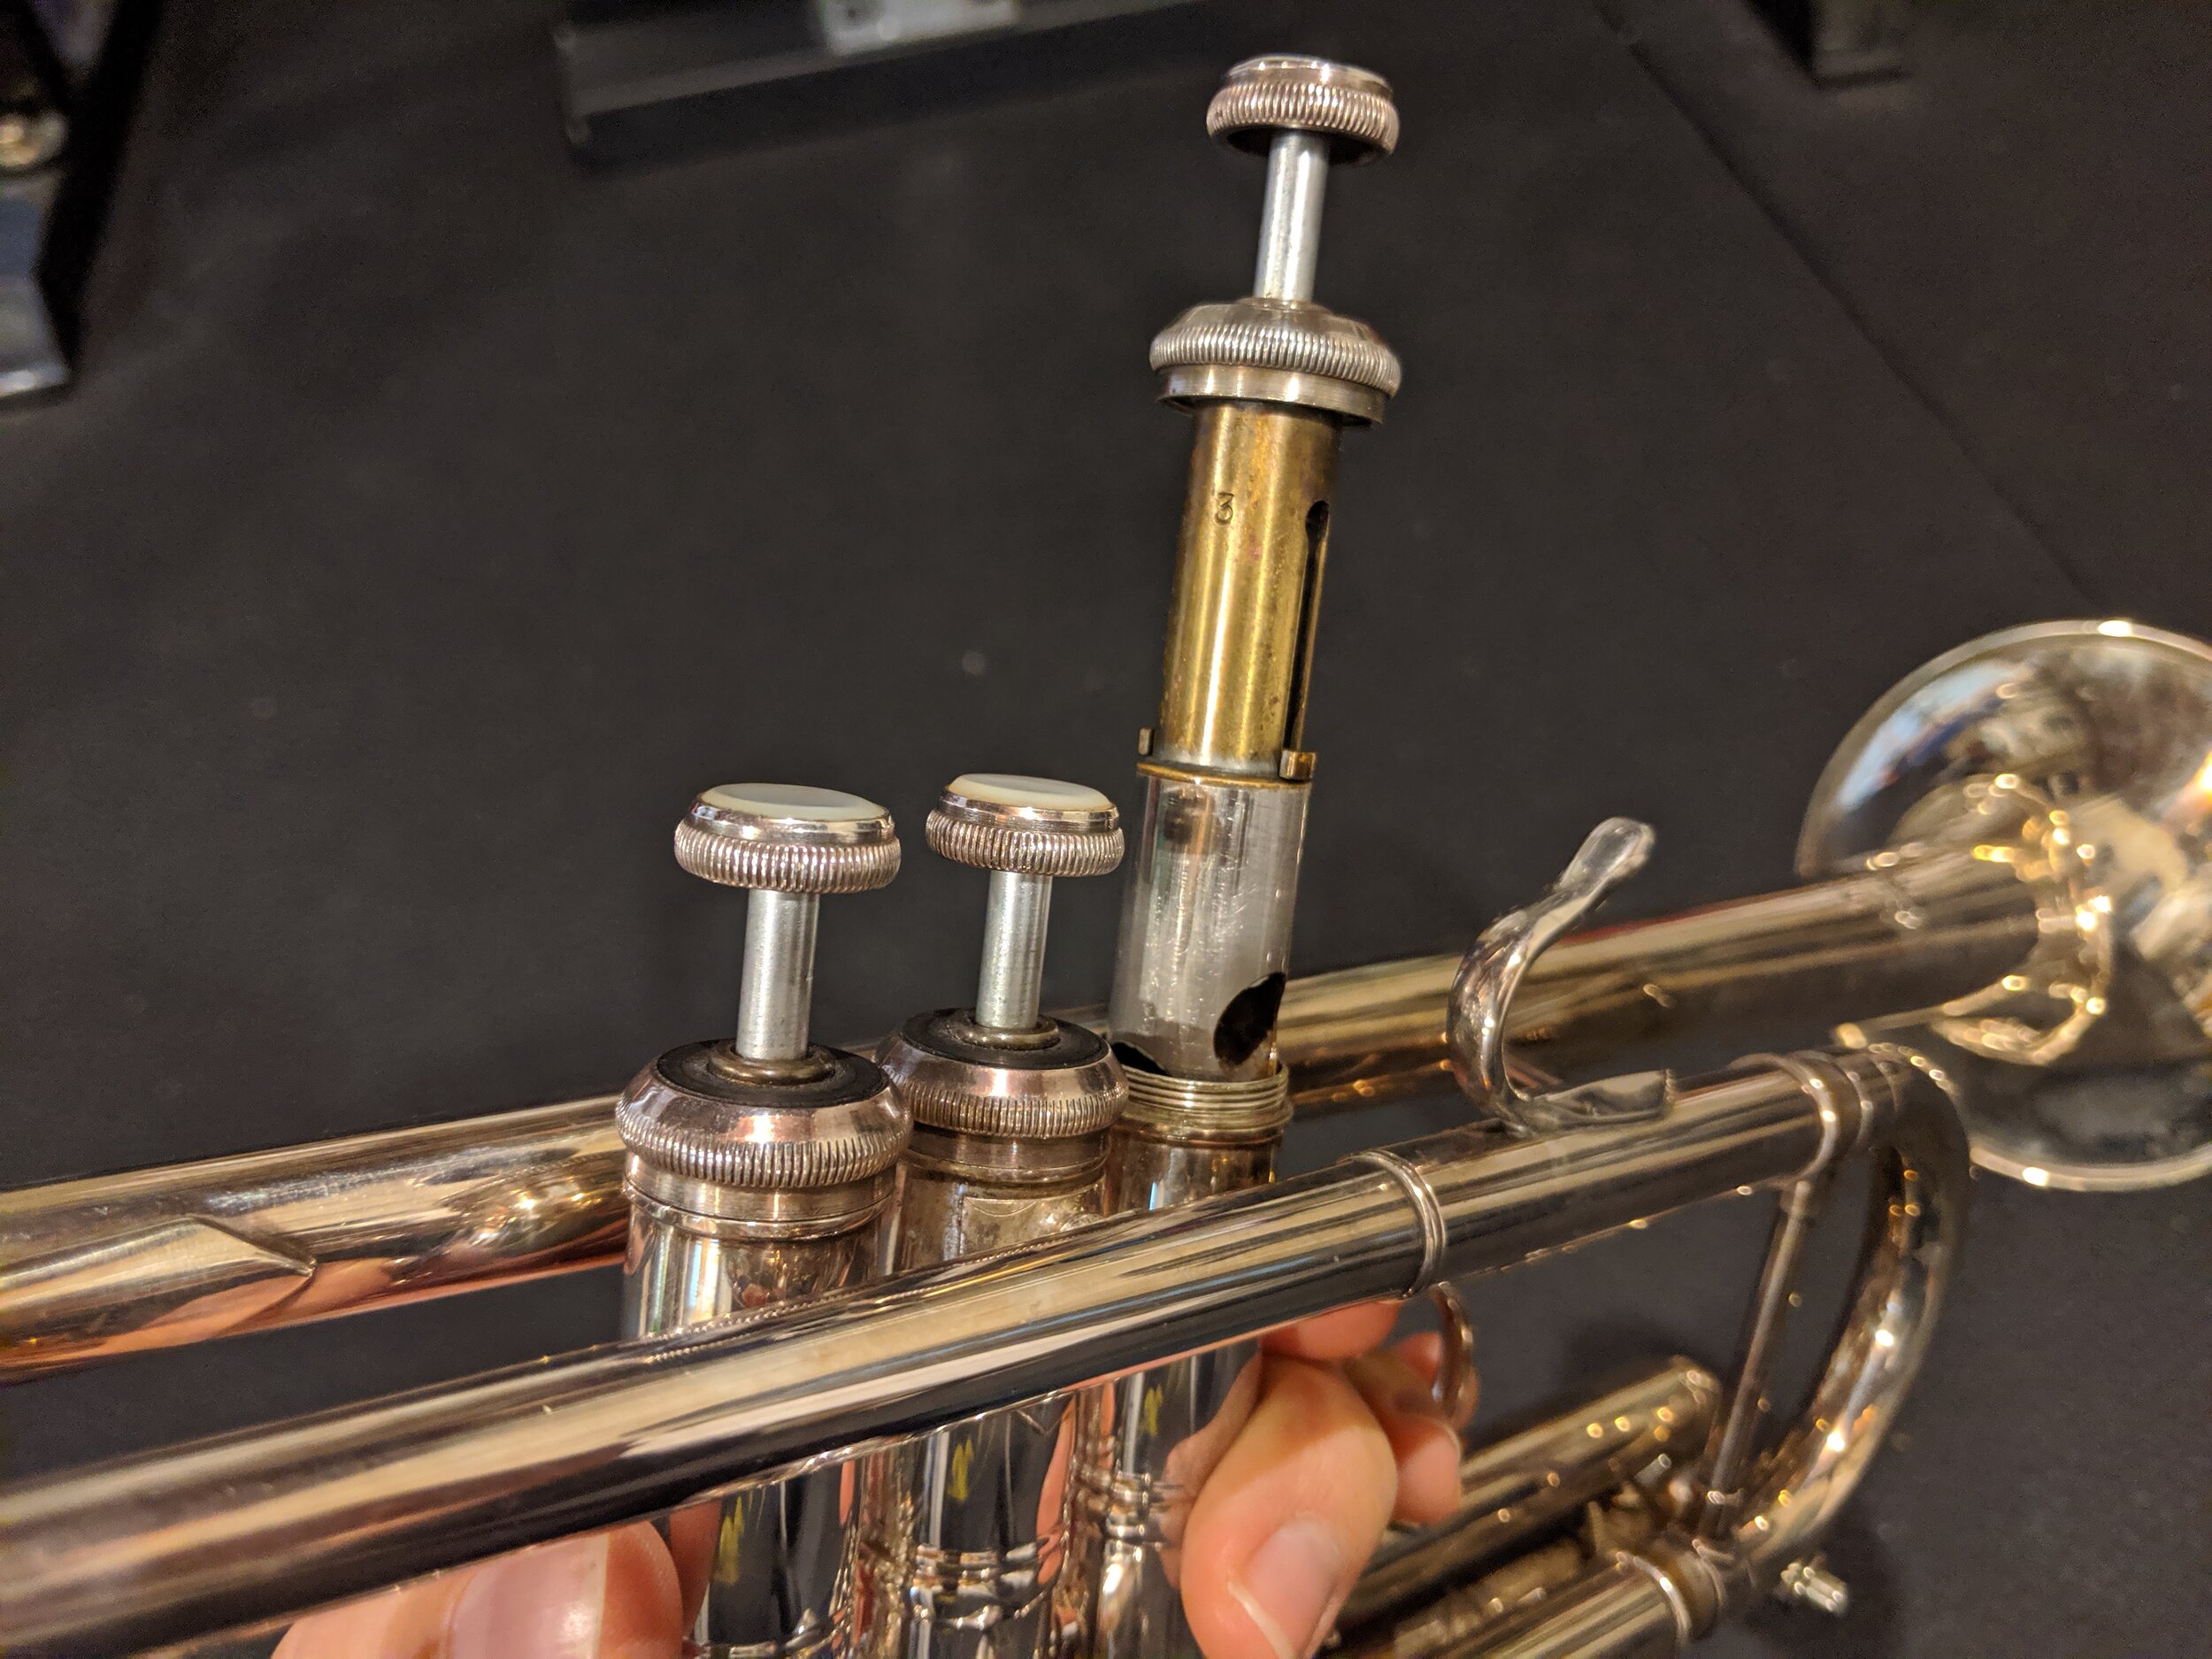
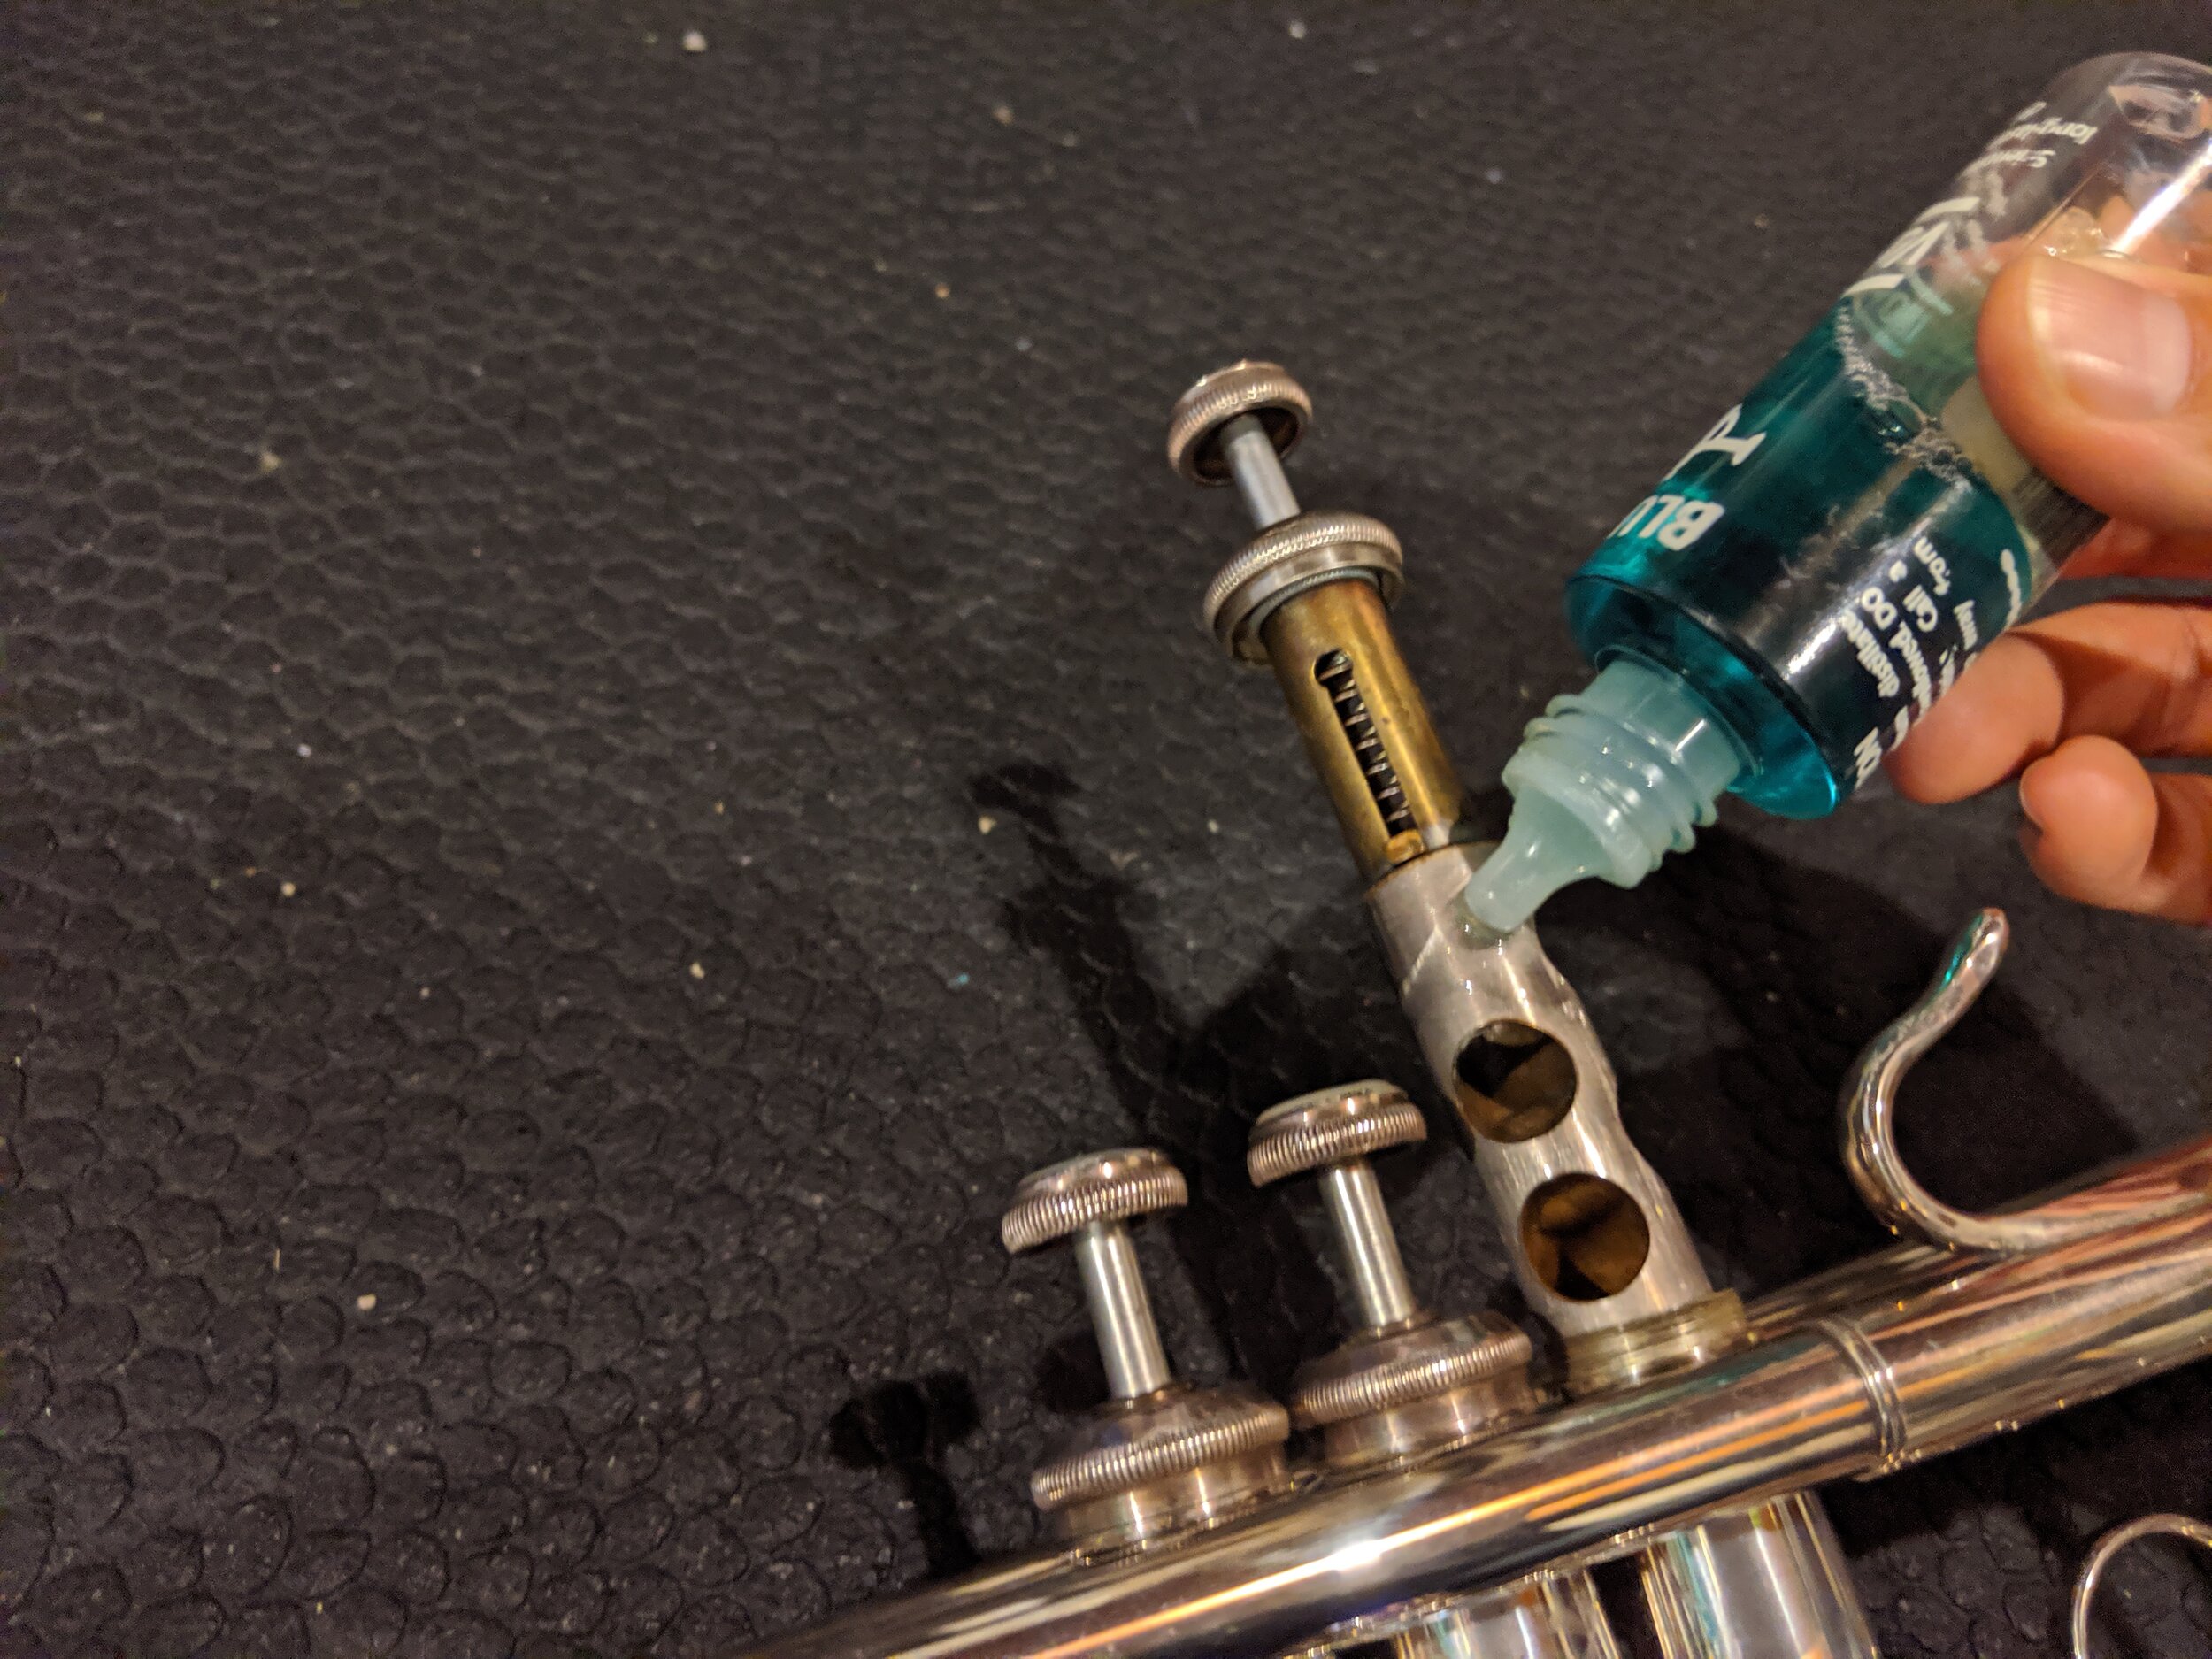
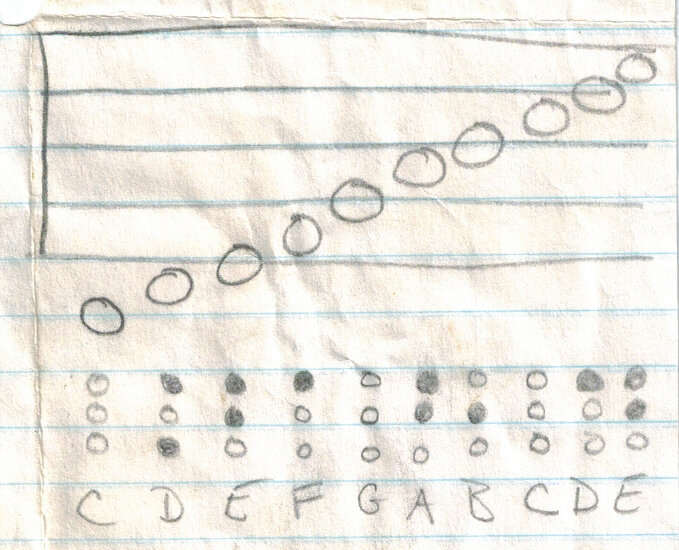
Then remove the valve, making note of the number on the upper half of the valve. The number will tell you which valve it is (useful if you take out all of them at once for cleaning) and all three numbers will face the same direction when replaced properly. For some manufacturers the numbers will face toward the mouthpiece, and others will face toward the bell. Pay close attention as a backward valve will block the air from moving. If there’s any noticeable build-up, dirt, or debris, wipe it off with a clean cloth or paper towel before adding oil. Add a line of oil on the main surface of the valve where it would make contact with the casing. Now put the valve back in (remembering which direction your numbers face). If you give a slight turn in both directions you should get a “click” when the valve guide at the base of the spring locks into its proper place. At this point, you can screw the valve cap back on and you’re good to go!

But wait! How much oil should I use? And how often should I oil the valves? Good questions. The answers, however are less good. The “correct” answers are that you should oil your valves as often as they need it, and only use enough to get them moving smoothly… Helpful, right? It is, however, true. Oiling more frequently won’t really help anything, and using too much oil ends up being wasteful. The good news here is that neither of those things will hurt anything. So if your valves start to slow down every couple weeks, try oiling them once a week. Obviously, your timeframe will vary based on how much you play. During the busiest times of year I end up oiling my valves every few days, and in the slower stretches (and depending on which trumpet/oil combination we’re talking about) it could be a month between oil applications. See what works for you and adjust as needed, but err on the side of too frequently. As for the amount of oil, a thin line along the contact surface is usually enough, but depending on the age and cleanliness of your horn, that might not be. If you’re worried about putting too much oil on, don’t be. Simply remove the bottom valve caps and any extra oil will drain out the bottom. CAUTION: Valve oil can be extremely hard to remove from certain fabrics, so if you’re wearing nice clothes you should place a towel under the valve section to catch any drips. Denim is the only fabric I’ve yet had consistently wash clean from valve oil.

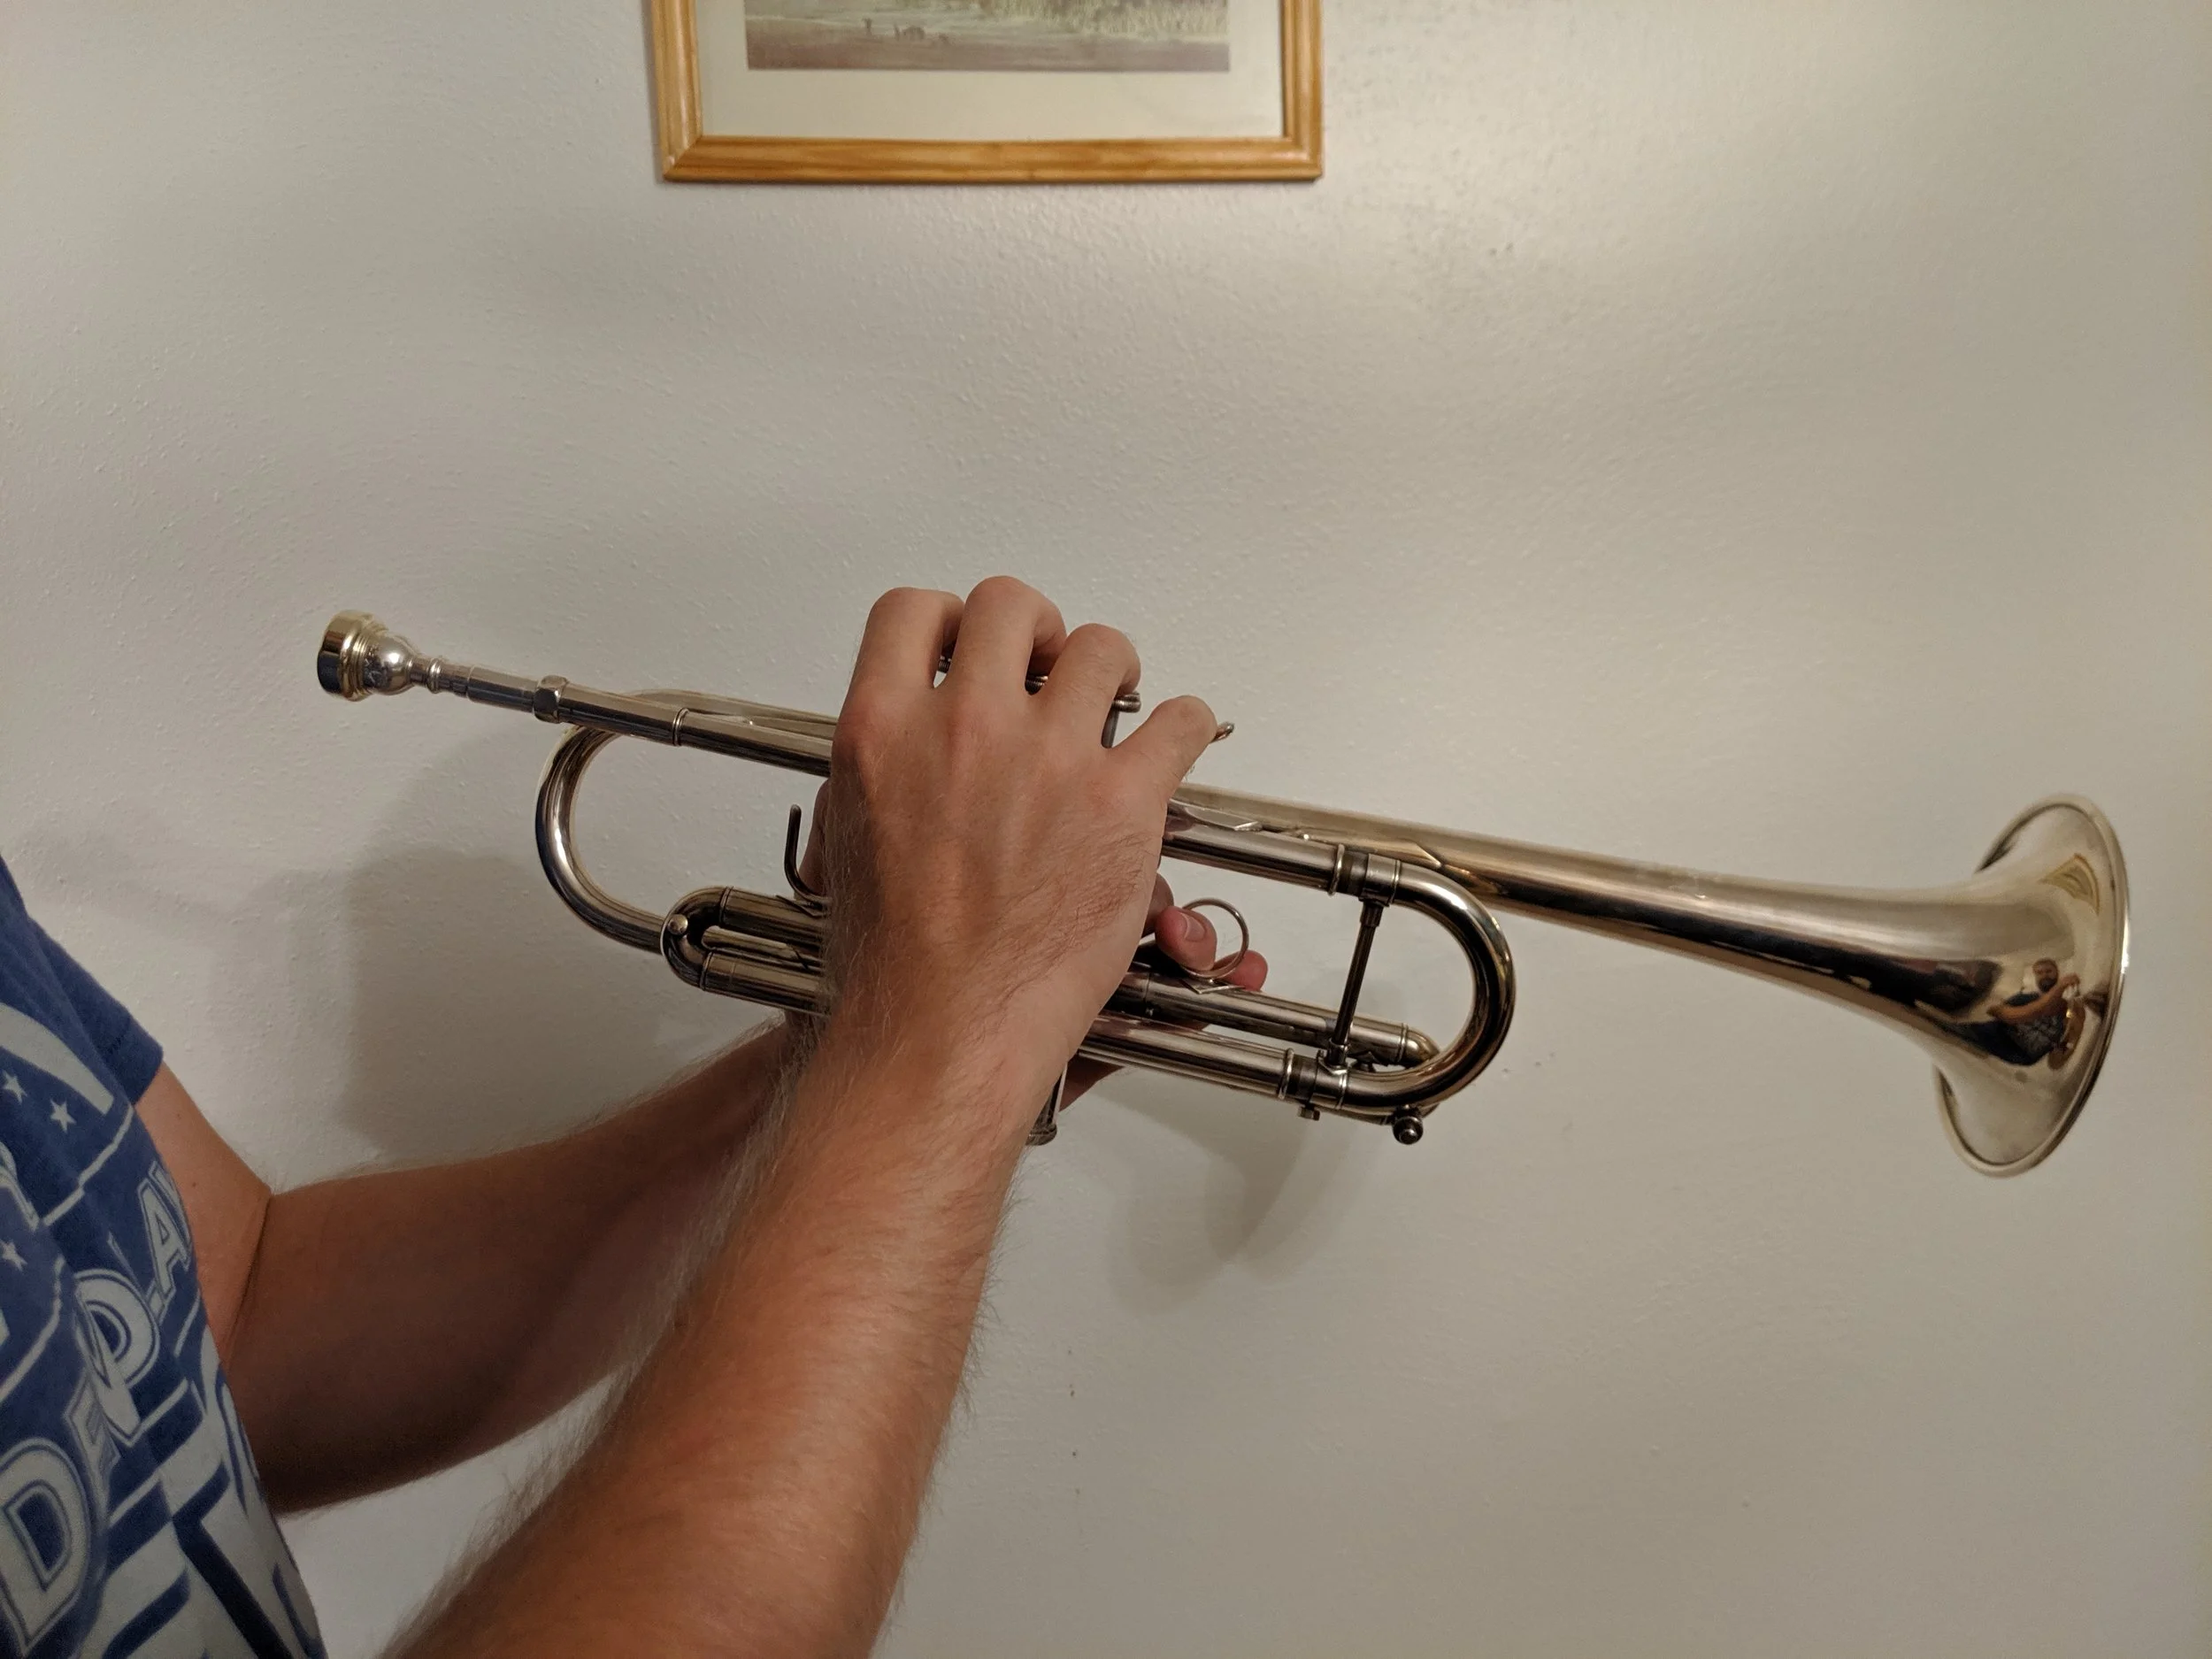
Now that the valves have been oiled, let’s look at the slides. There are 4 slides on the trumpet: the main tuning slide and one valve slide for each valve. As they serve different purposes, they’ll have to be treated differently in lubricating them.

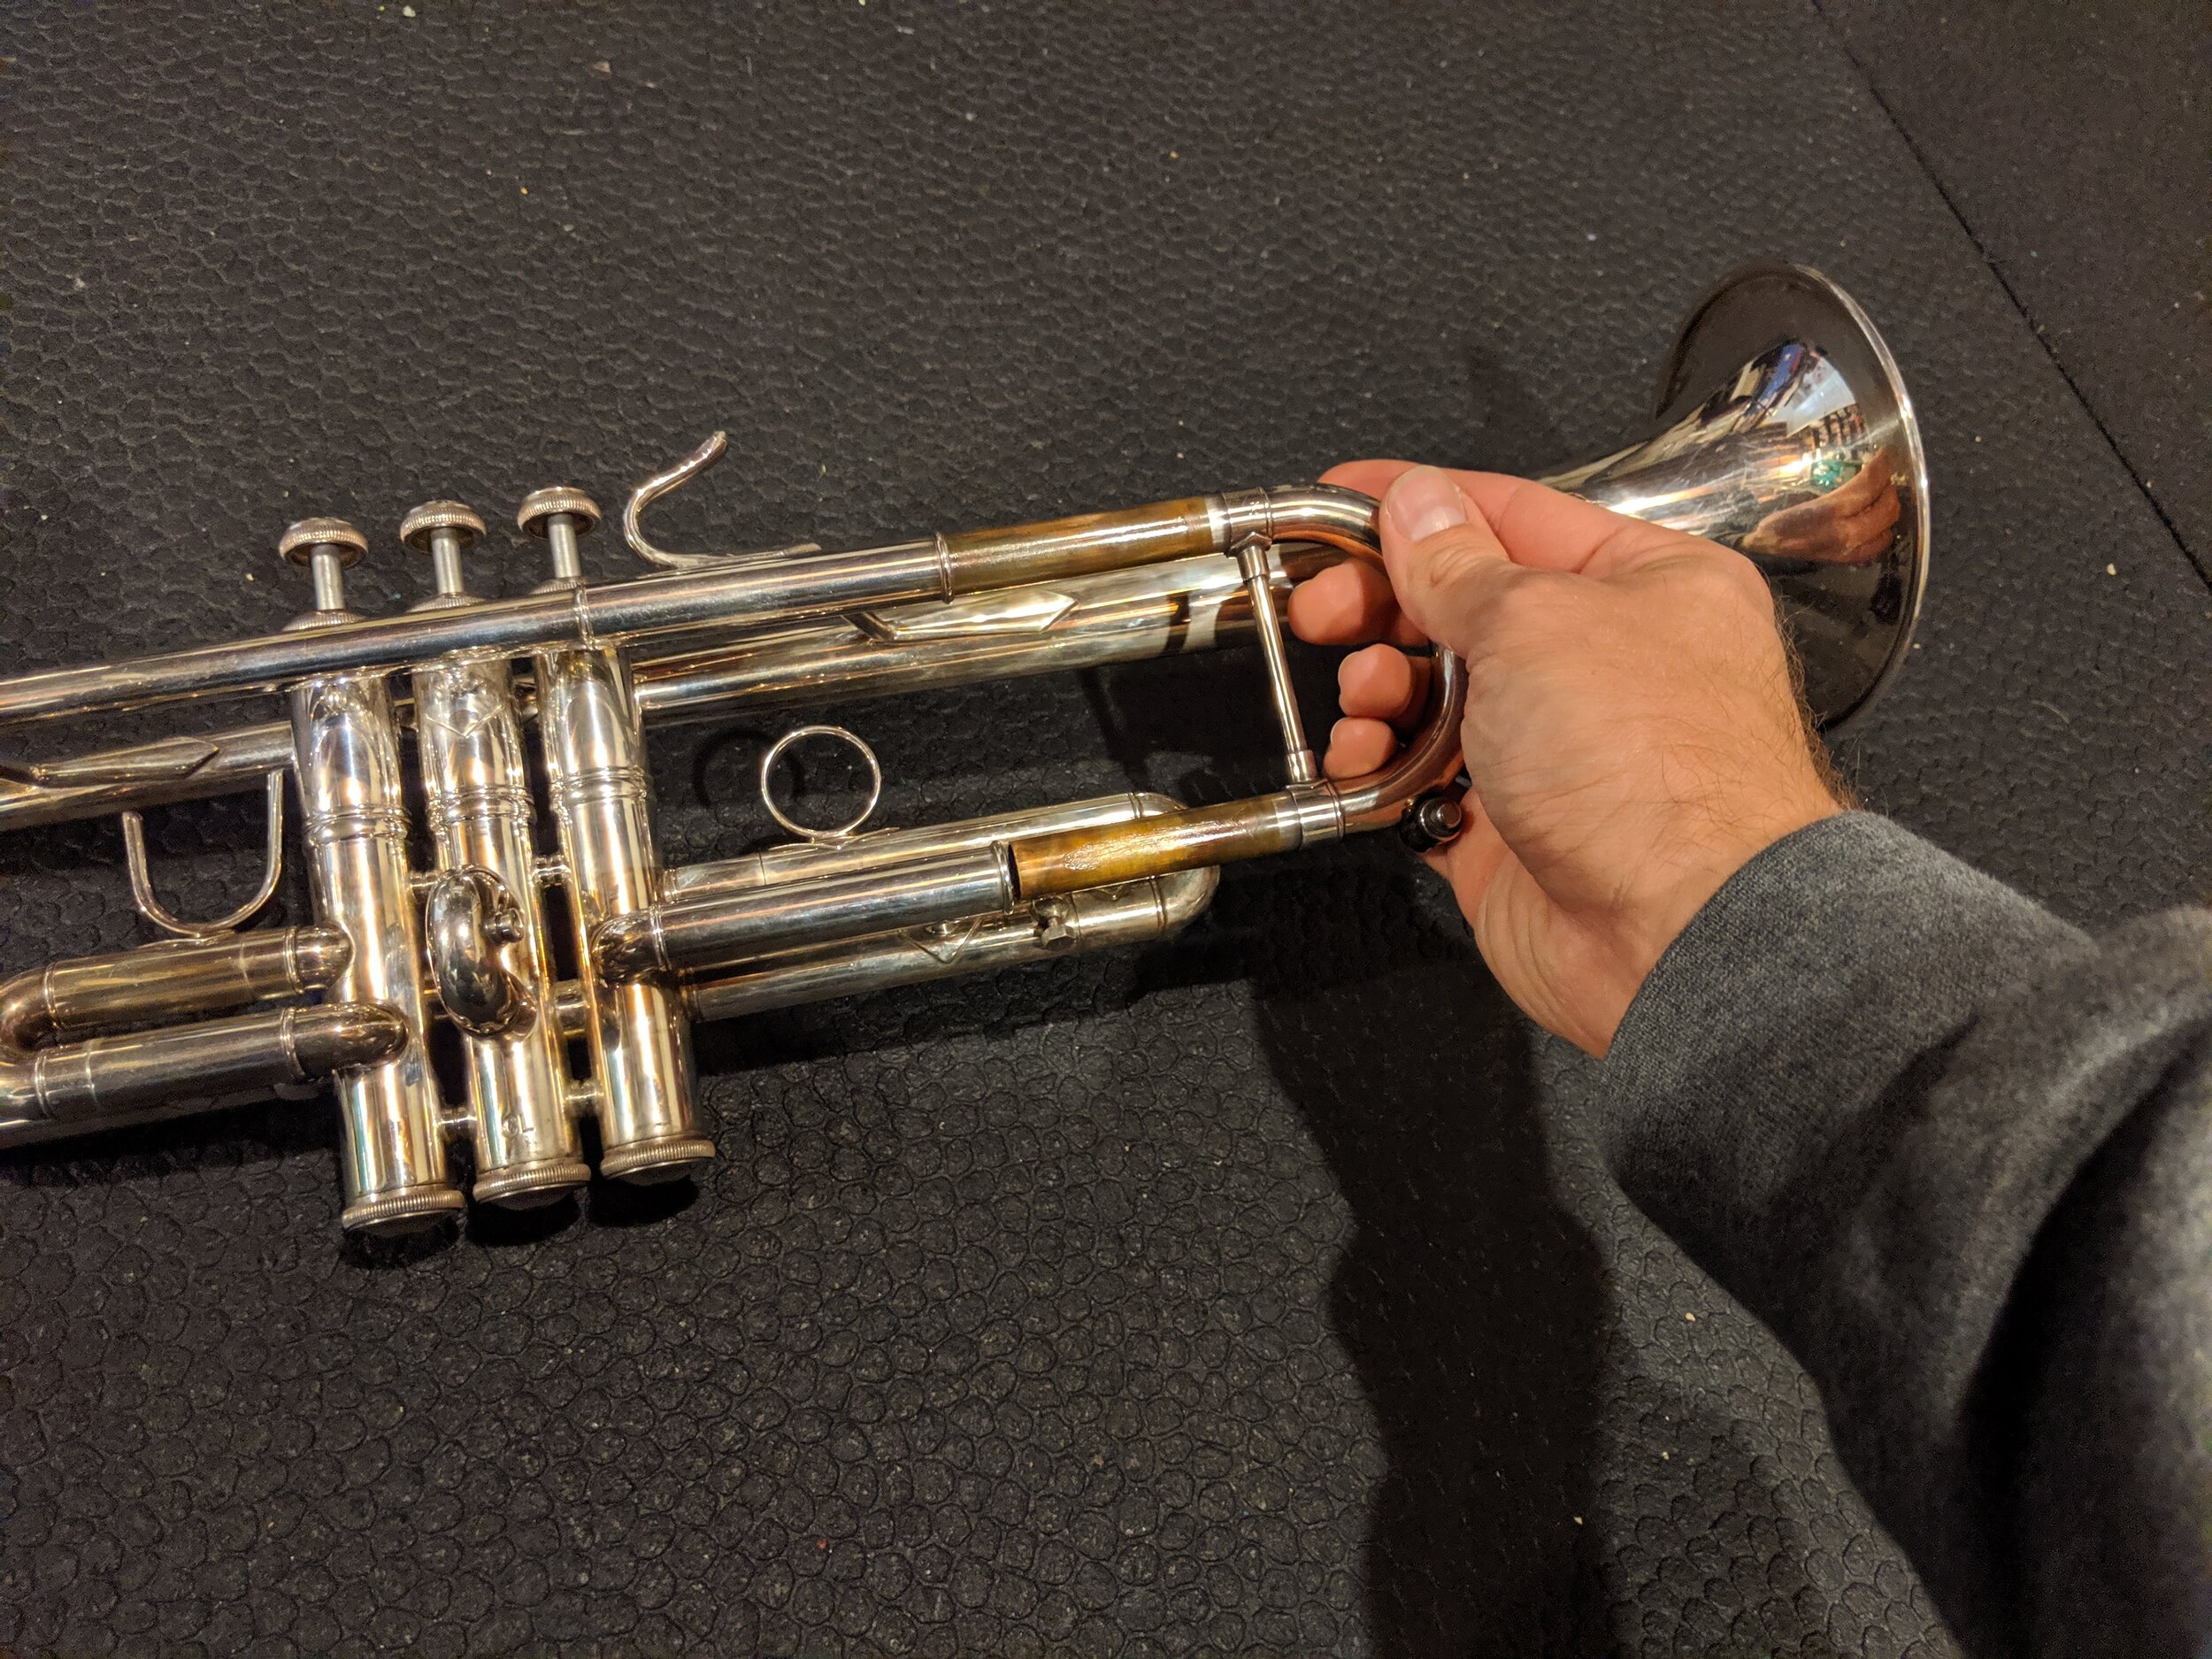
The main tuning slide is the easiest. It needs to be able to move, but it is supposed to be slow and take an intentional effort to move. There are probably as many slide greases as there are valve oils and, once again, most of them perform just as well as every other one. Unless your tuning slide moves out from the air pressure of playing or slowly falls out under its own weight, you should be fine with any standard slide grease. [If your slide is particularly loose, try Hetman Ultra slide grease or see a local brass instrument repair technician.] These will likely either be petroleum or lanolin based and, in my experience, neither outperforms the other. I find the lanolin grease smell a tad nicer (and it can be used to condition leather in a pinch), but it can also be harder to find at local music shops. The choice is yours here. To grease the tuning slide, first you need to remove it.

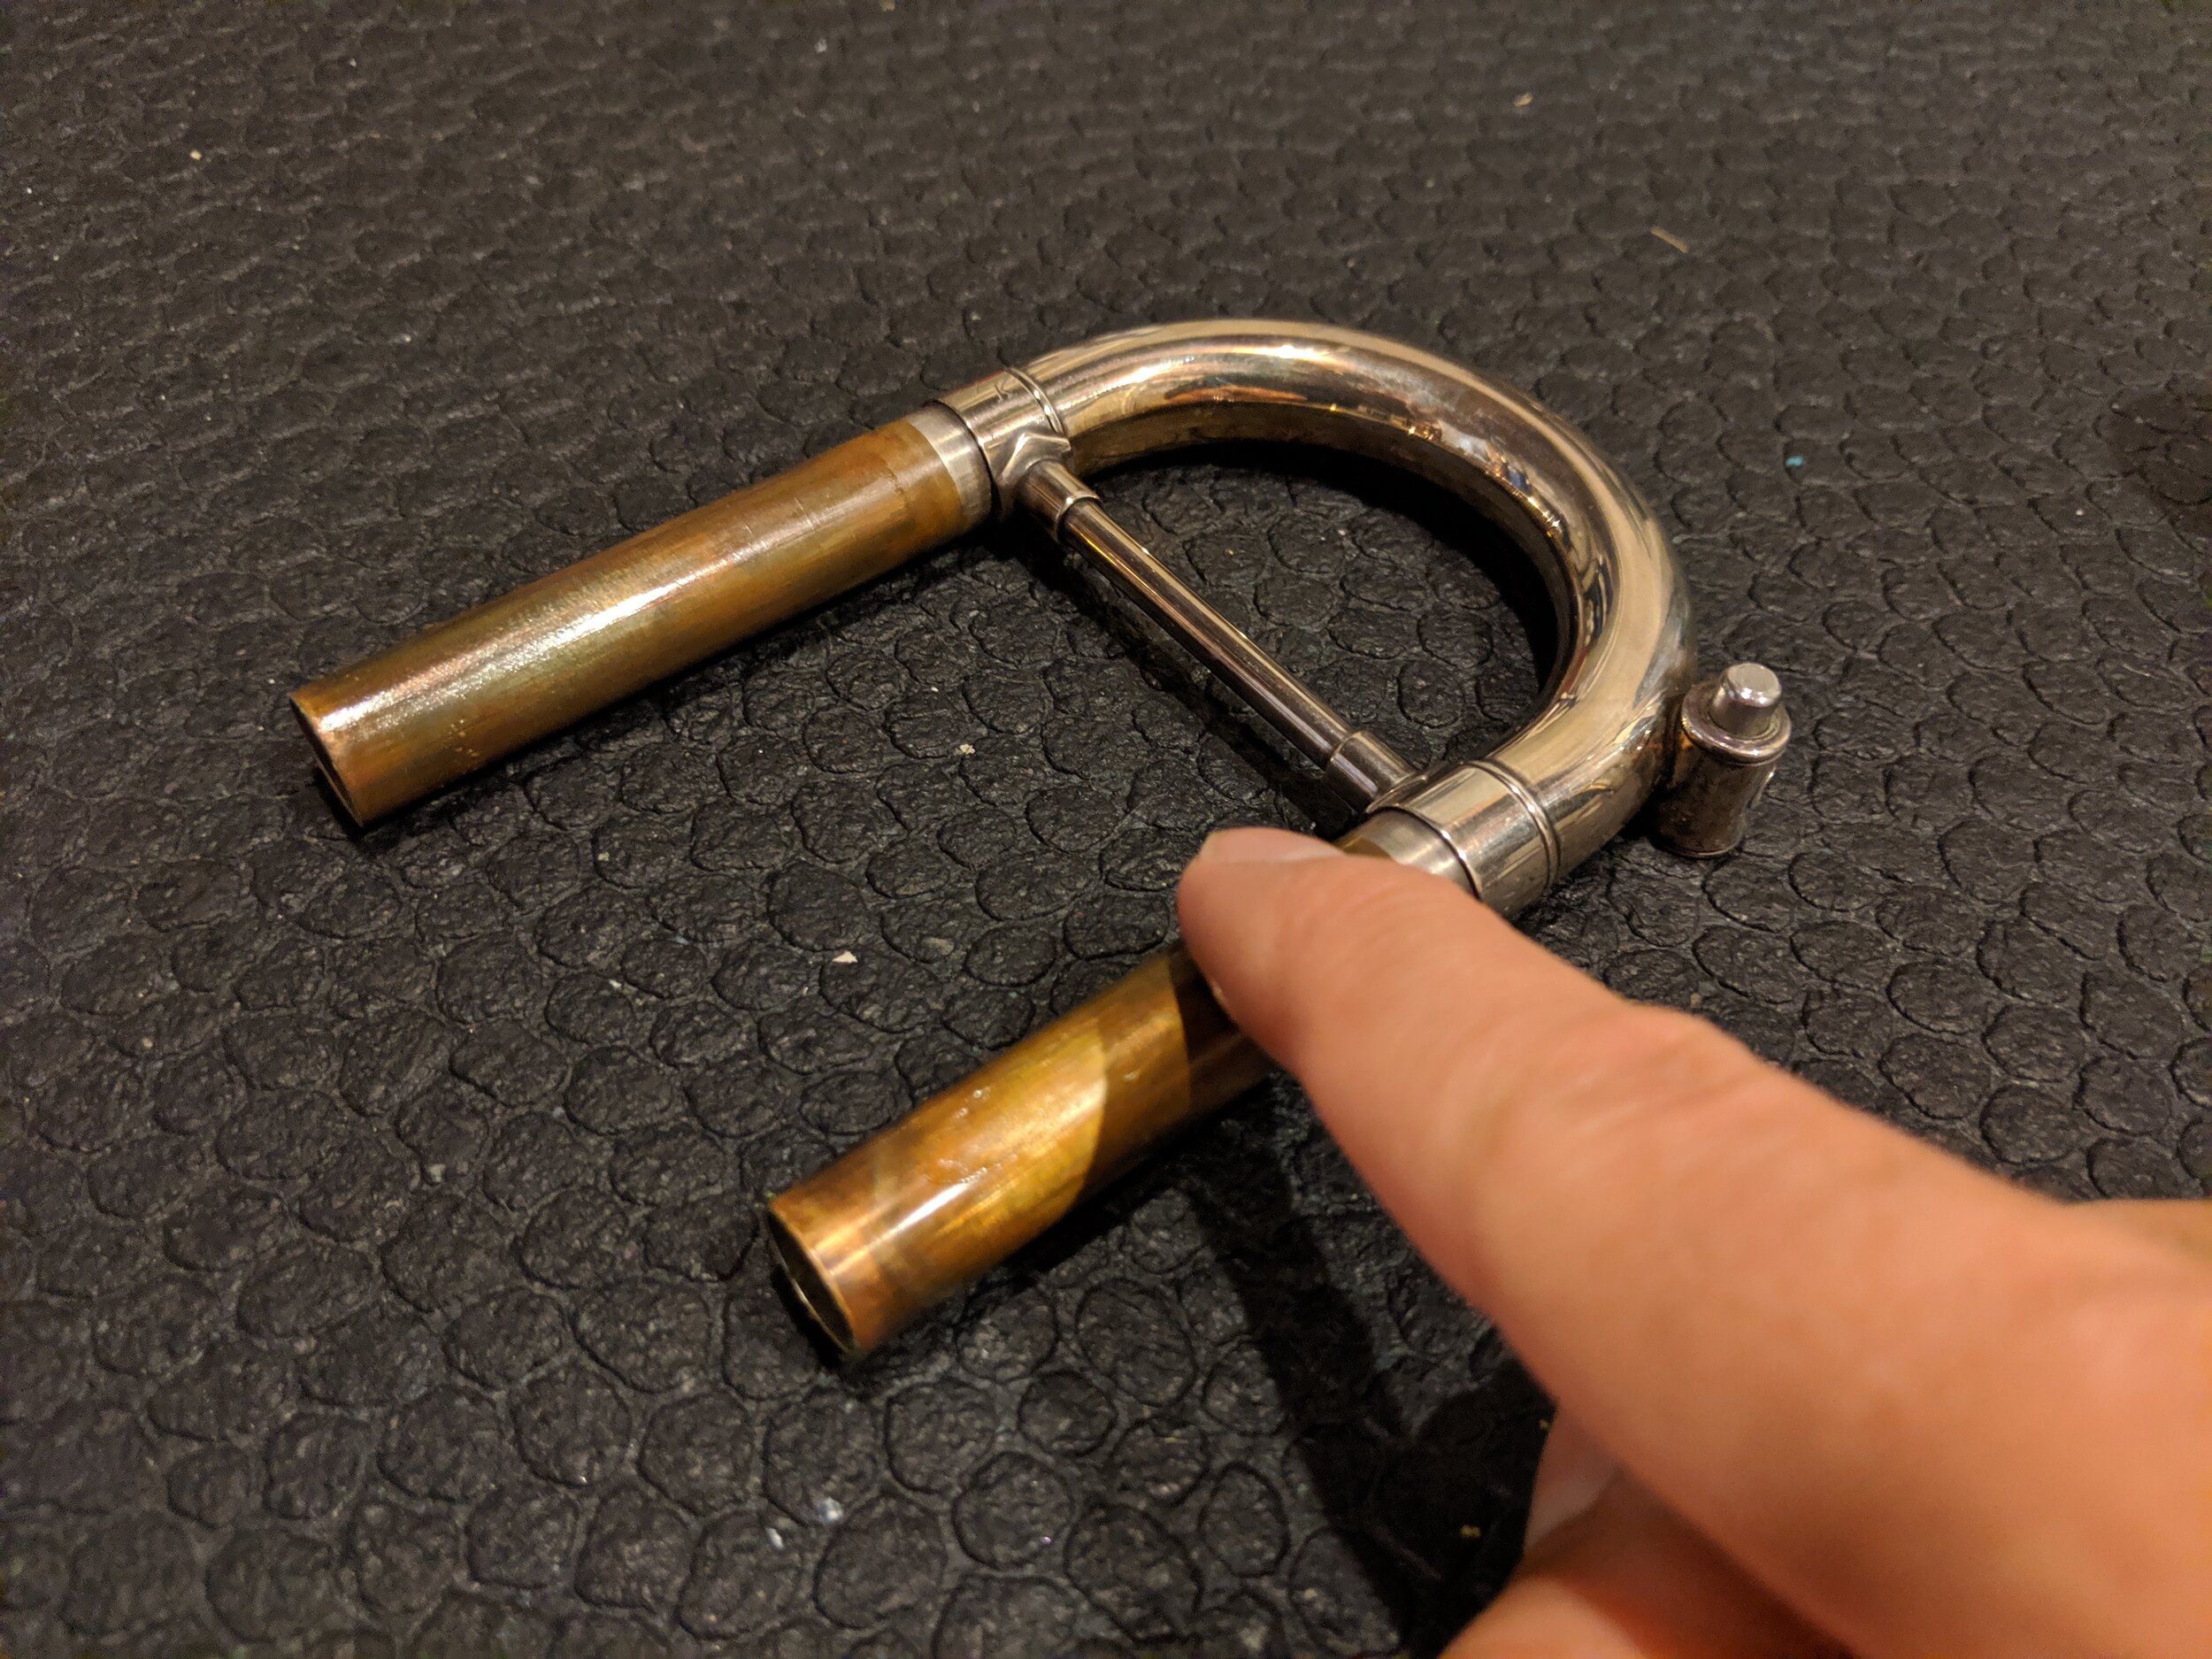
Once out, wipe off the slide surfaces with a clean rag to remove any old grease, grime, and gunk. Now, use your finger to apply grease to your slide, ensuring a thin, even coat. Then put it back in. That’s it!

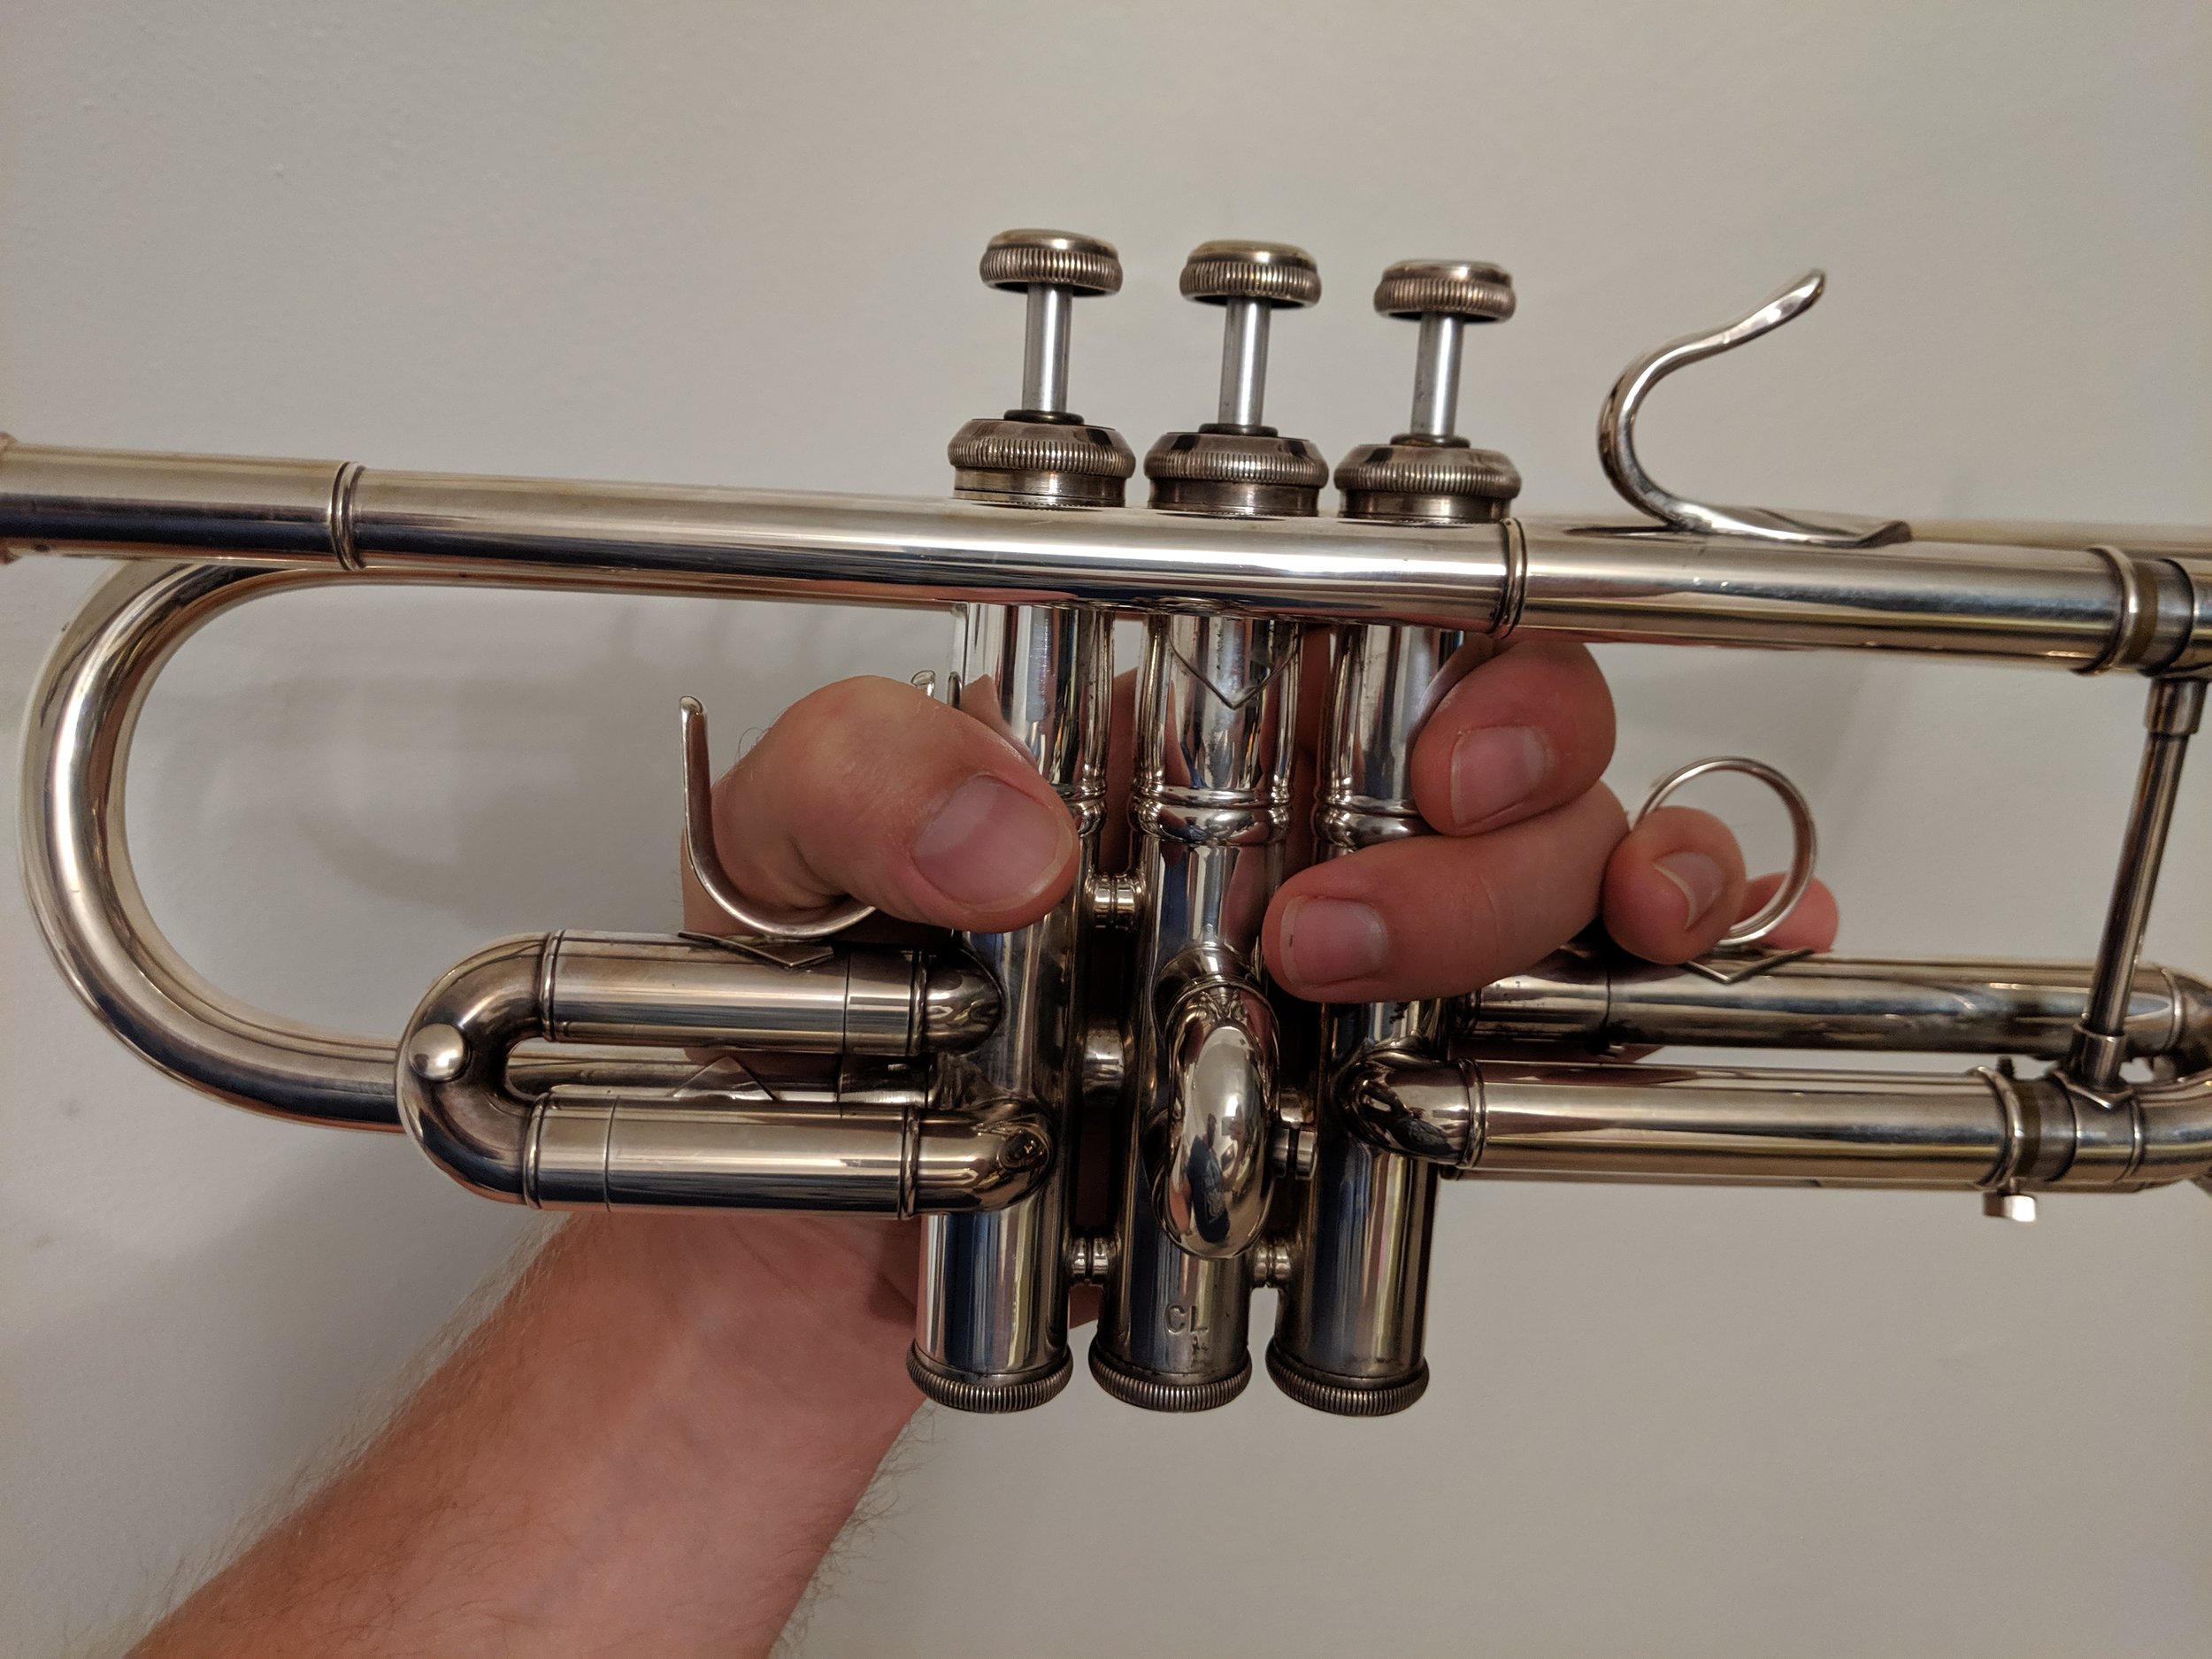
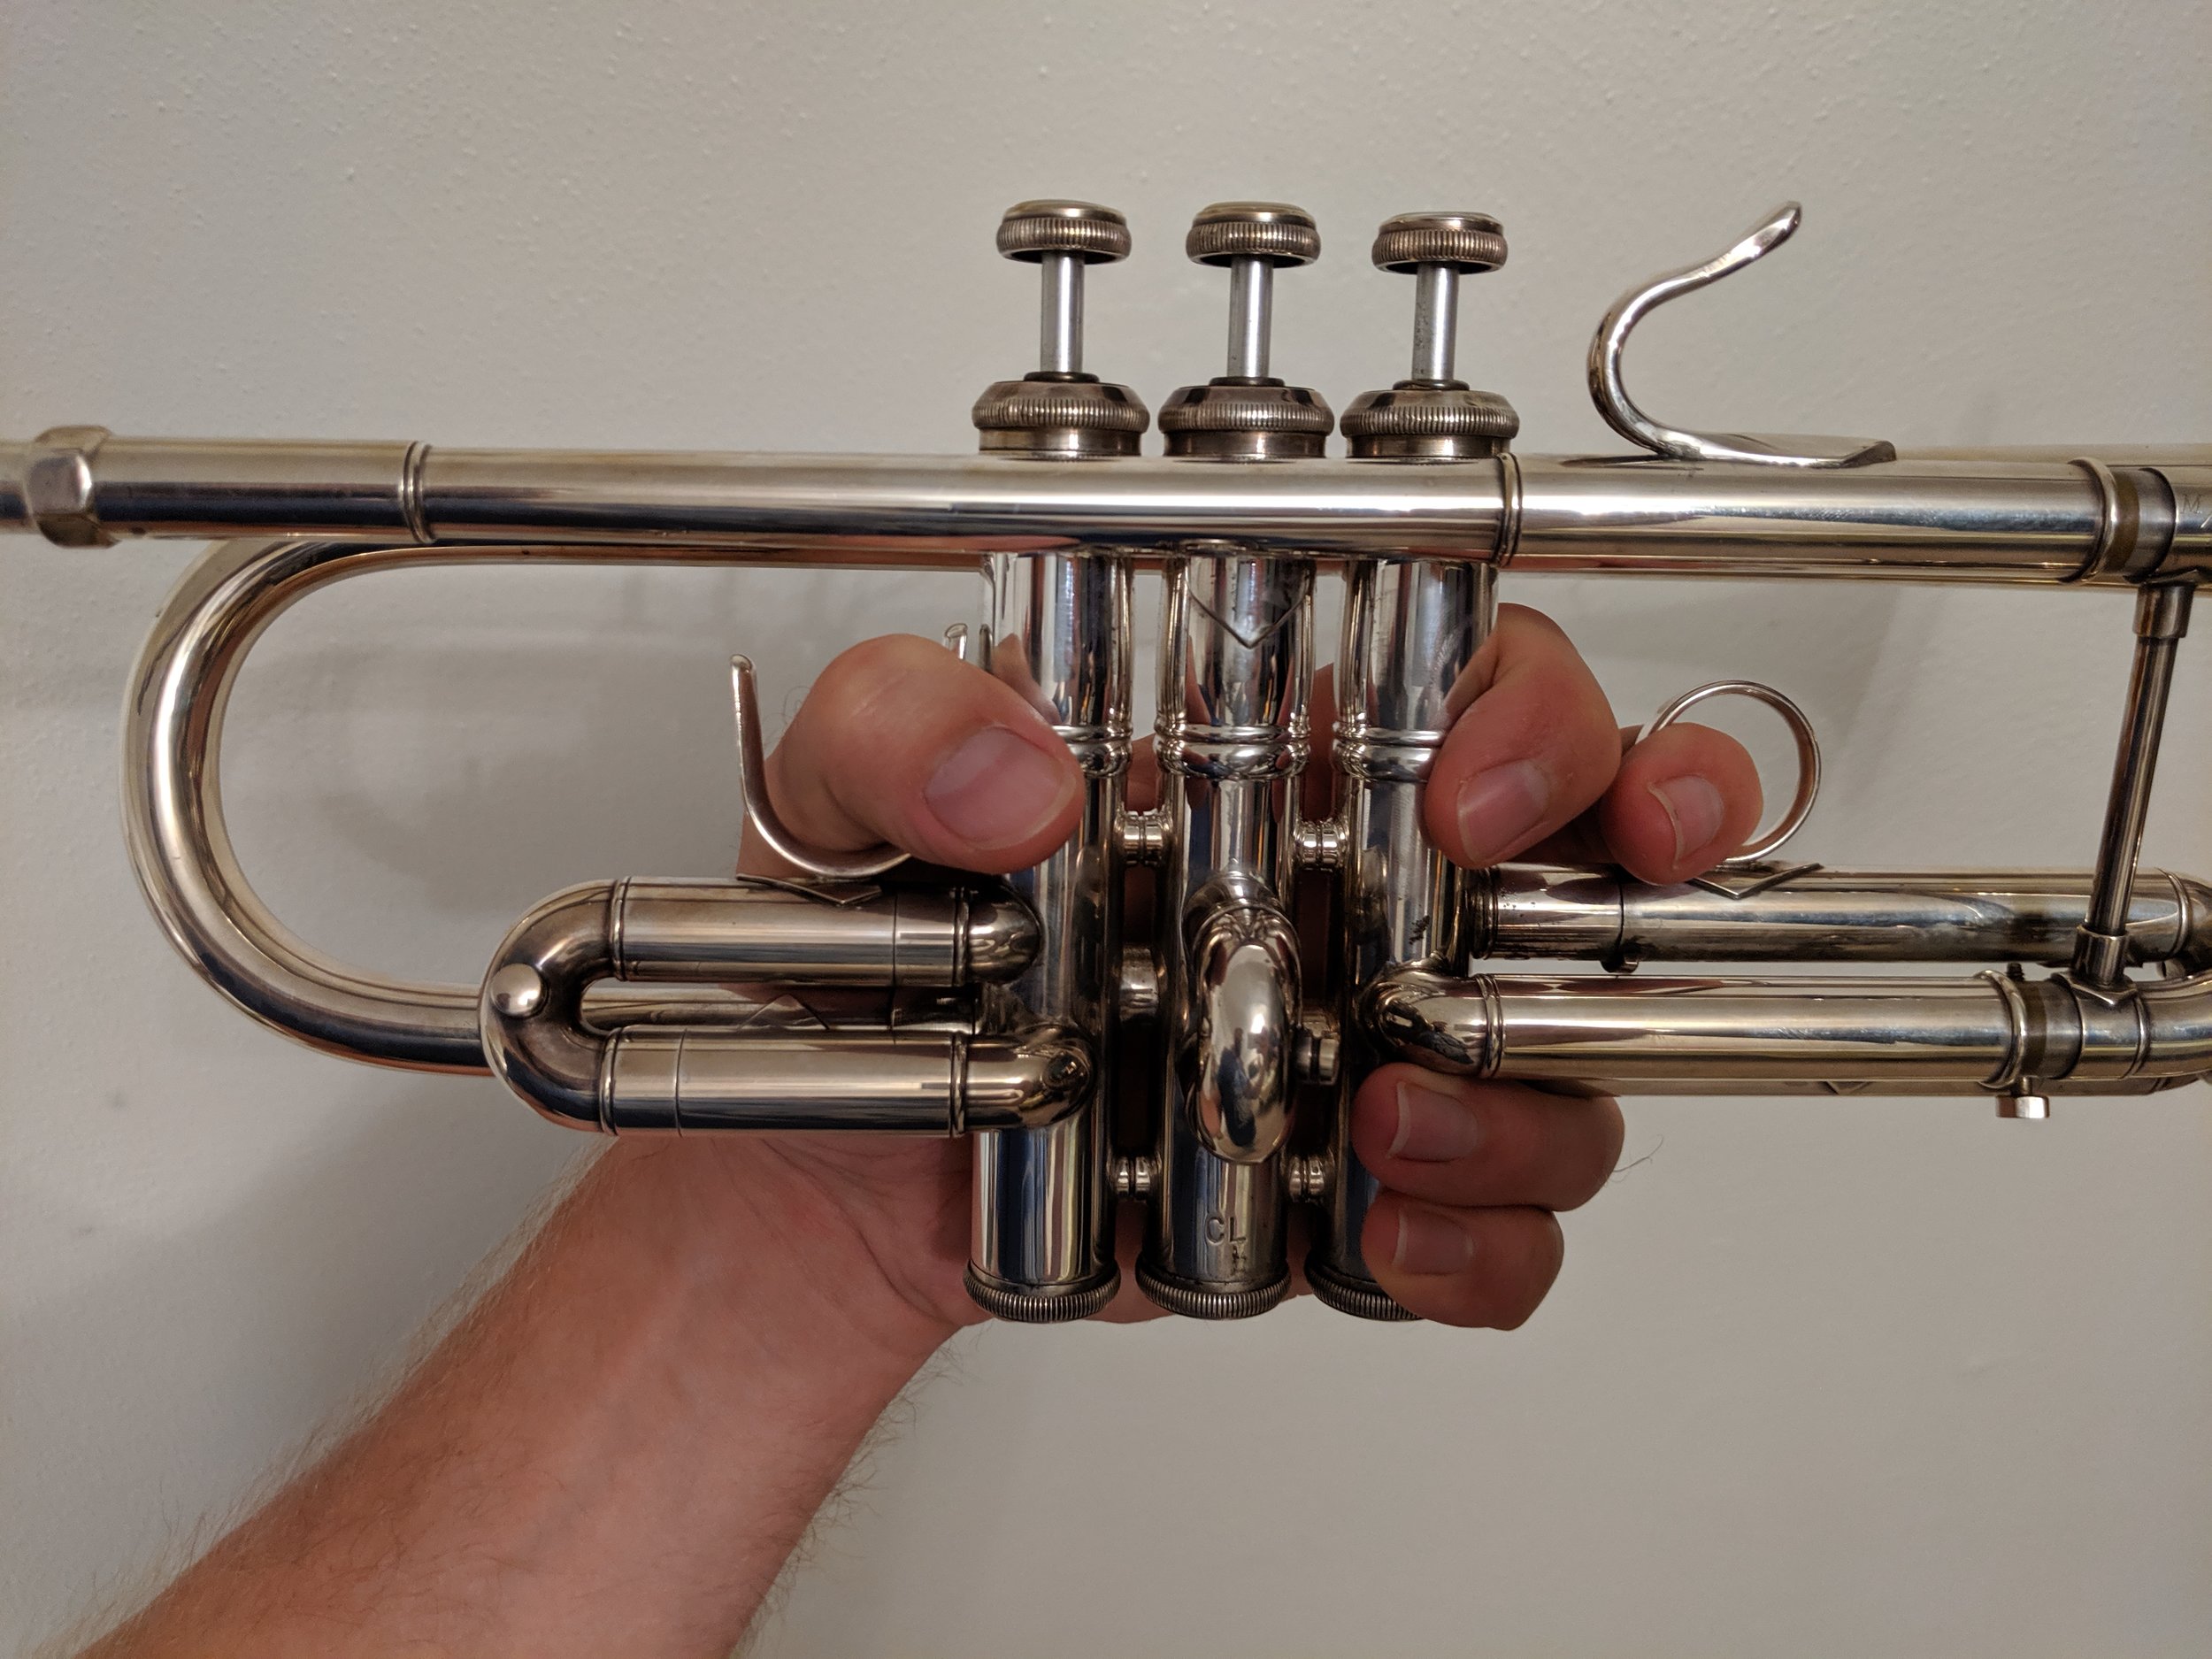
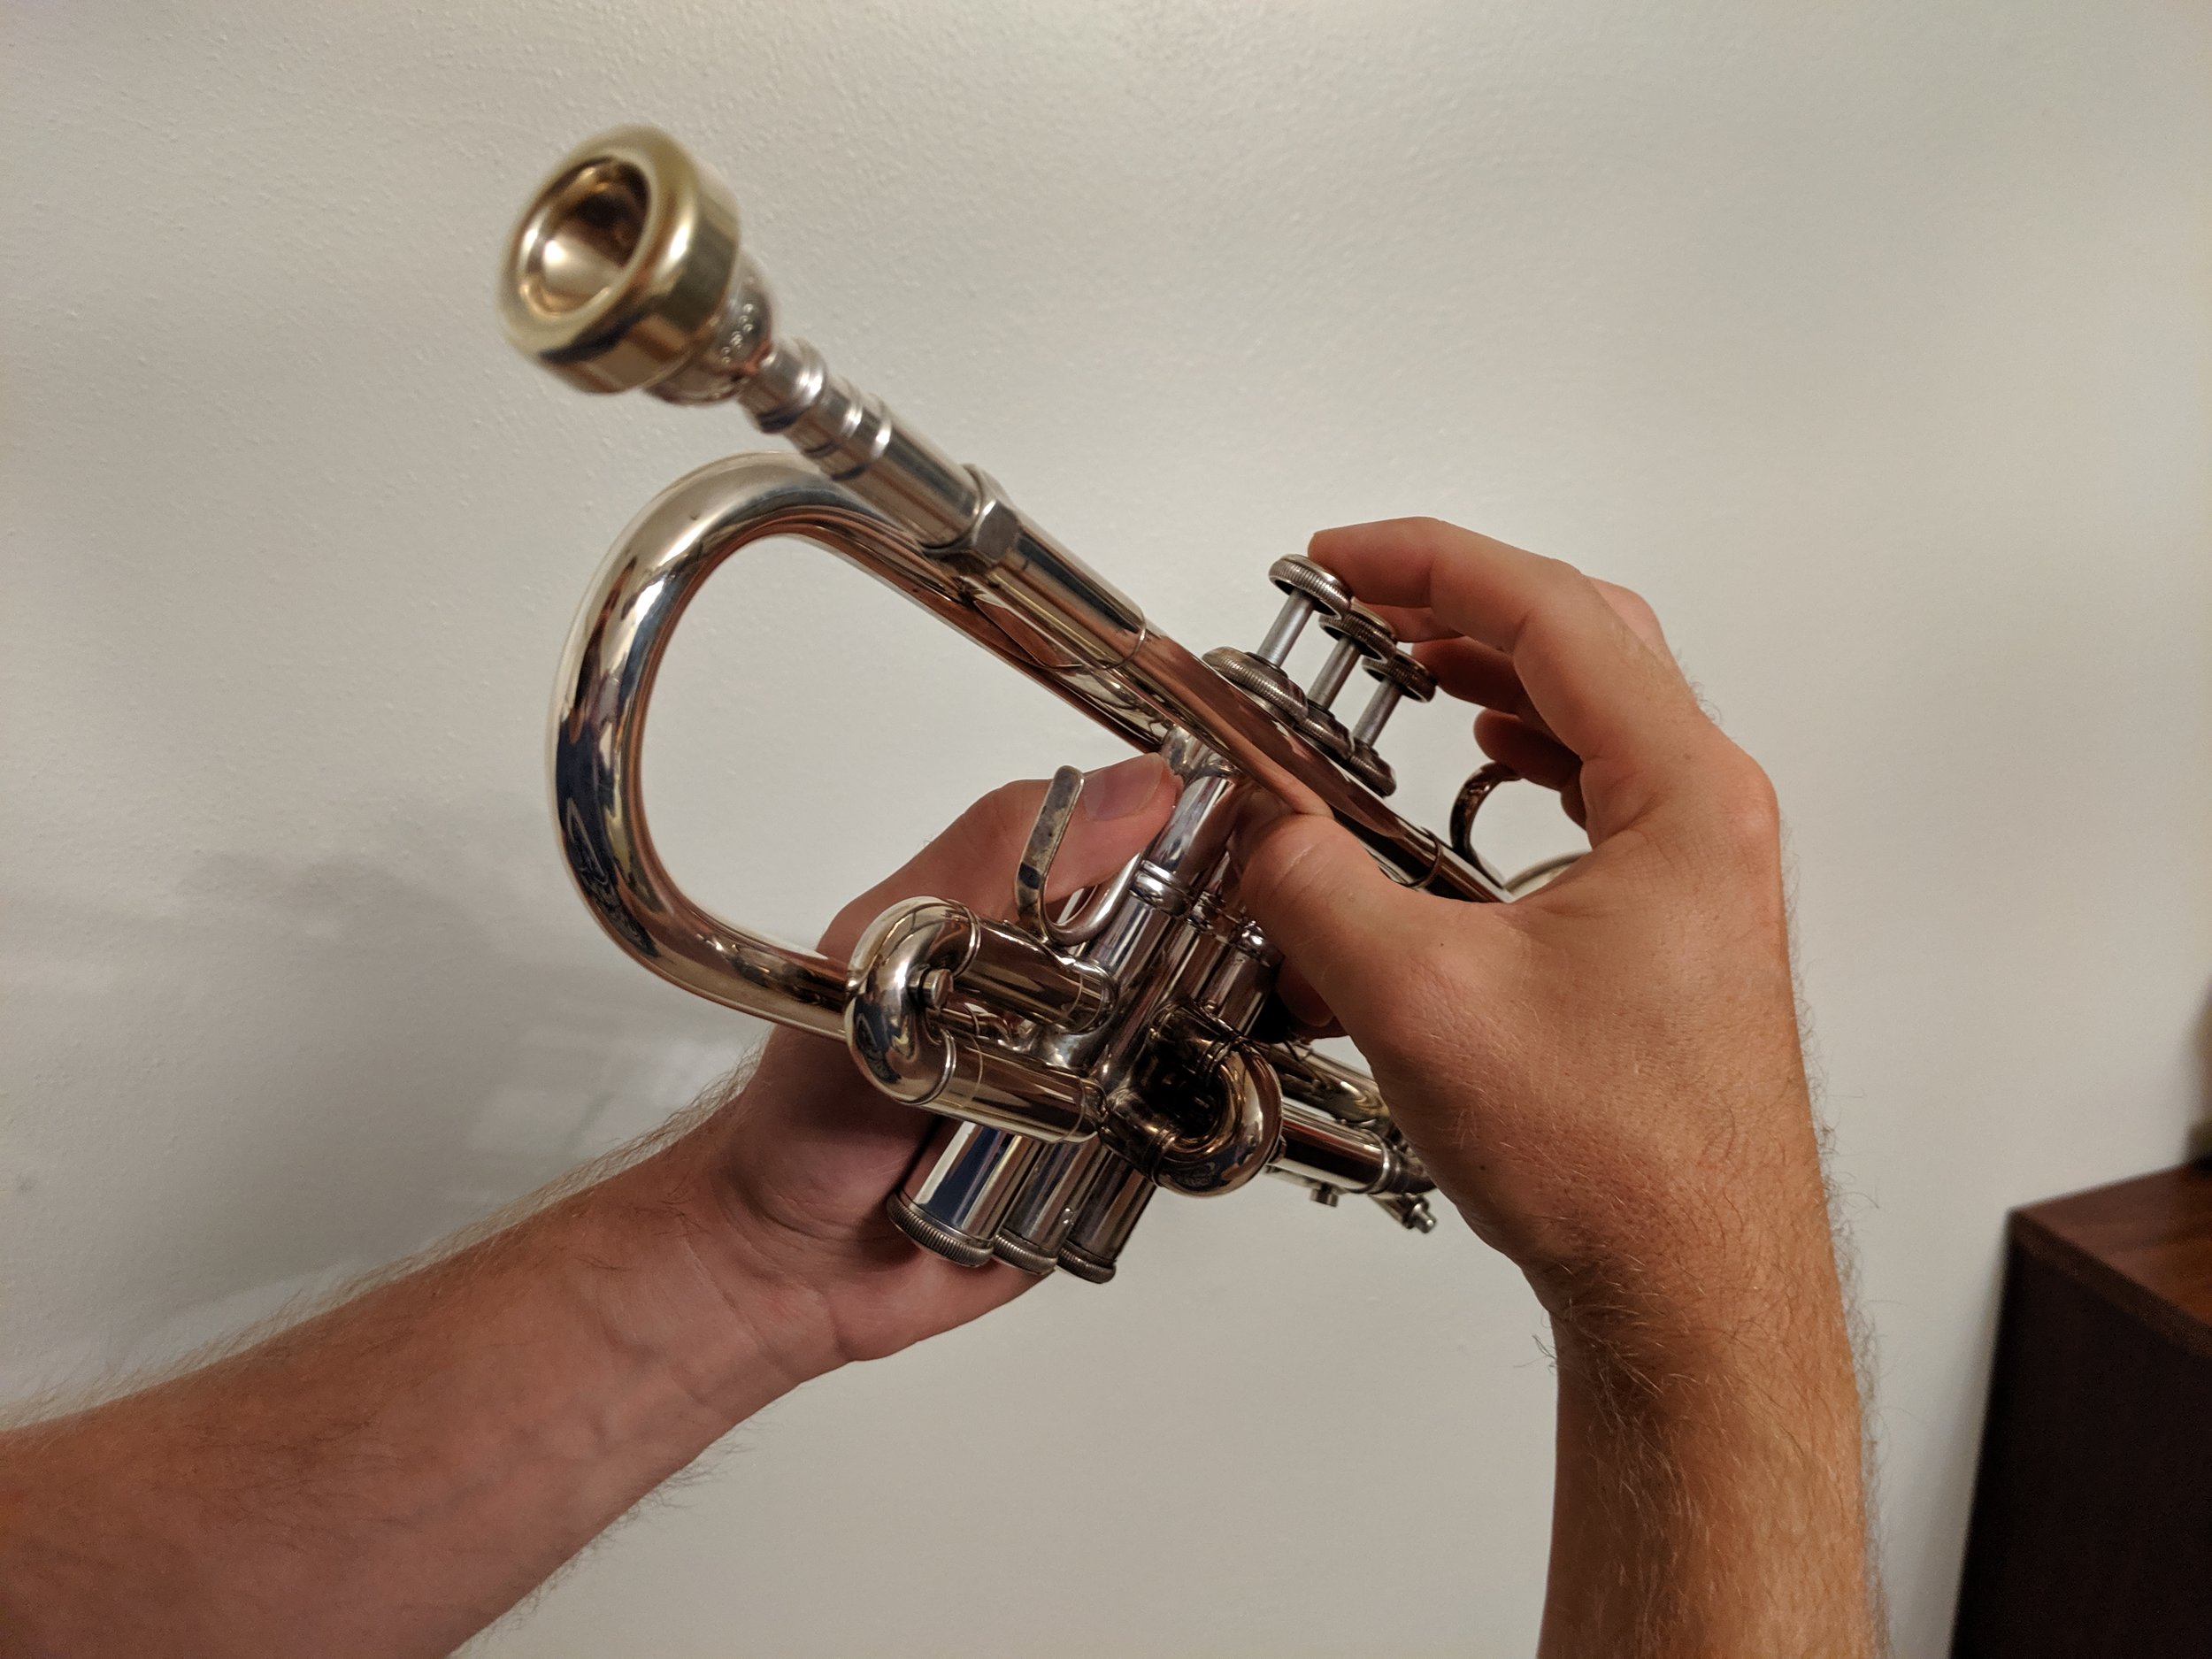
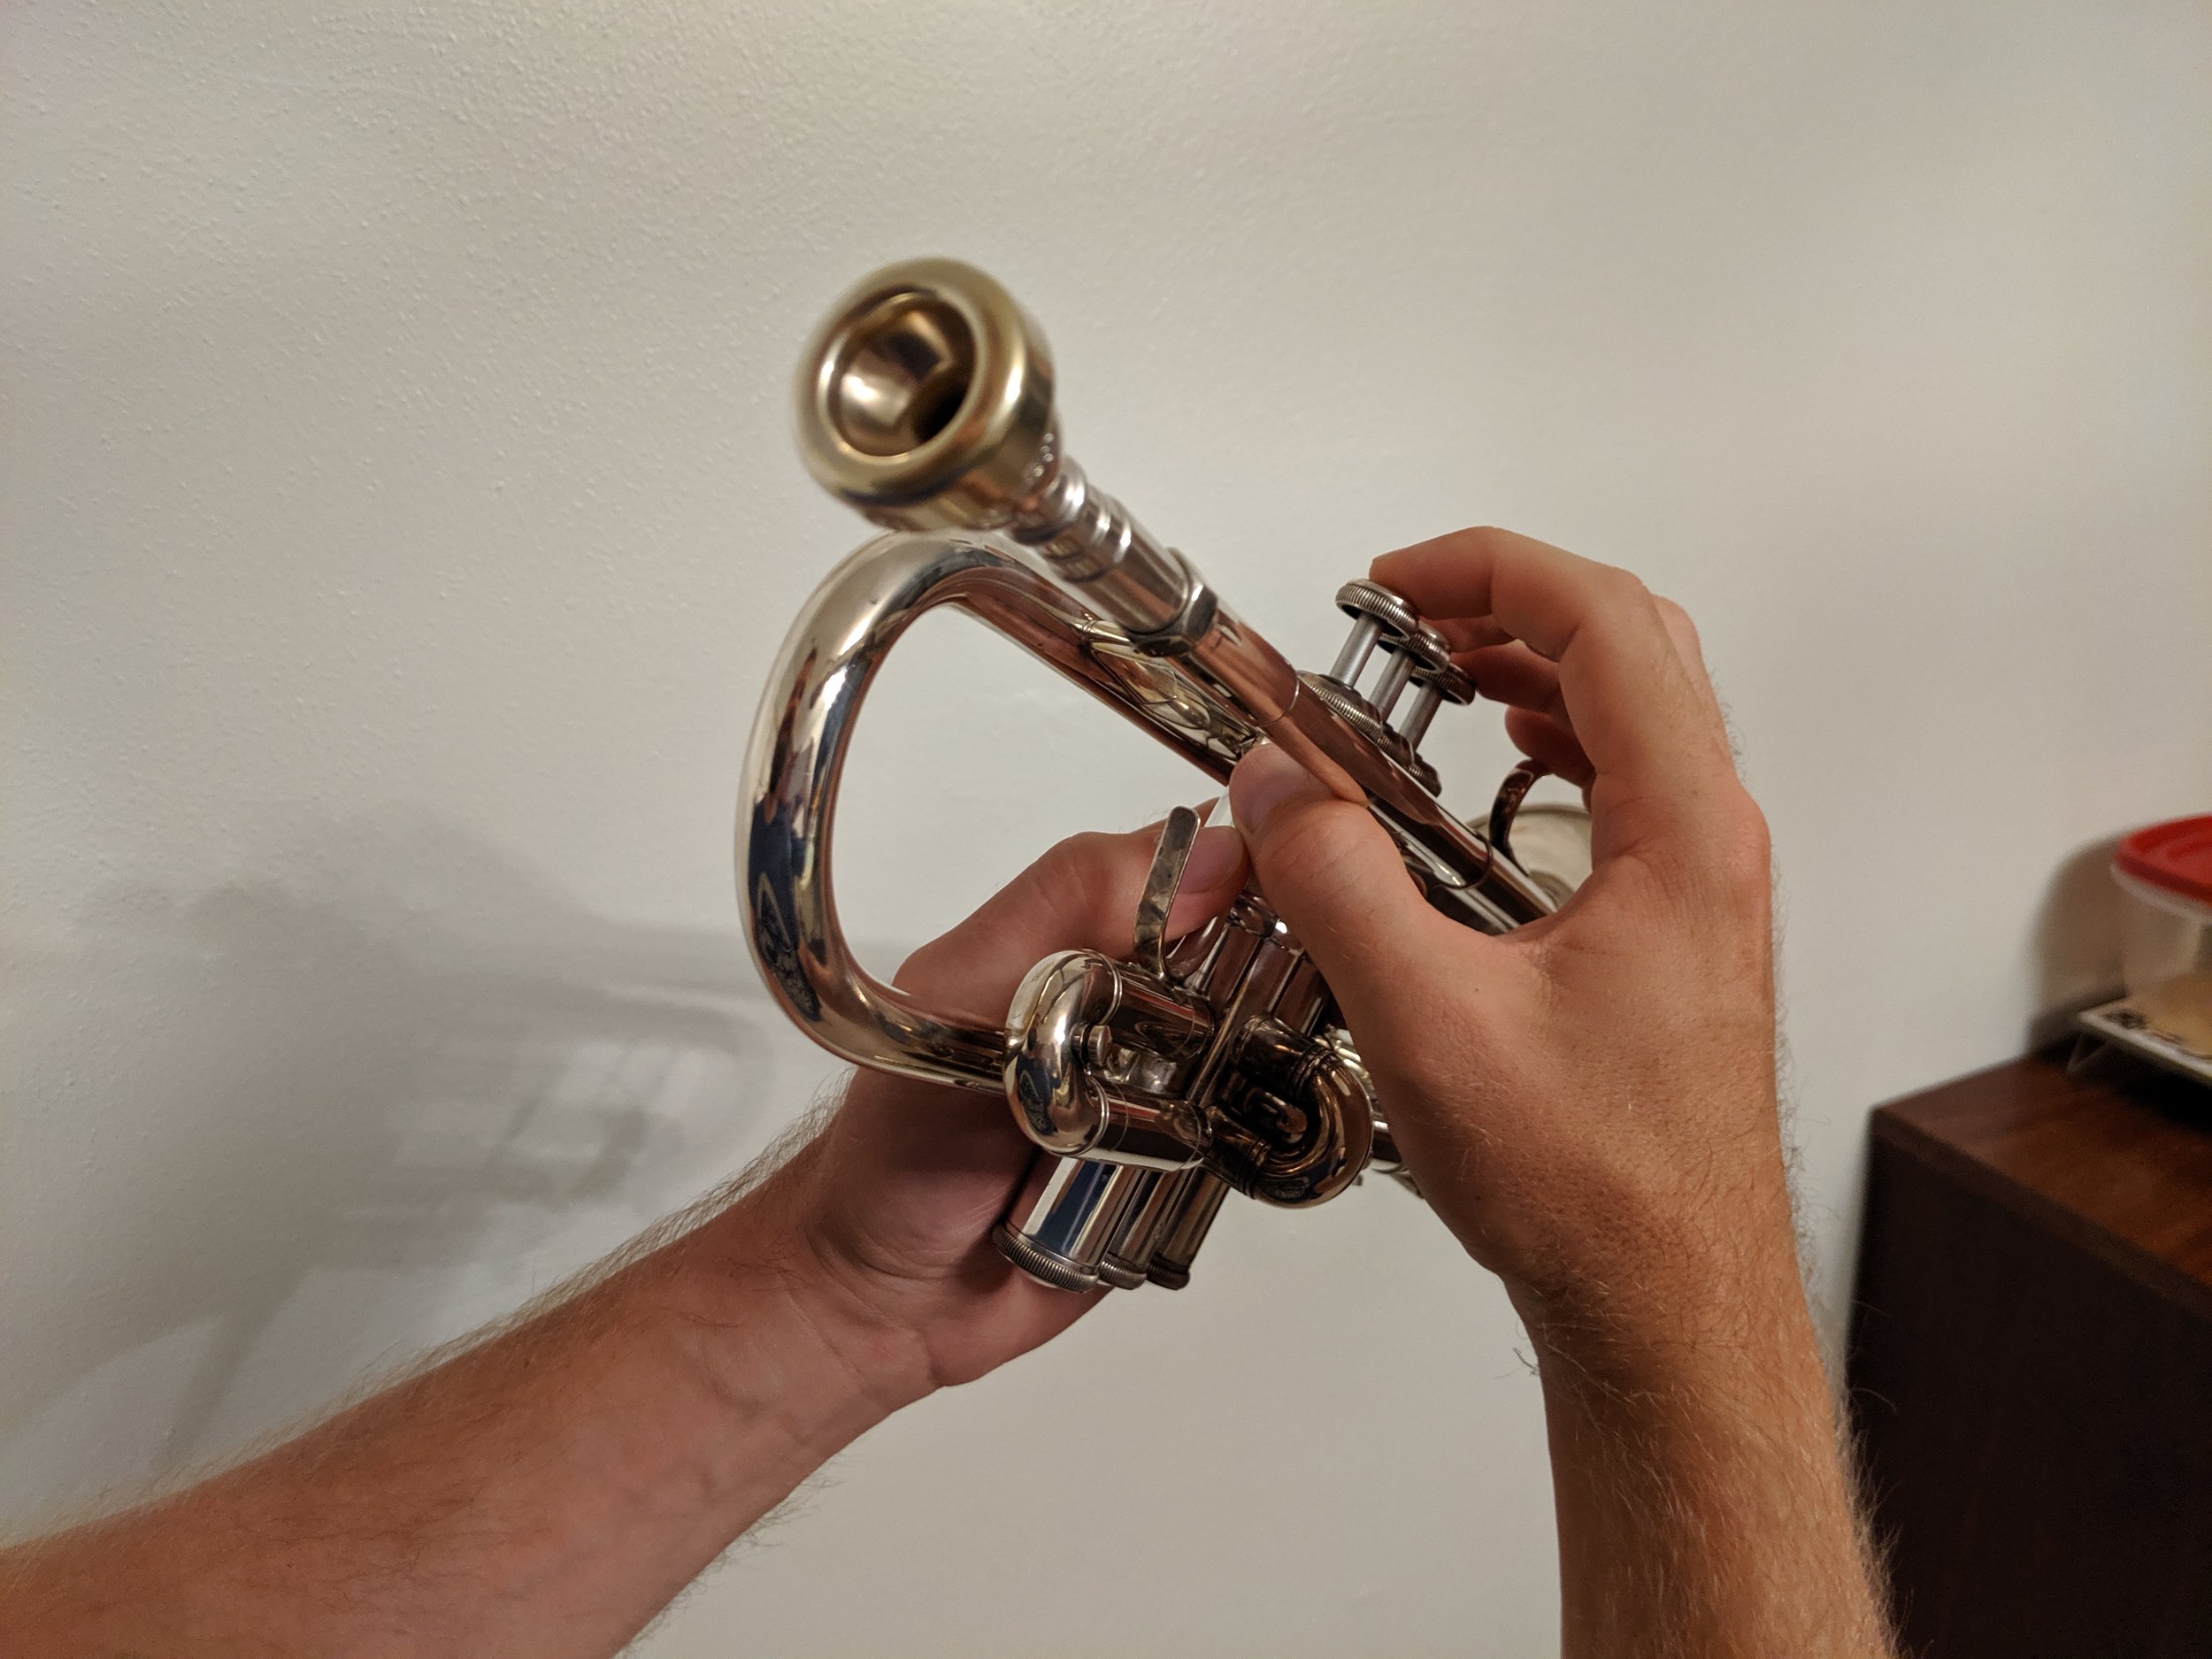
The second valve slide will use the same process as the main tuning slide. Because it is so small, though, it will typically need an even thinner layer of grease. Just enough so that it’s removable, but not movable. The first valve slide has two possibilities. If you don’t have a thumb saddle on the slide, the process is once again the same as the main tuning slide. If you do have a thumb saddle, then the process changes up a bit and becomes the same process described next for the third valve slide.

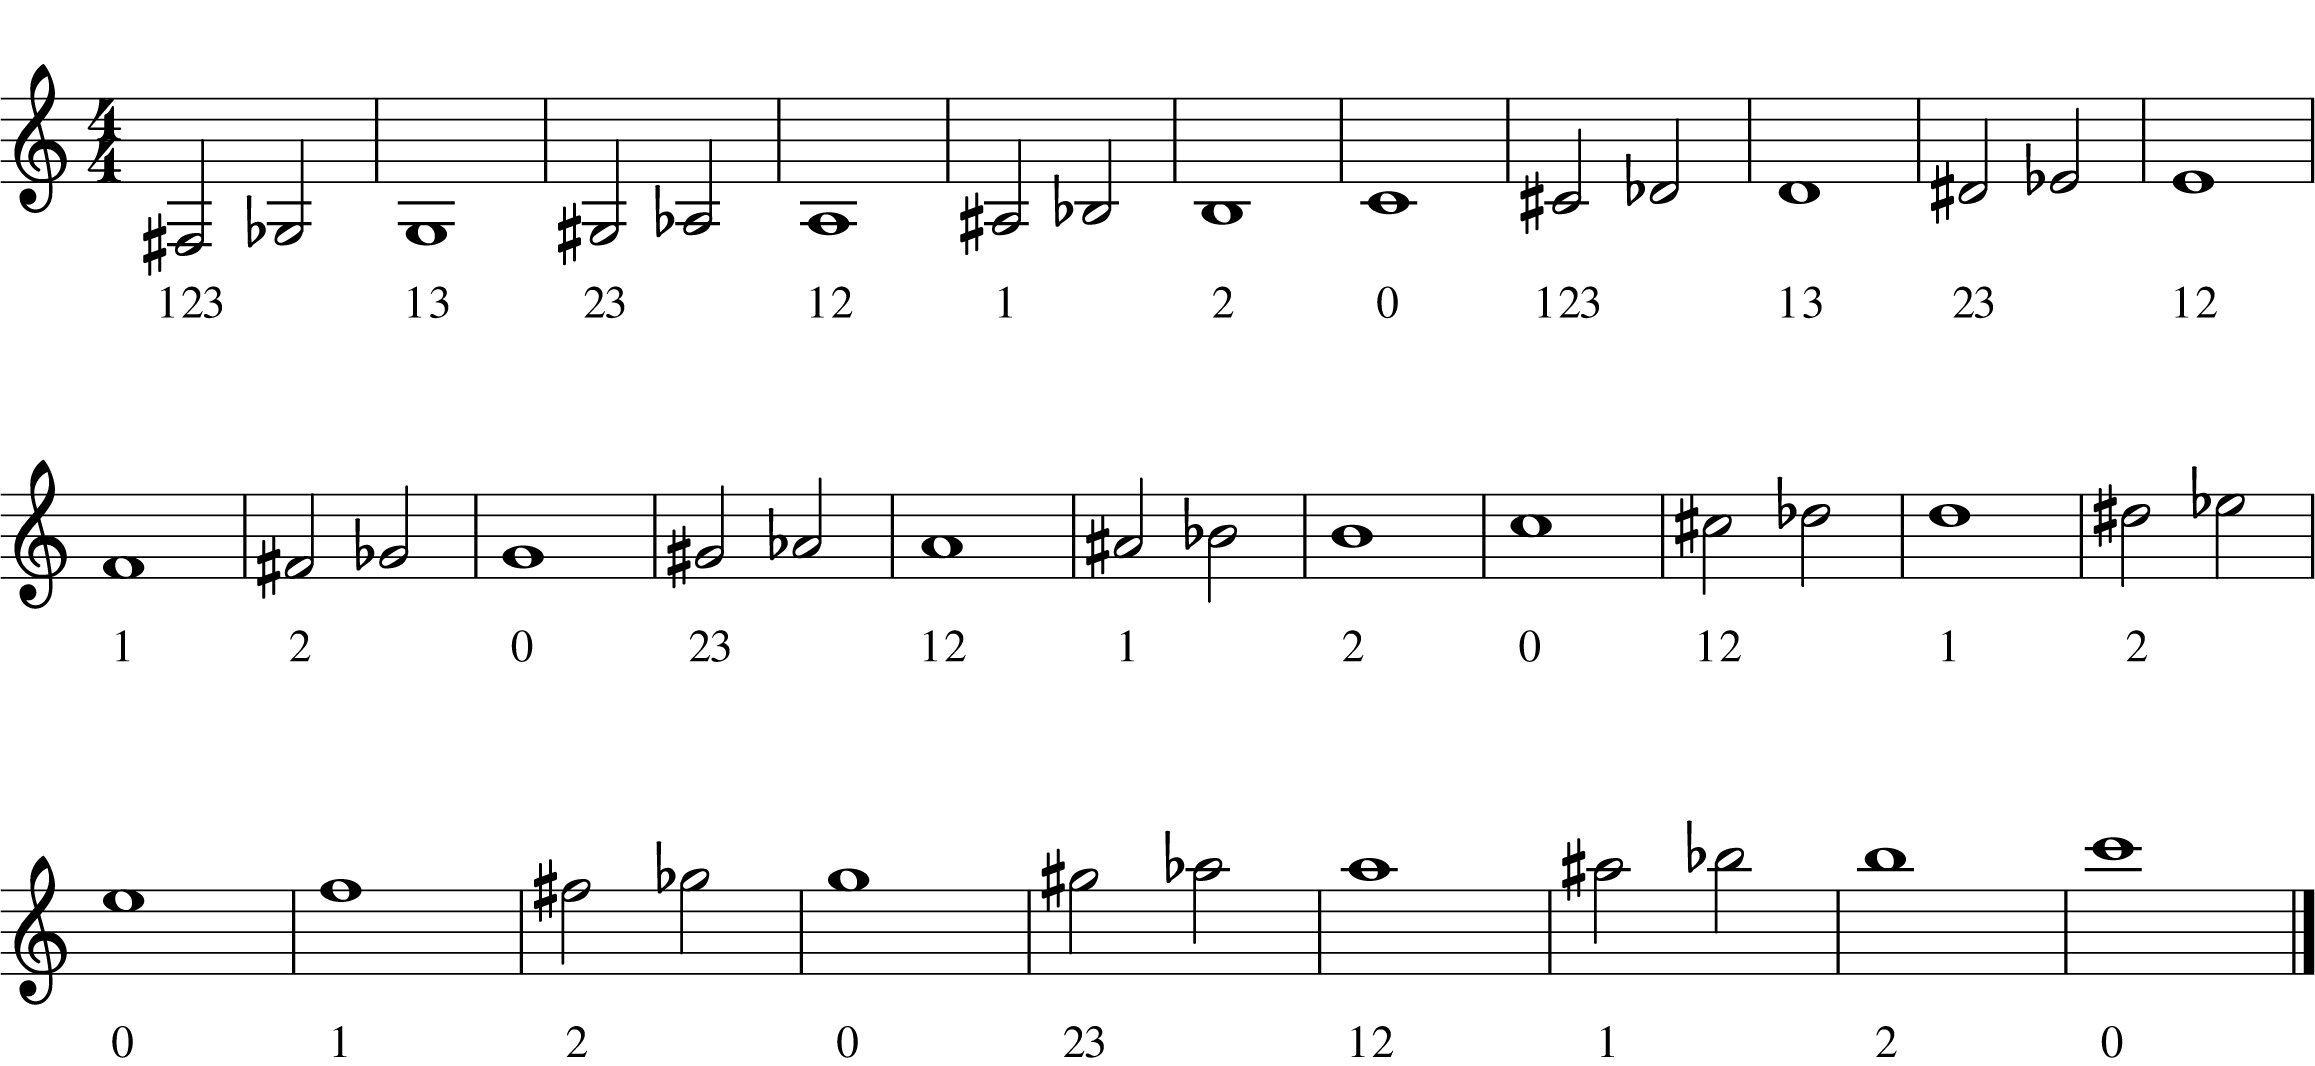
The third valve slide (and first valve slide if it has a thumb saddle) is designed to be moveable while playing in order to compensate for the tuning deficiencies inherent in a valved instrument. If you remember from Changing notes, the 13 and 123 valve combinations are always too short, so the third valve slide is used to correct that (the first slide is used for a similar purpose, but that’s for a later article). This means the slide needs to be able to move, and to be moved easily. Regular slide grease won’t allow for a quick enough motion, so this is where we either use a specialty product (Spacefiller TS works well) or a combination of grease and oil. You'll want to start off just as you did for the main tuning slide by applying grease. Once the grease is on, start by adding a drop or two of valve oil and then moving the slide in and out to incorporate it. If you find the slide sticking you probably need more grease. On the opposite end of that if the slide is too sluggish, add some oil. This will be a process of trial and error because the feel of the slide at this point is one of personal preference.

Cleaning

Now that we've covered lubrication, it's time to look at how to clean your trumpet. Let me first say that there really is no substitute for having your horn chemically cleaned by a professional. If you have a good music store accessible to you, they should be able to thoroughly clean your trumpet much better than we can on our own. That said, it's impractical to have this done every time the trumpet needs to be cleaned. Cleaning at home really isn't that hard, doesn't take long, and only requires a few specialty tools and, optionally, a sink or tub that holds water.

Before you get started, know that you don’t need to clean the trumpet in a bath every time. Routine cleaning (every few months) can be done with just brushes and a rag. About once a year or so, you’ll want to get in a more thorough cleaning. This is where the bath comes in. When you want to give your trumpet a full bath, the first thing you're going to want is some kind of degreaser. This will help remove all the residual oil and grease from the inside of your trumpet, including all the nooks and crannies we can’t get with a brush or cloth. As good as oil and grease are at keeping your valves and slides moving, they are also excellent at attracting and holding onto dirt and gunk of all types. You don't need to go overboard on a degreaser.

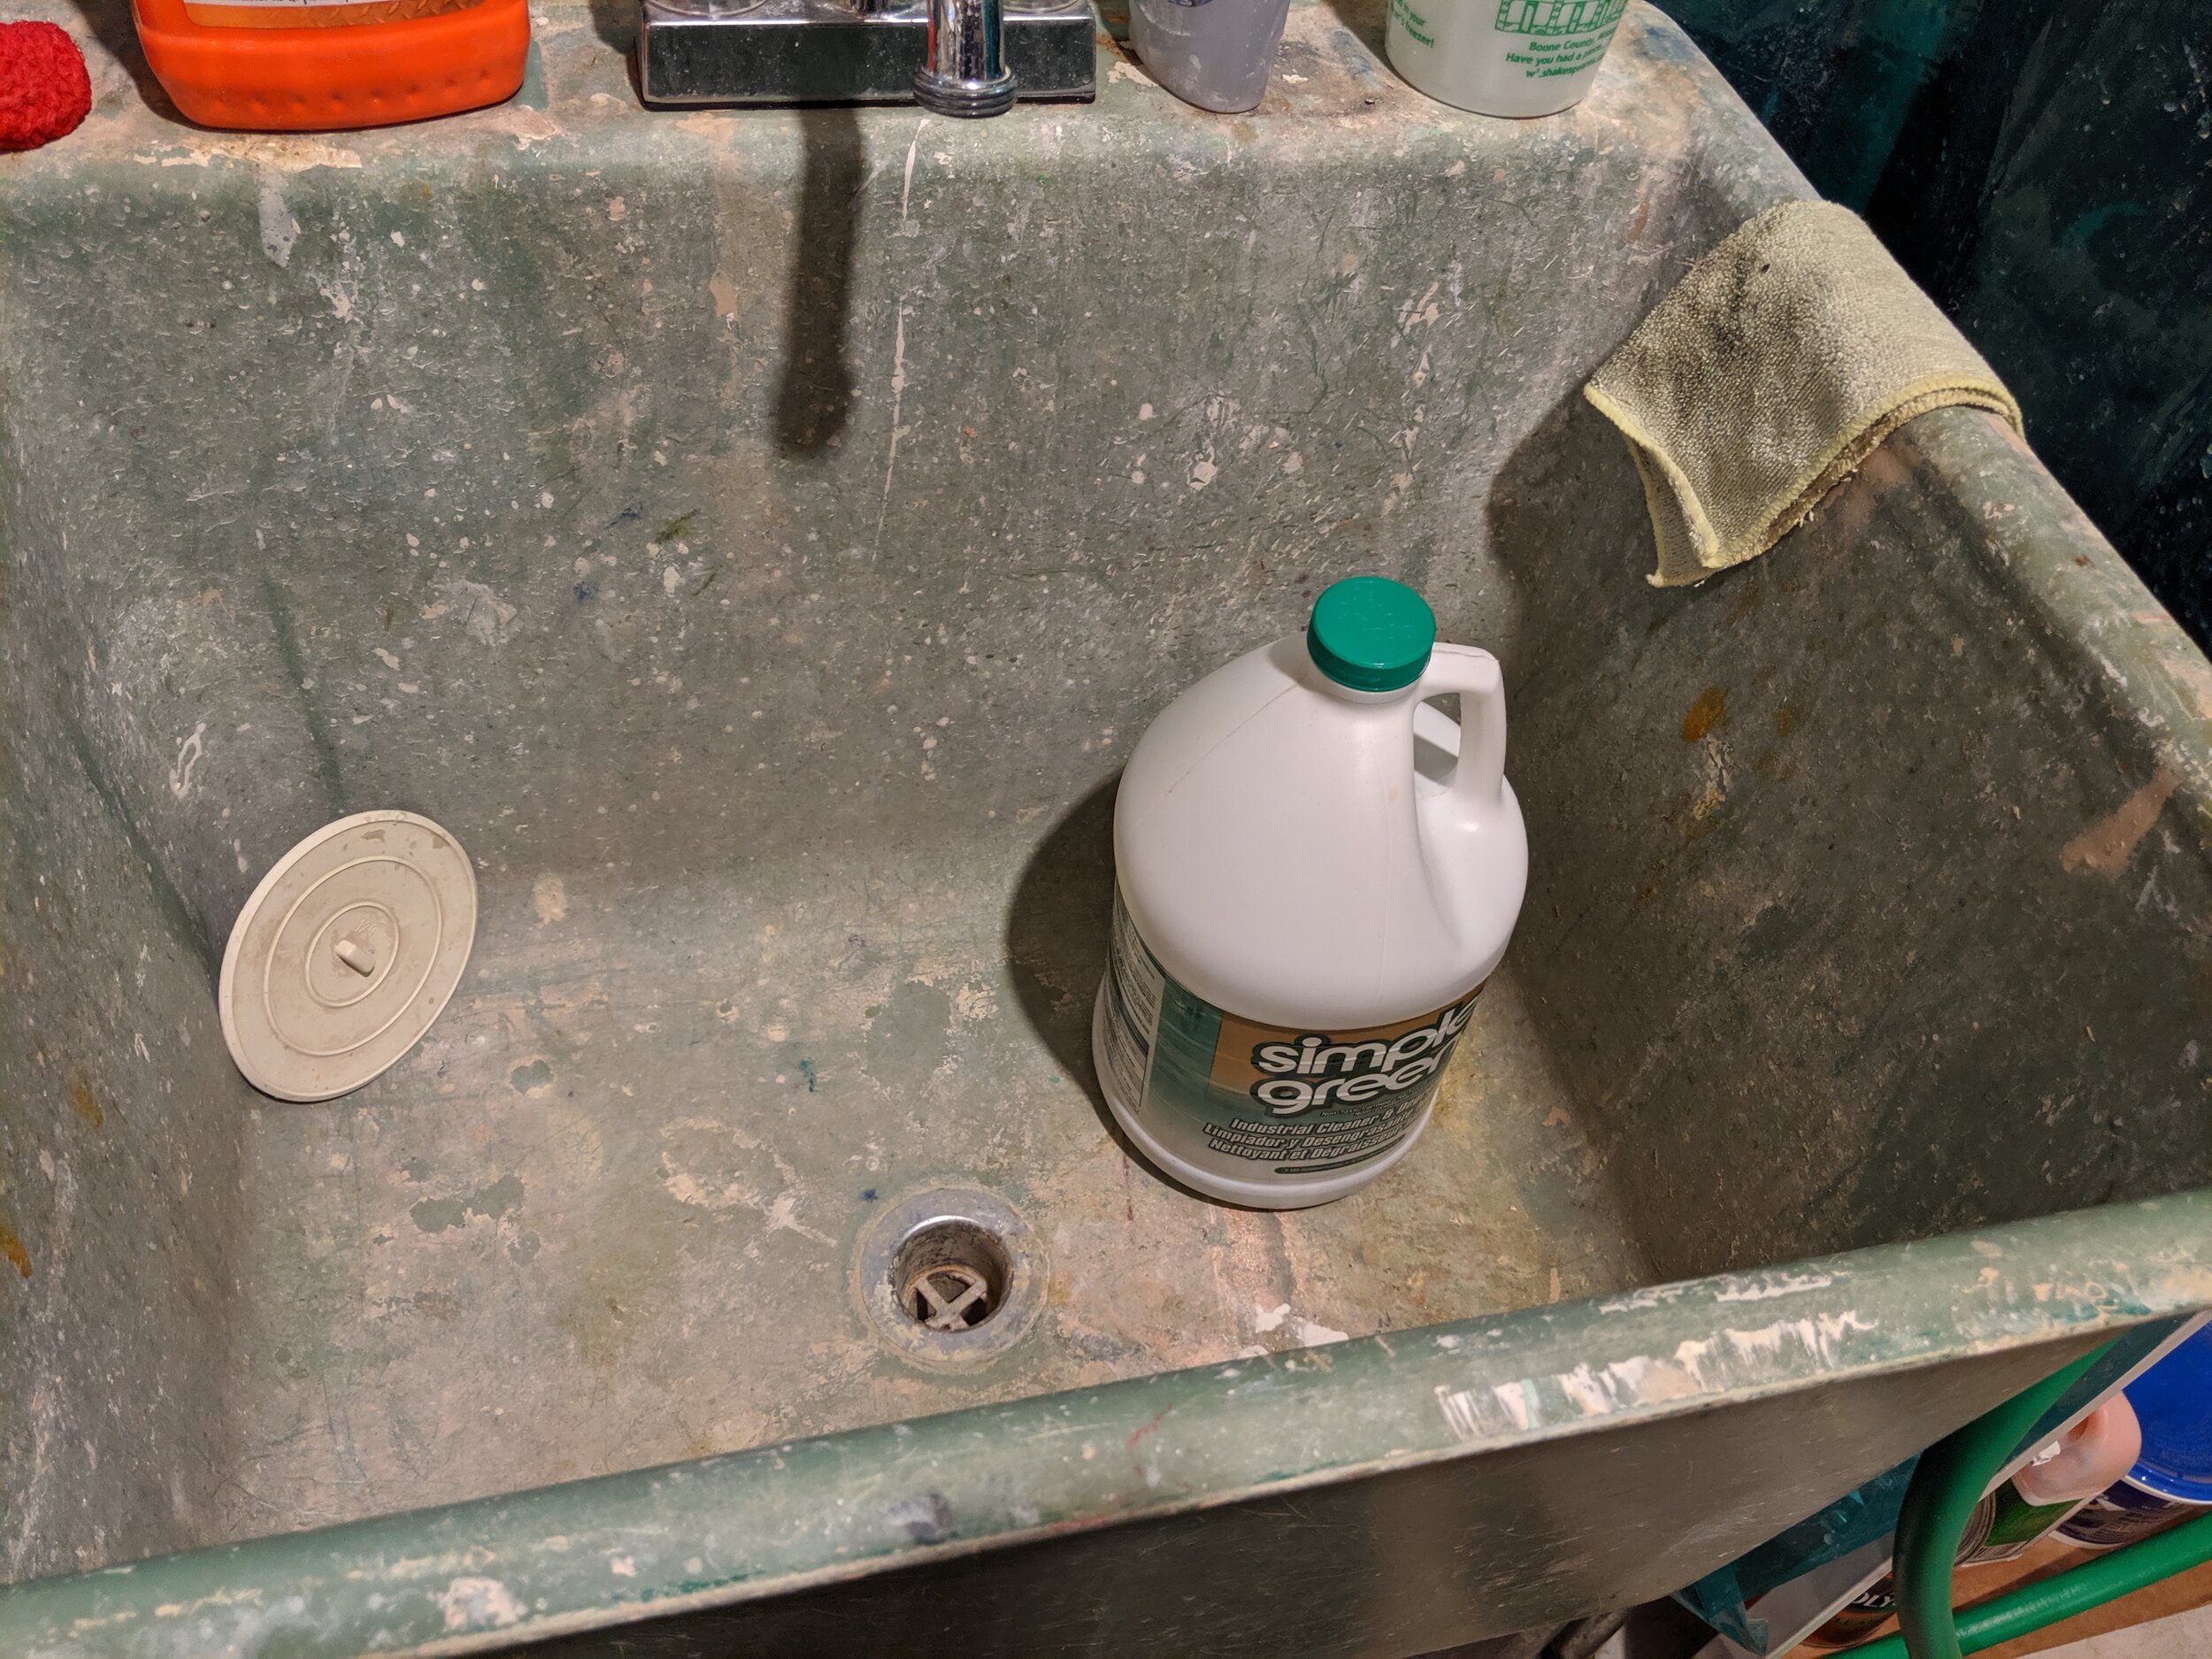
Personally, I use a degreaser called Simple Green that is available at pretty much any hardware store. You can also get decent results using a dish soap. Whichever you choose, make sure you dilute it so you're not getting a lot of suds, because that will just make the cleaning process take longer when you're rinsing everything out. I find that a few good splashes of degreaser into a half-full shop sink is more than enough, and soap needs even less to be effective. Caution: If you plan on using a bathtub or sink that is enamel coated, you may want to place a towel in the bottom as it fills with water, as the parts of the trumpet moving around may scratch through that protective coating. This is one of the reasons that I typically use my laundry room shop sink as it's made of plastic and I don't care if it gets scratched.

Once you have your selected tub or sink filled with your water and soap/degreaser, it's time to disassemble your trumpet.

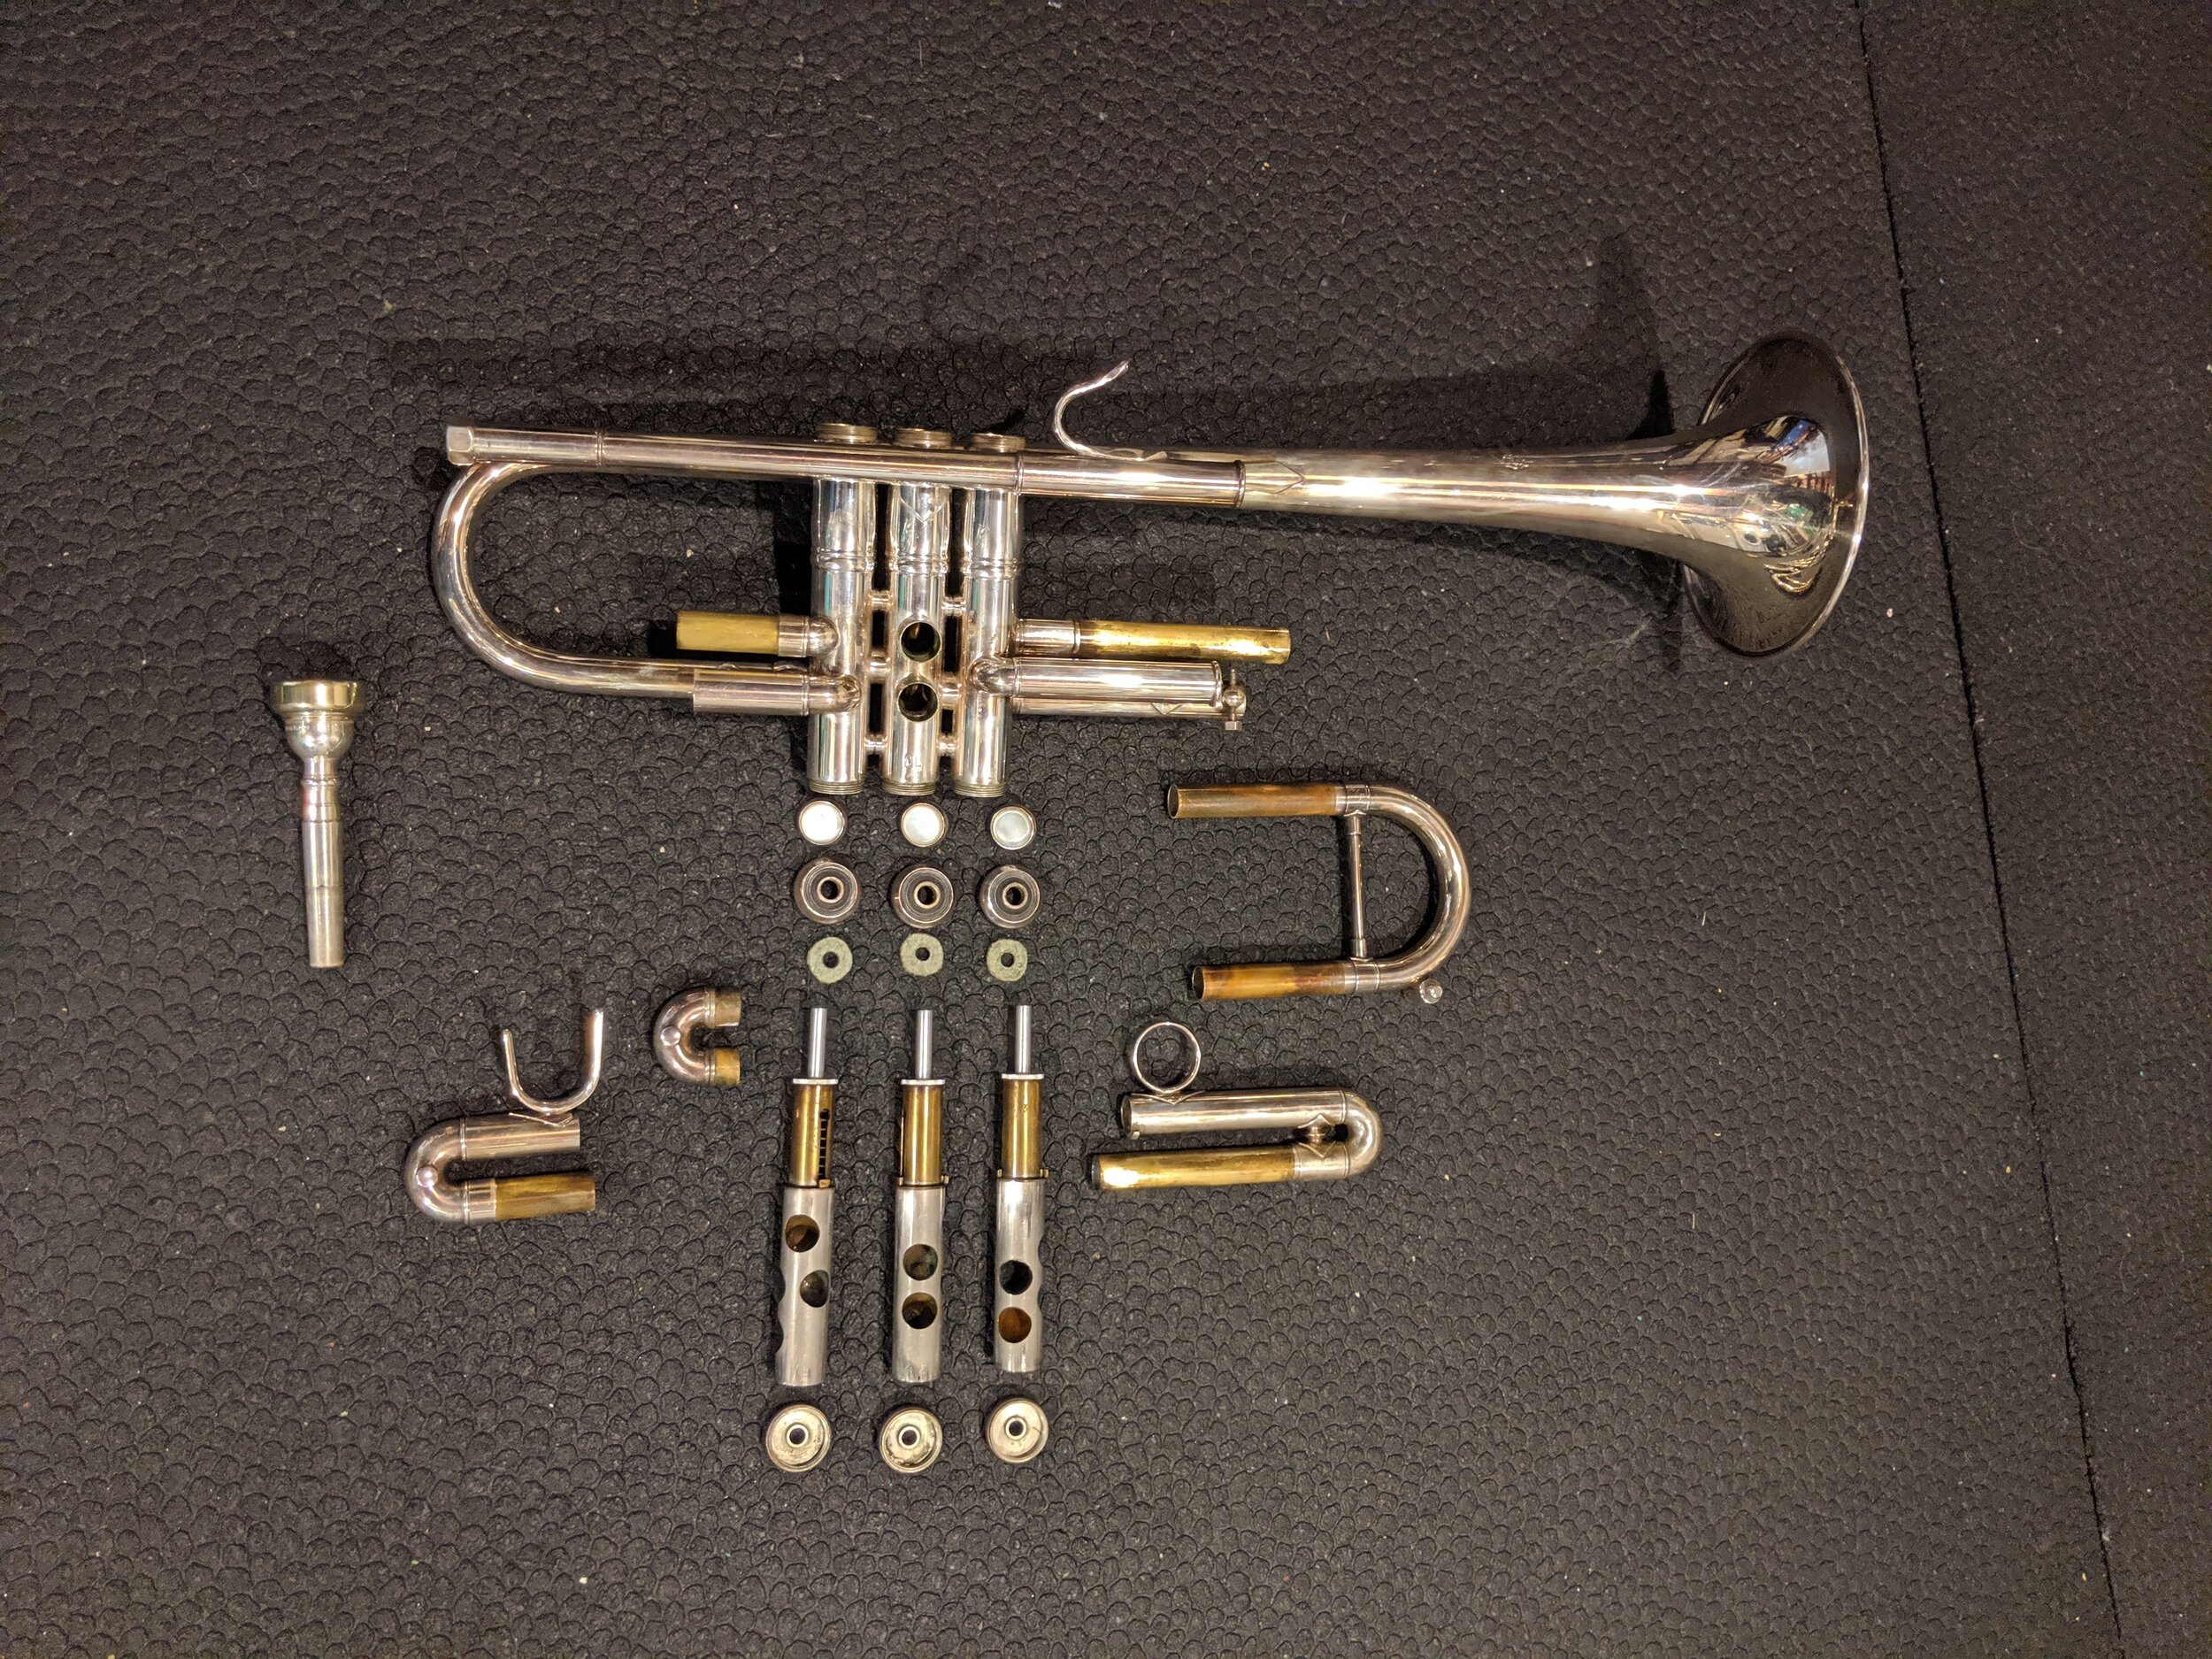
It can be useful to lay things out so that parts that go together are next to each other. Most of what you need to do is take out the valves and slides and place them in the tub or sink. You will have to remove the finger buttons from each valve in order to take off the top valve cap and pads before submerging the valves because the pads (which are likely made of felt) will lose some functionality if they are soaked and then dry out.

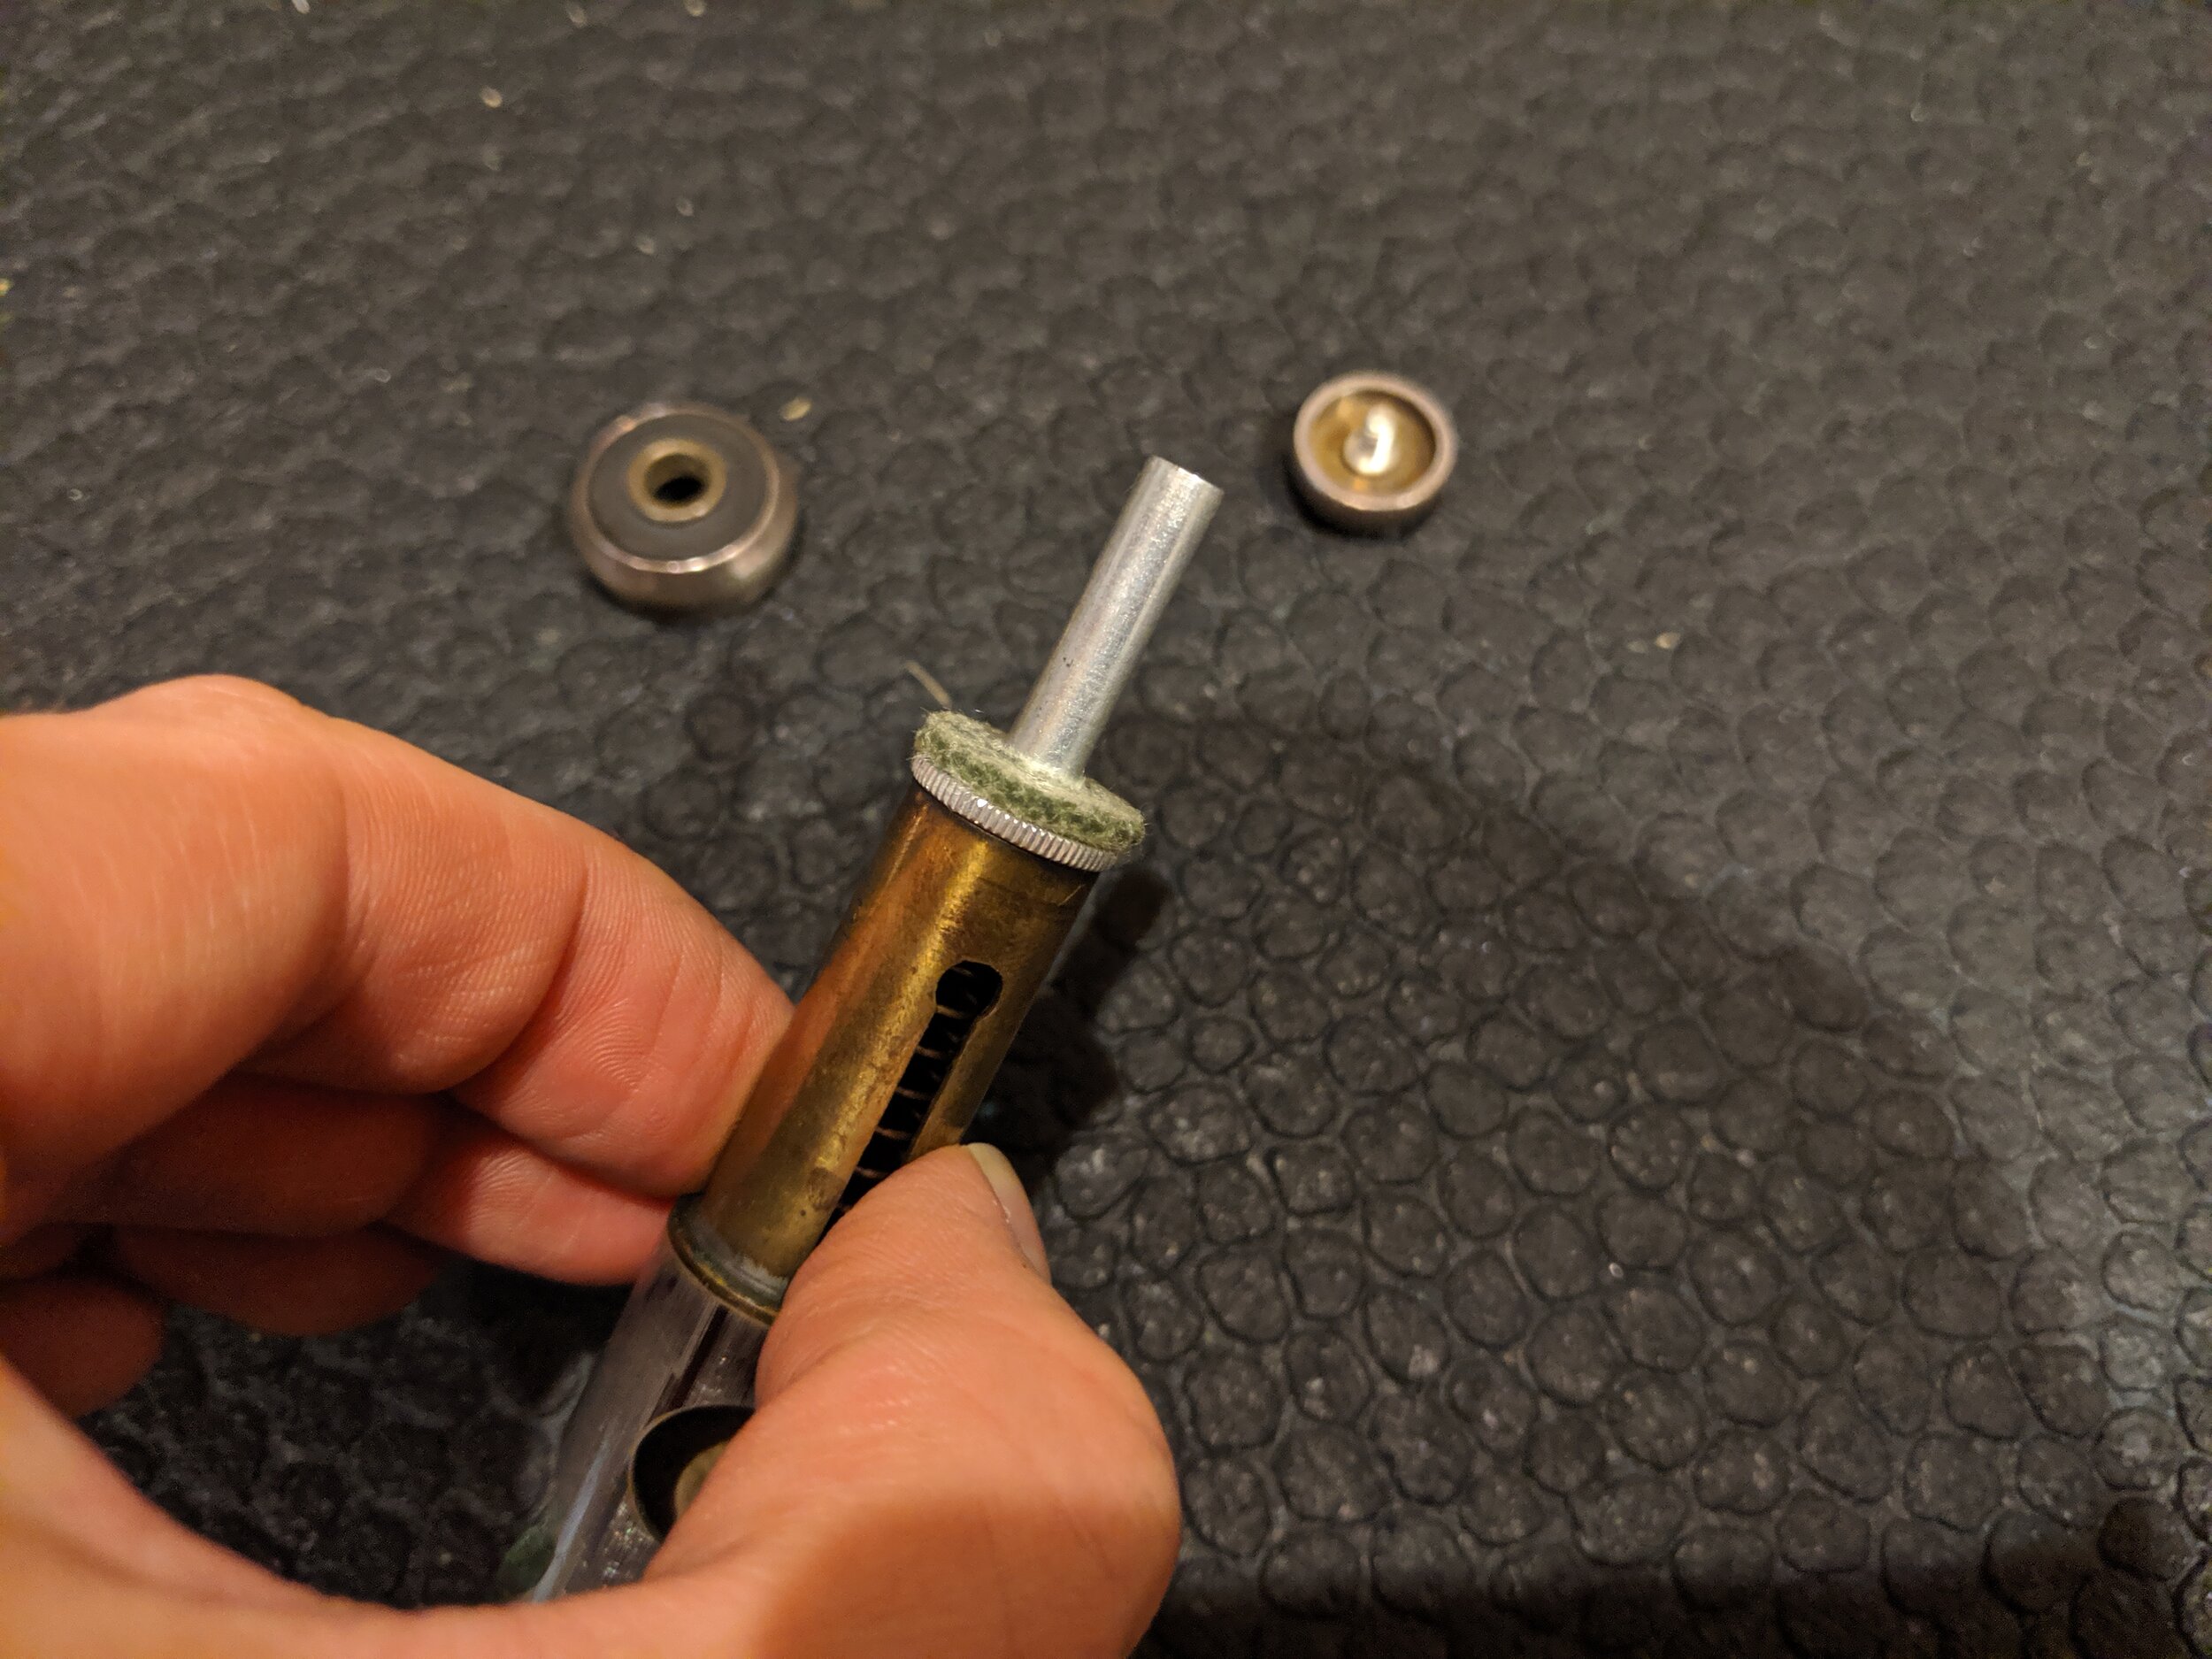
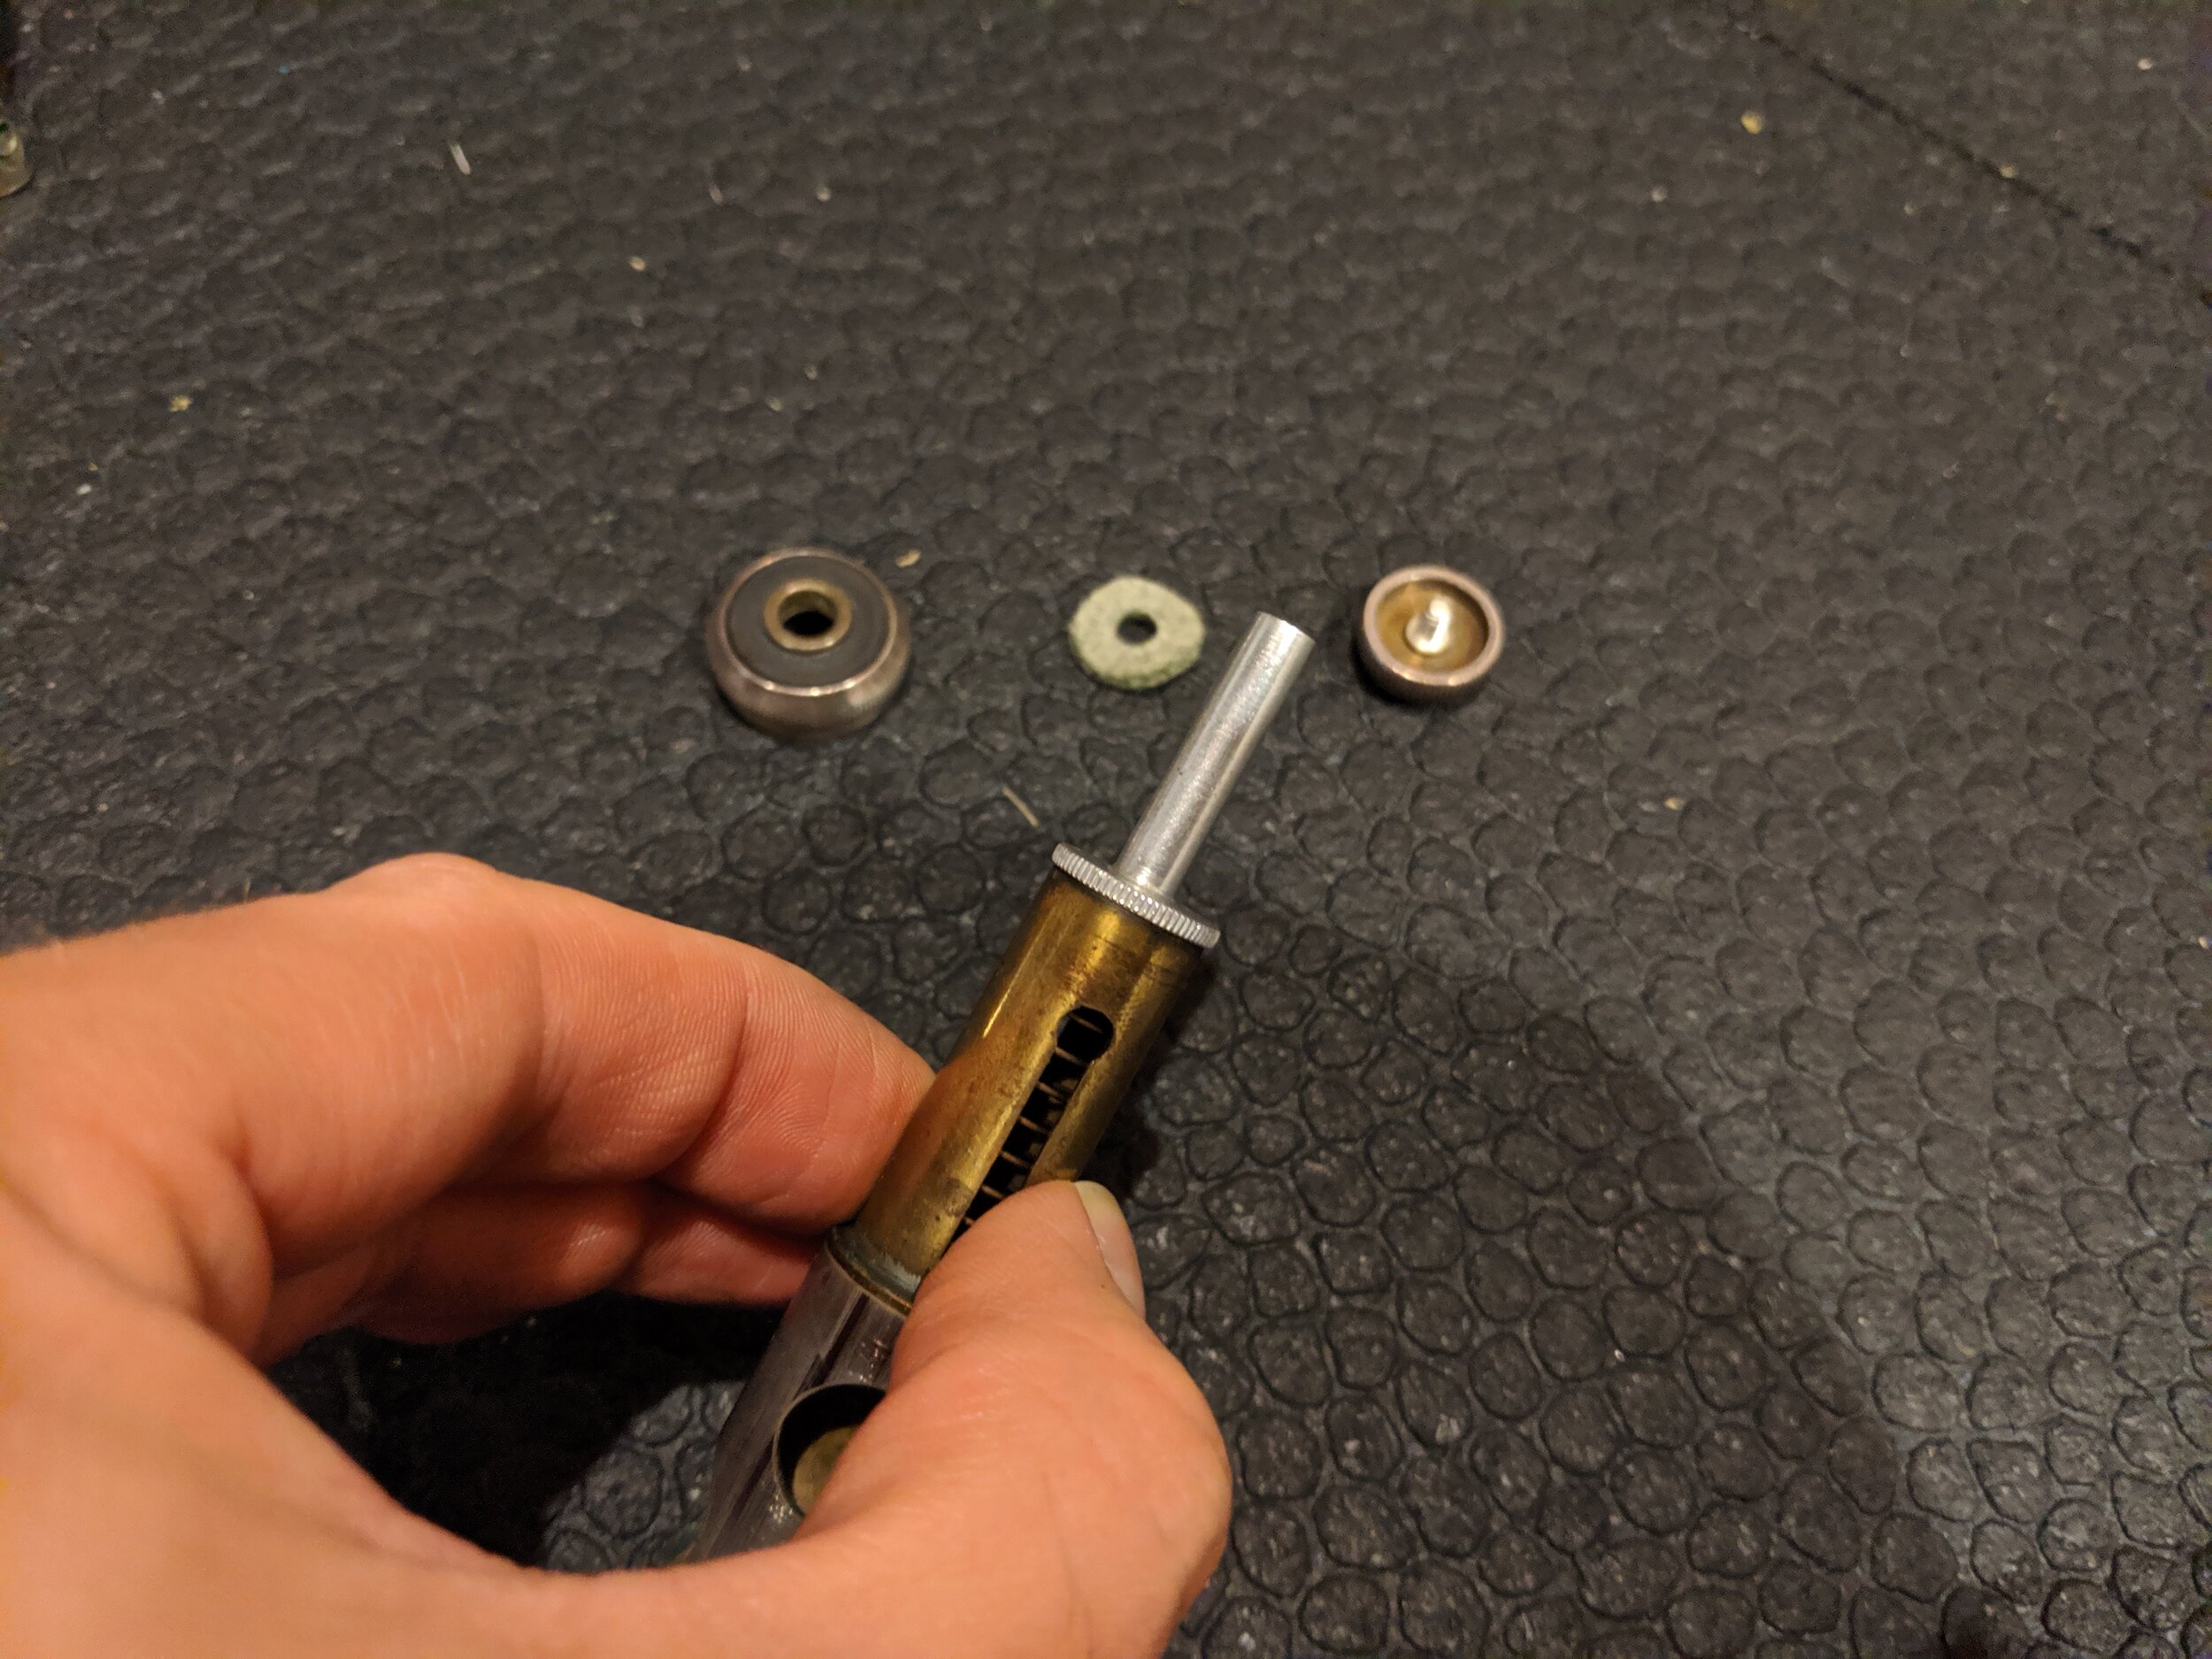
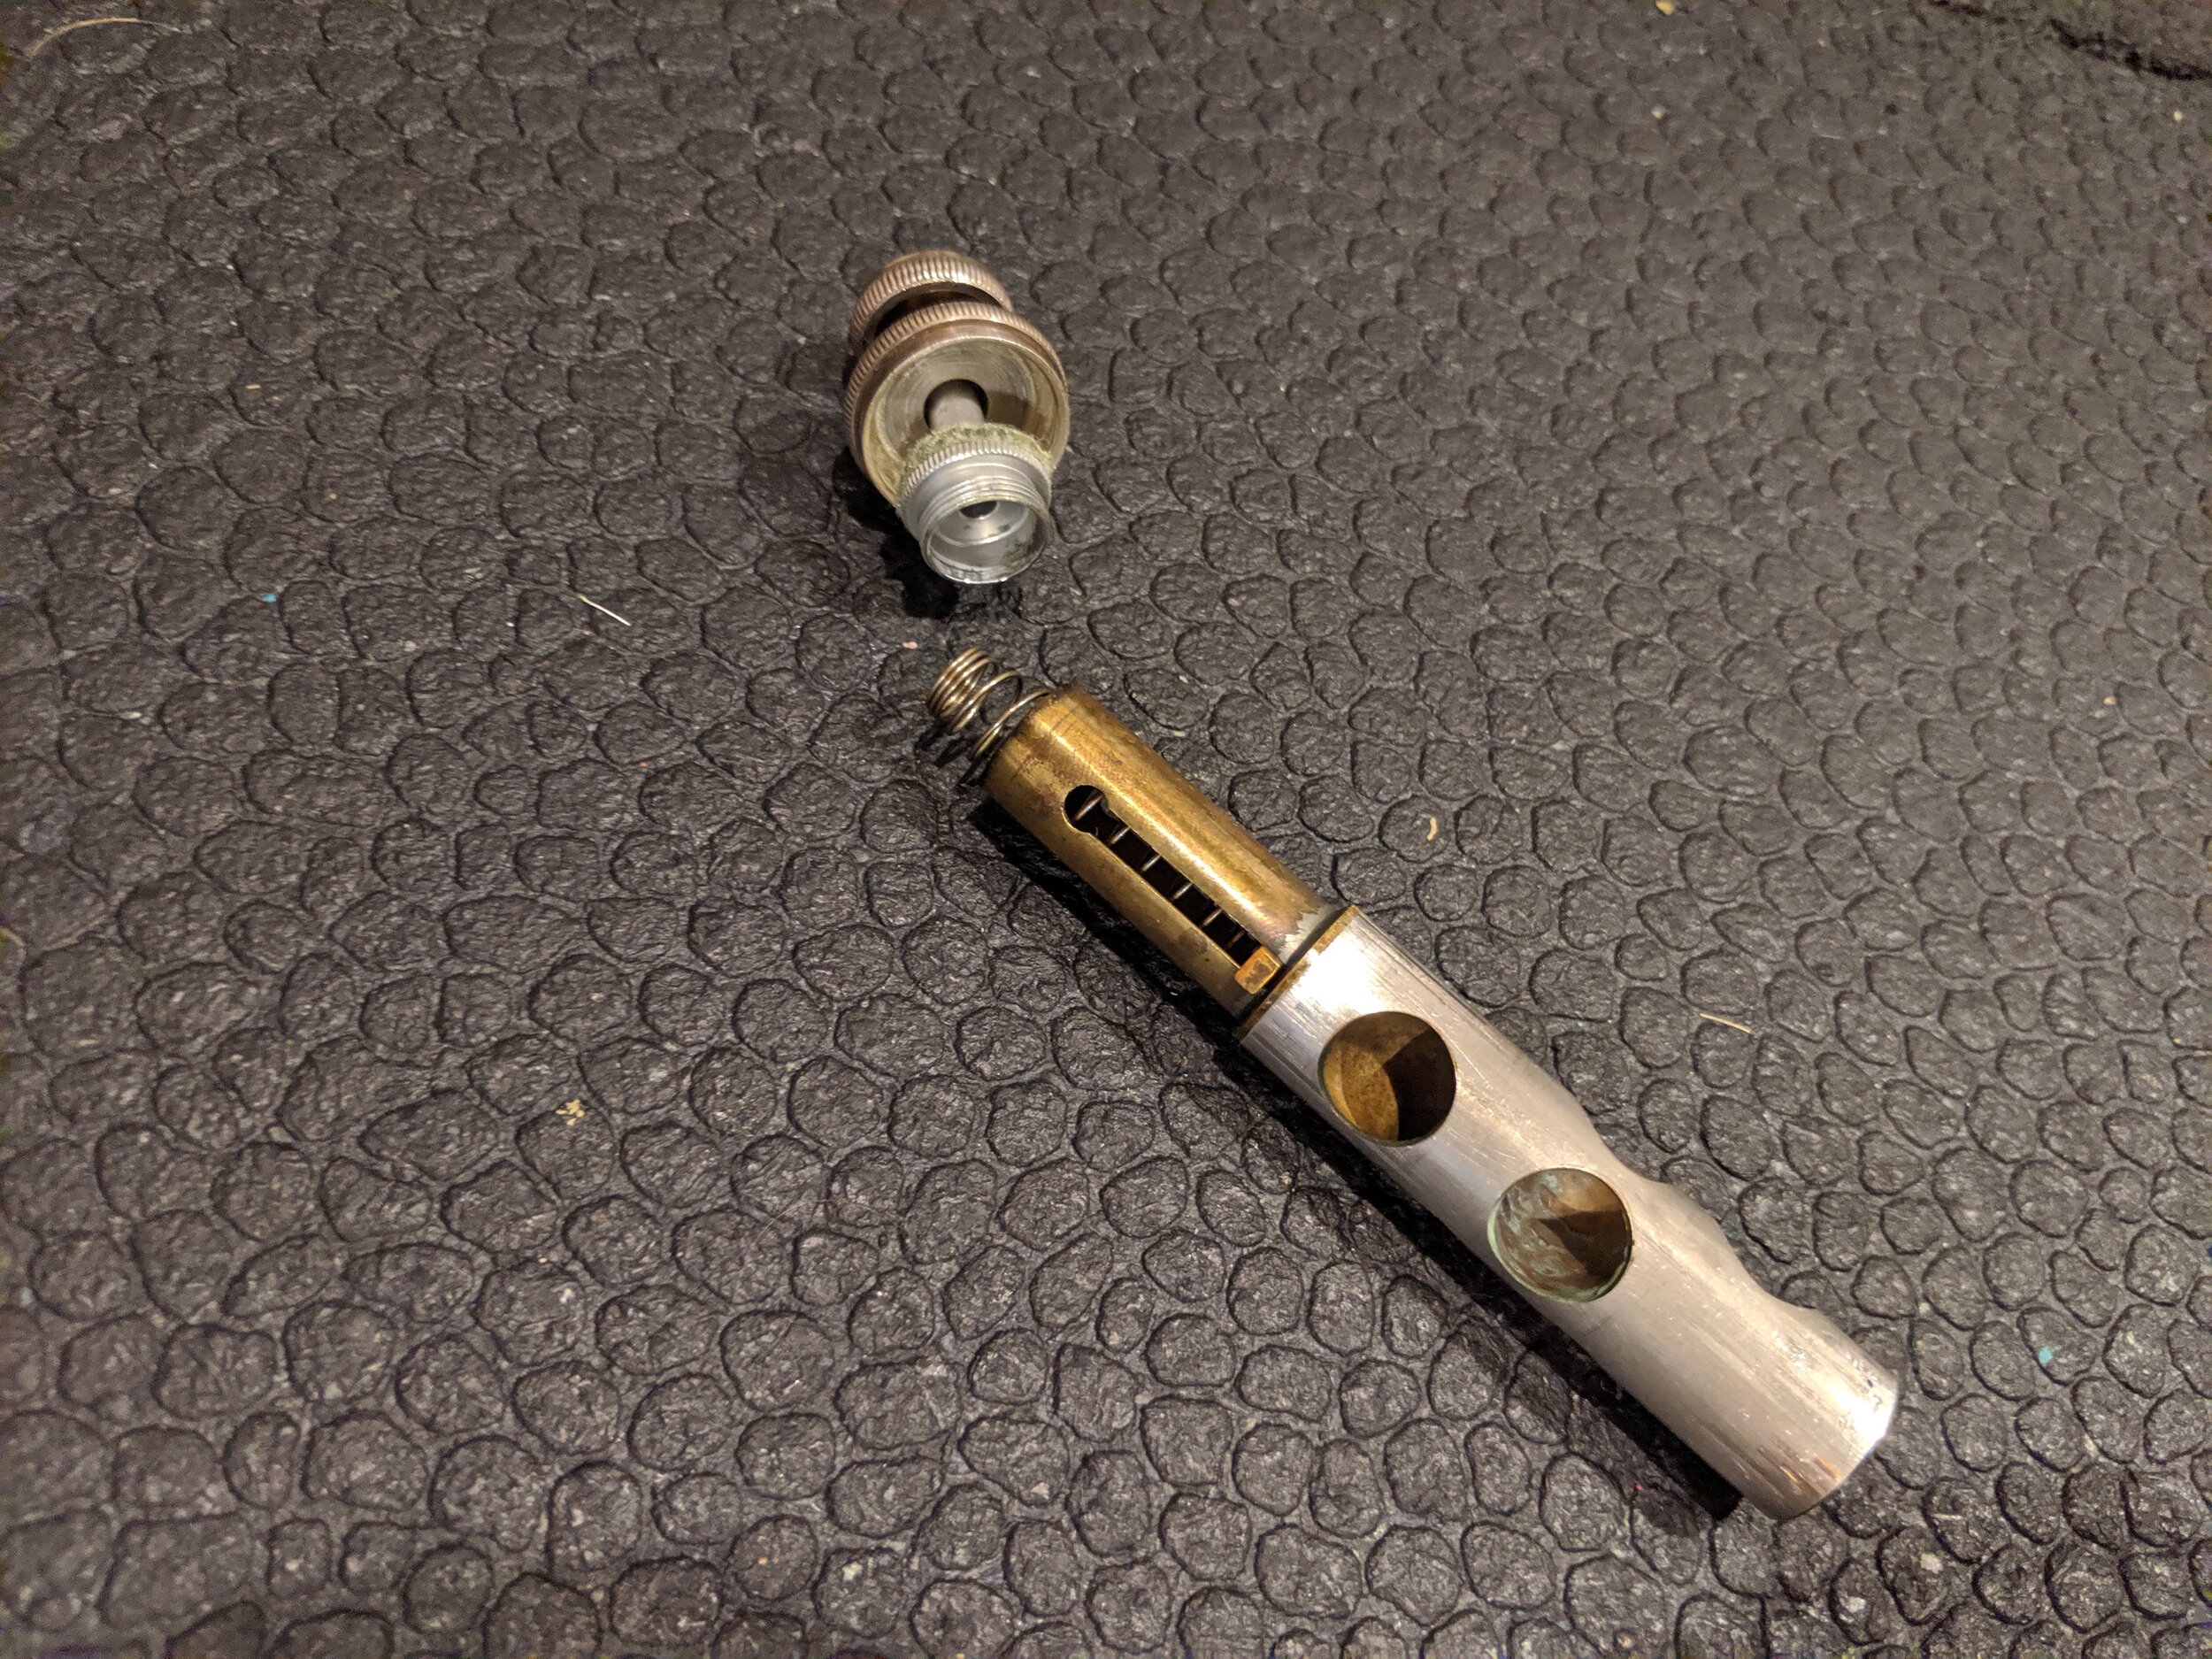
If you end up removing the entire stem and have exposed the spring (seen on the right), re-screw it together and hold the stem steady while unscrewing the button. Set the buttons and caps side making note of which valve they will return to as there may be slight variations between them that could affect your trumpet's playability.


Now that everything is in your cleaning solution, let's talk about tools. You'll want to have some kind of cup to be able to pour water through the various parts of your instrument. Beyond that there are two specialty tools that will make cleaning much easier and quicker. These are the snake brush and mouthpiece brush.

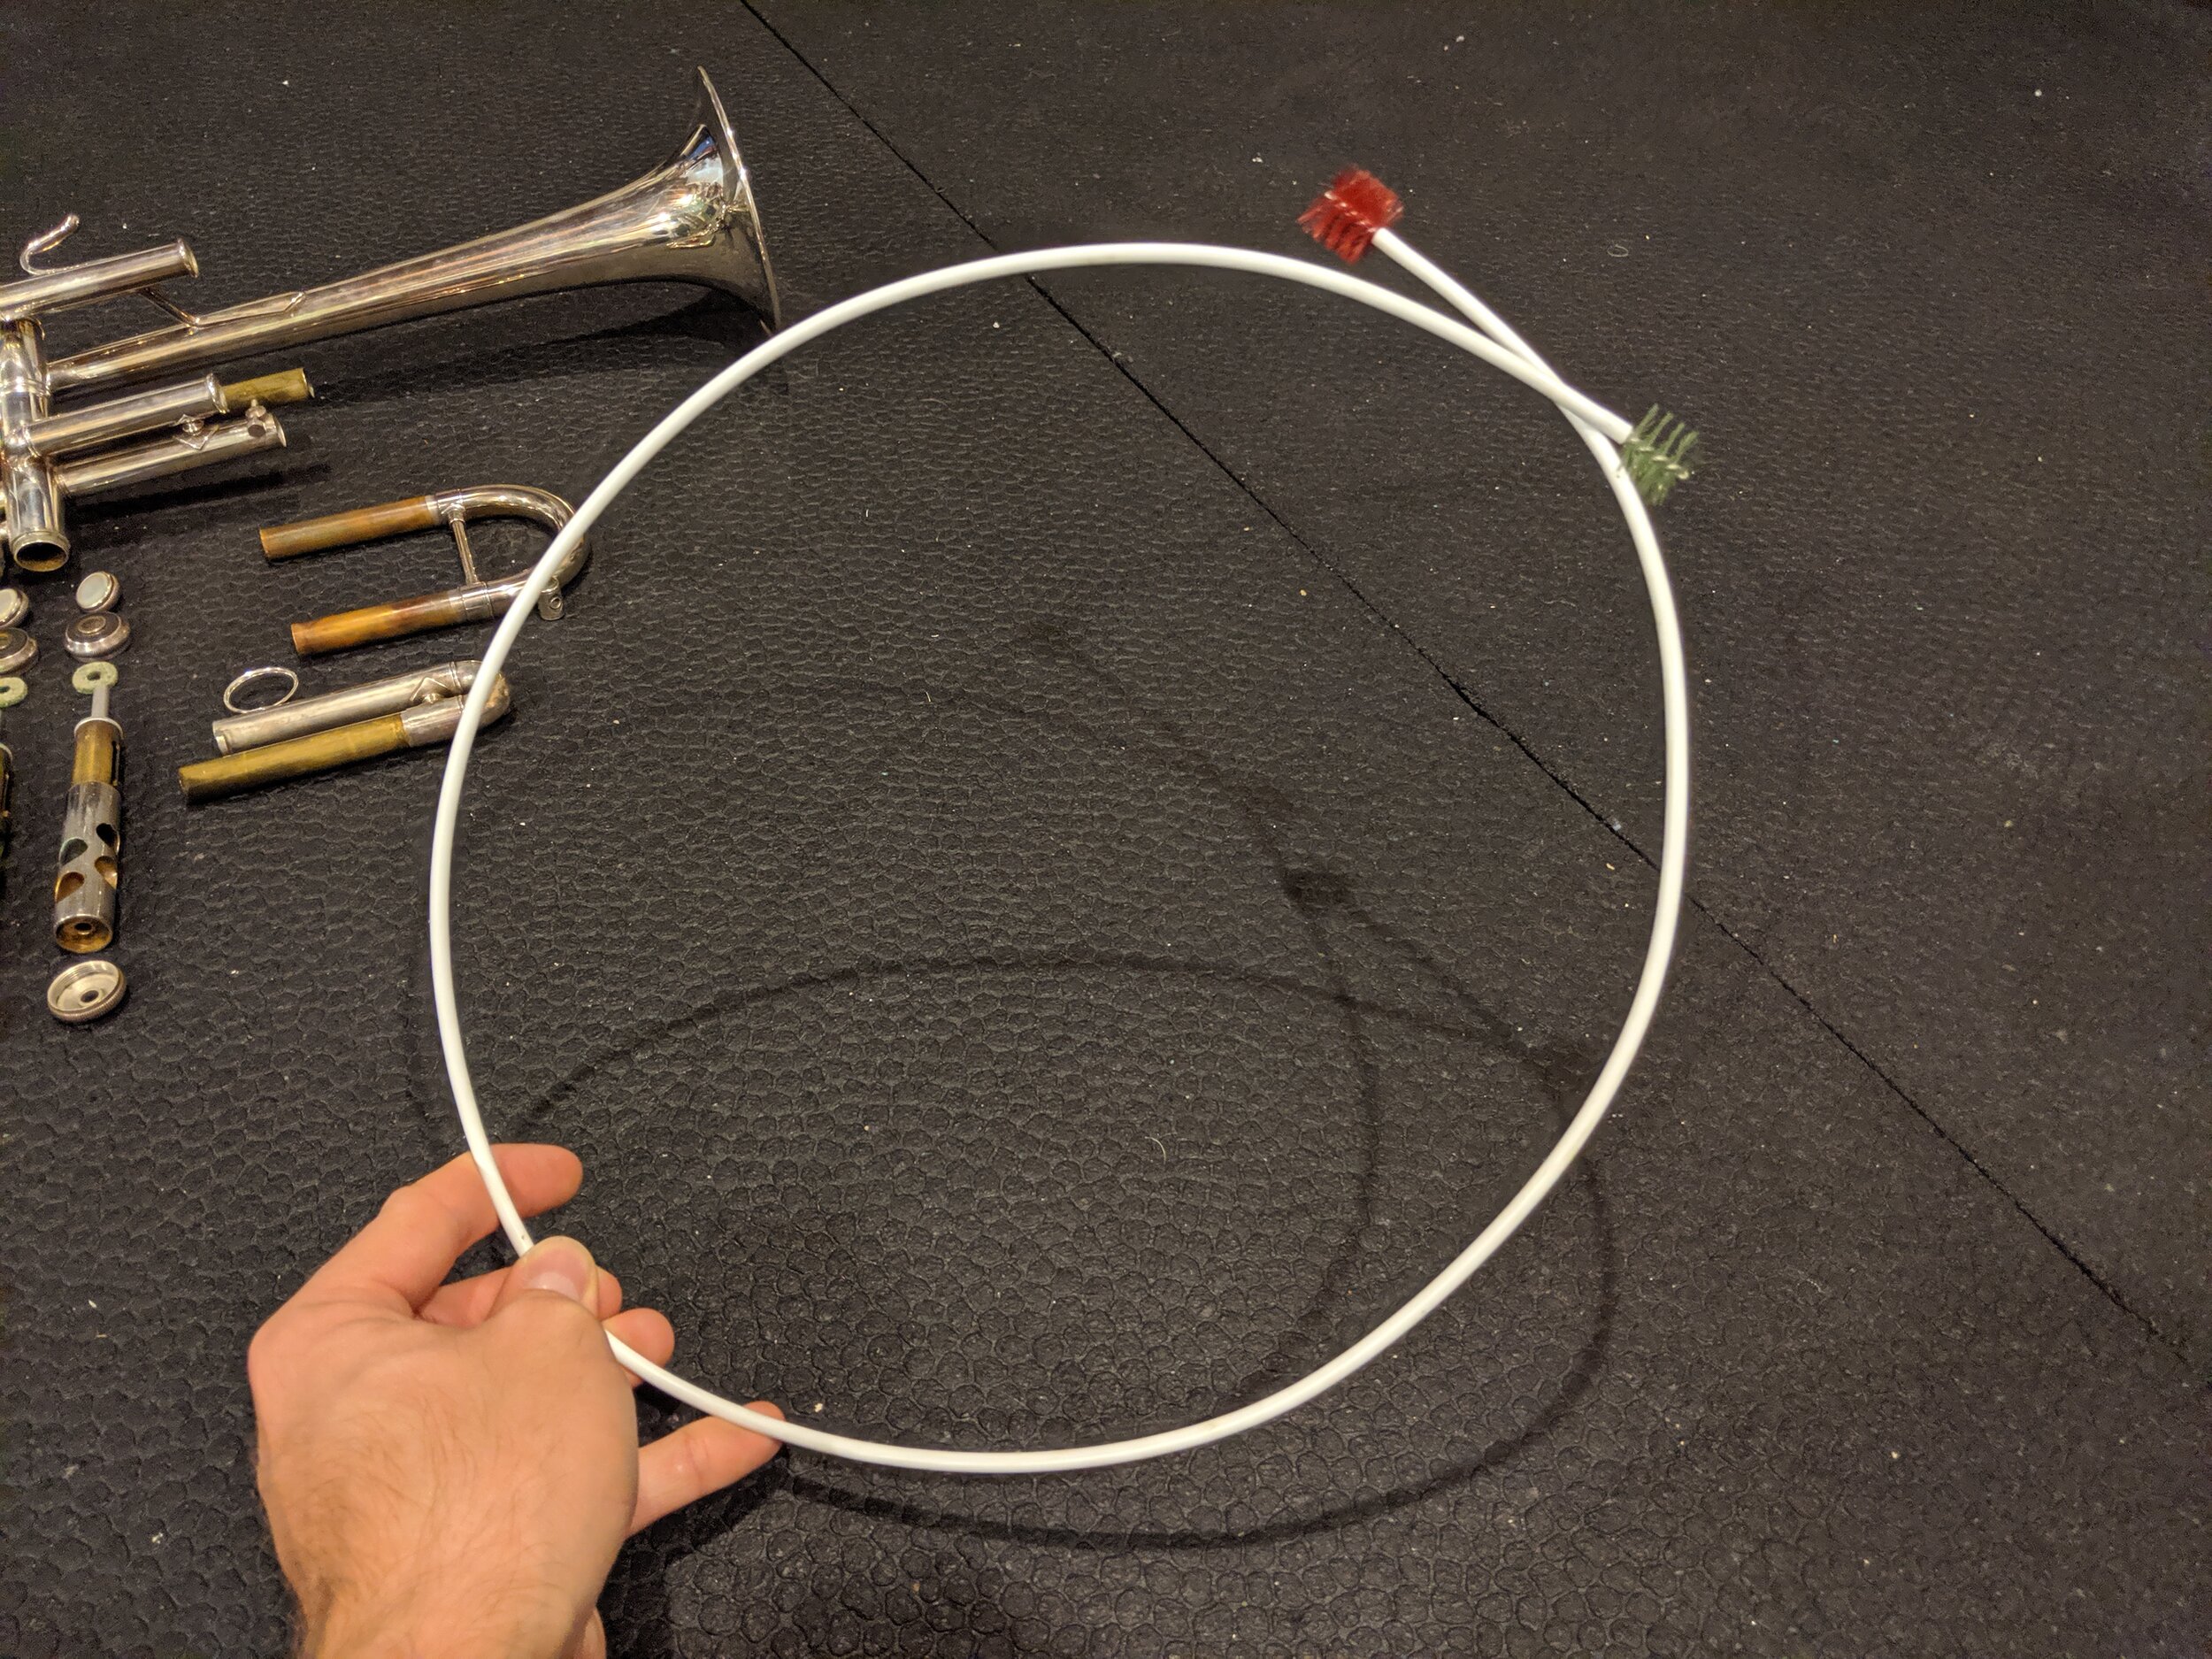
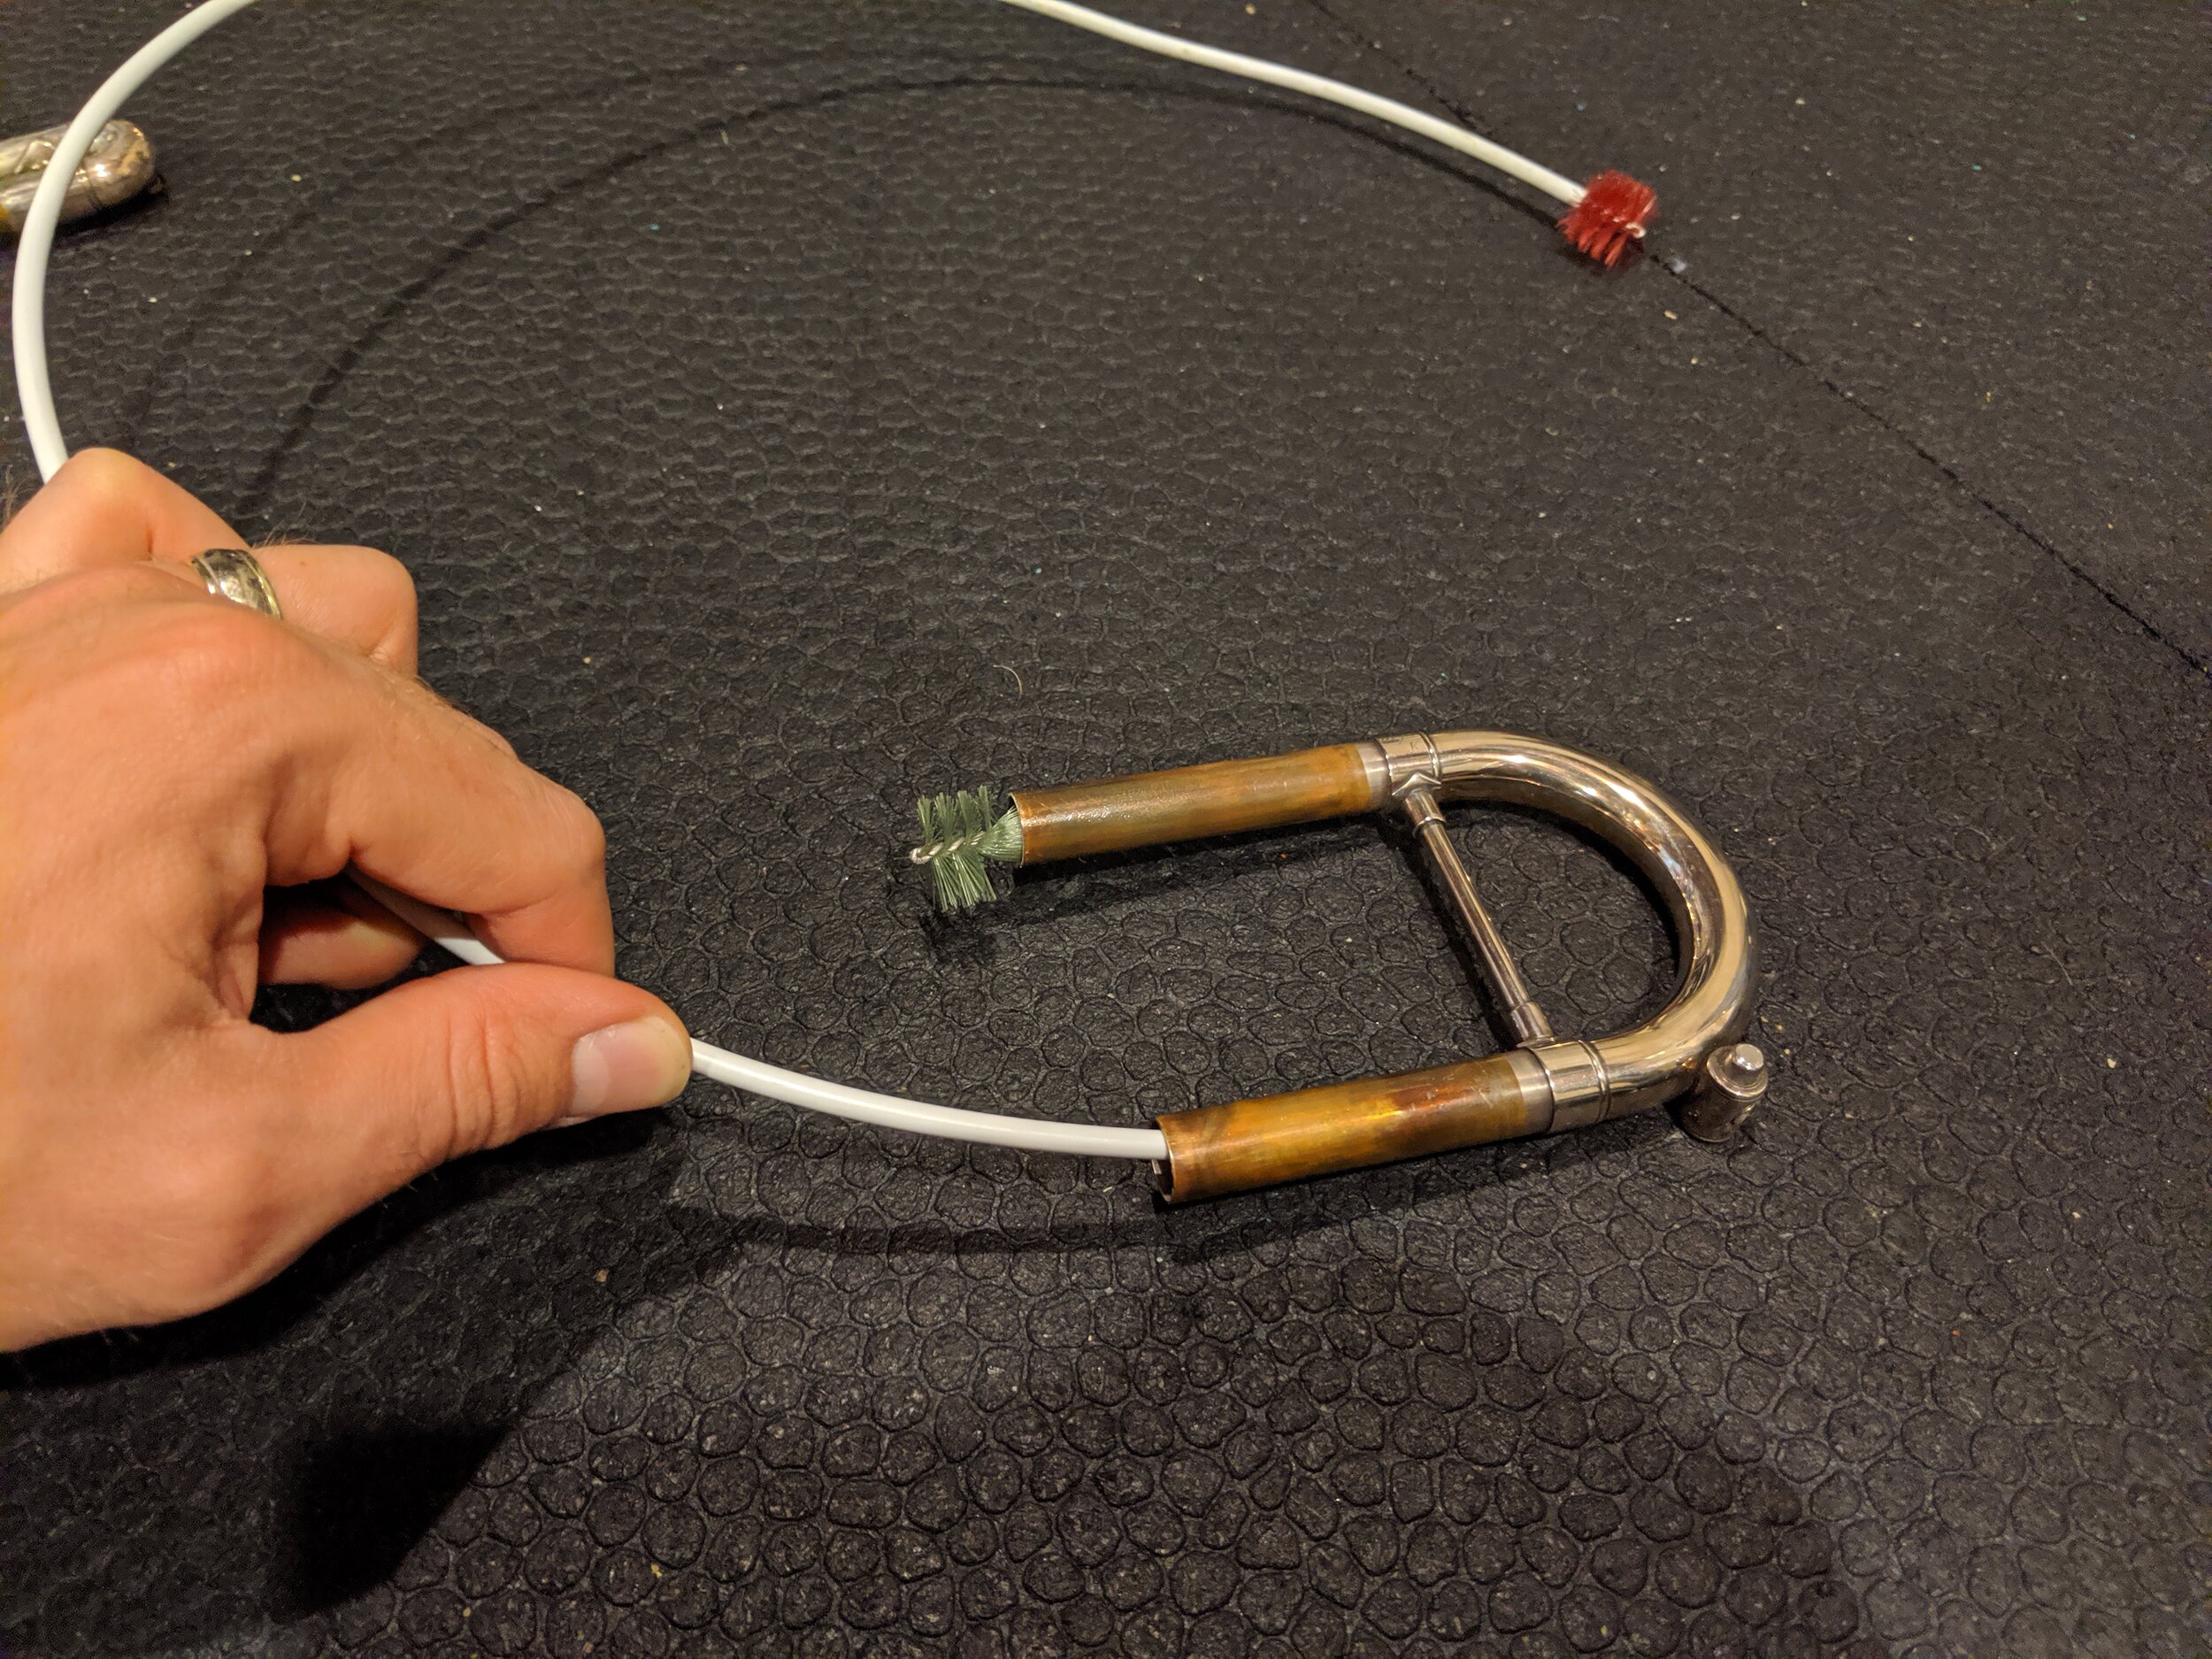
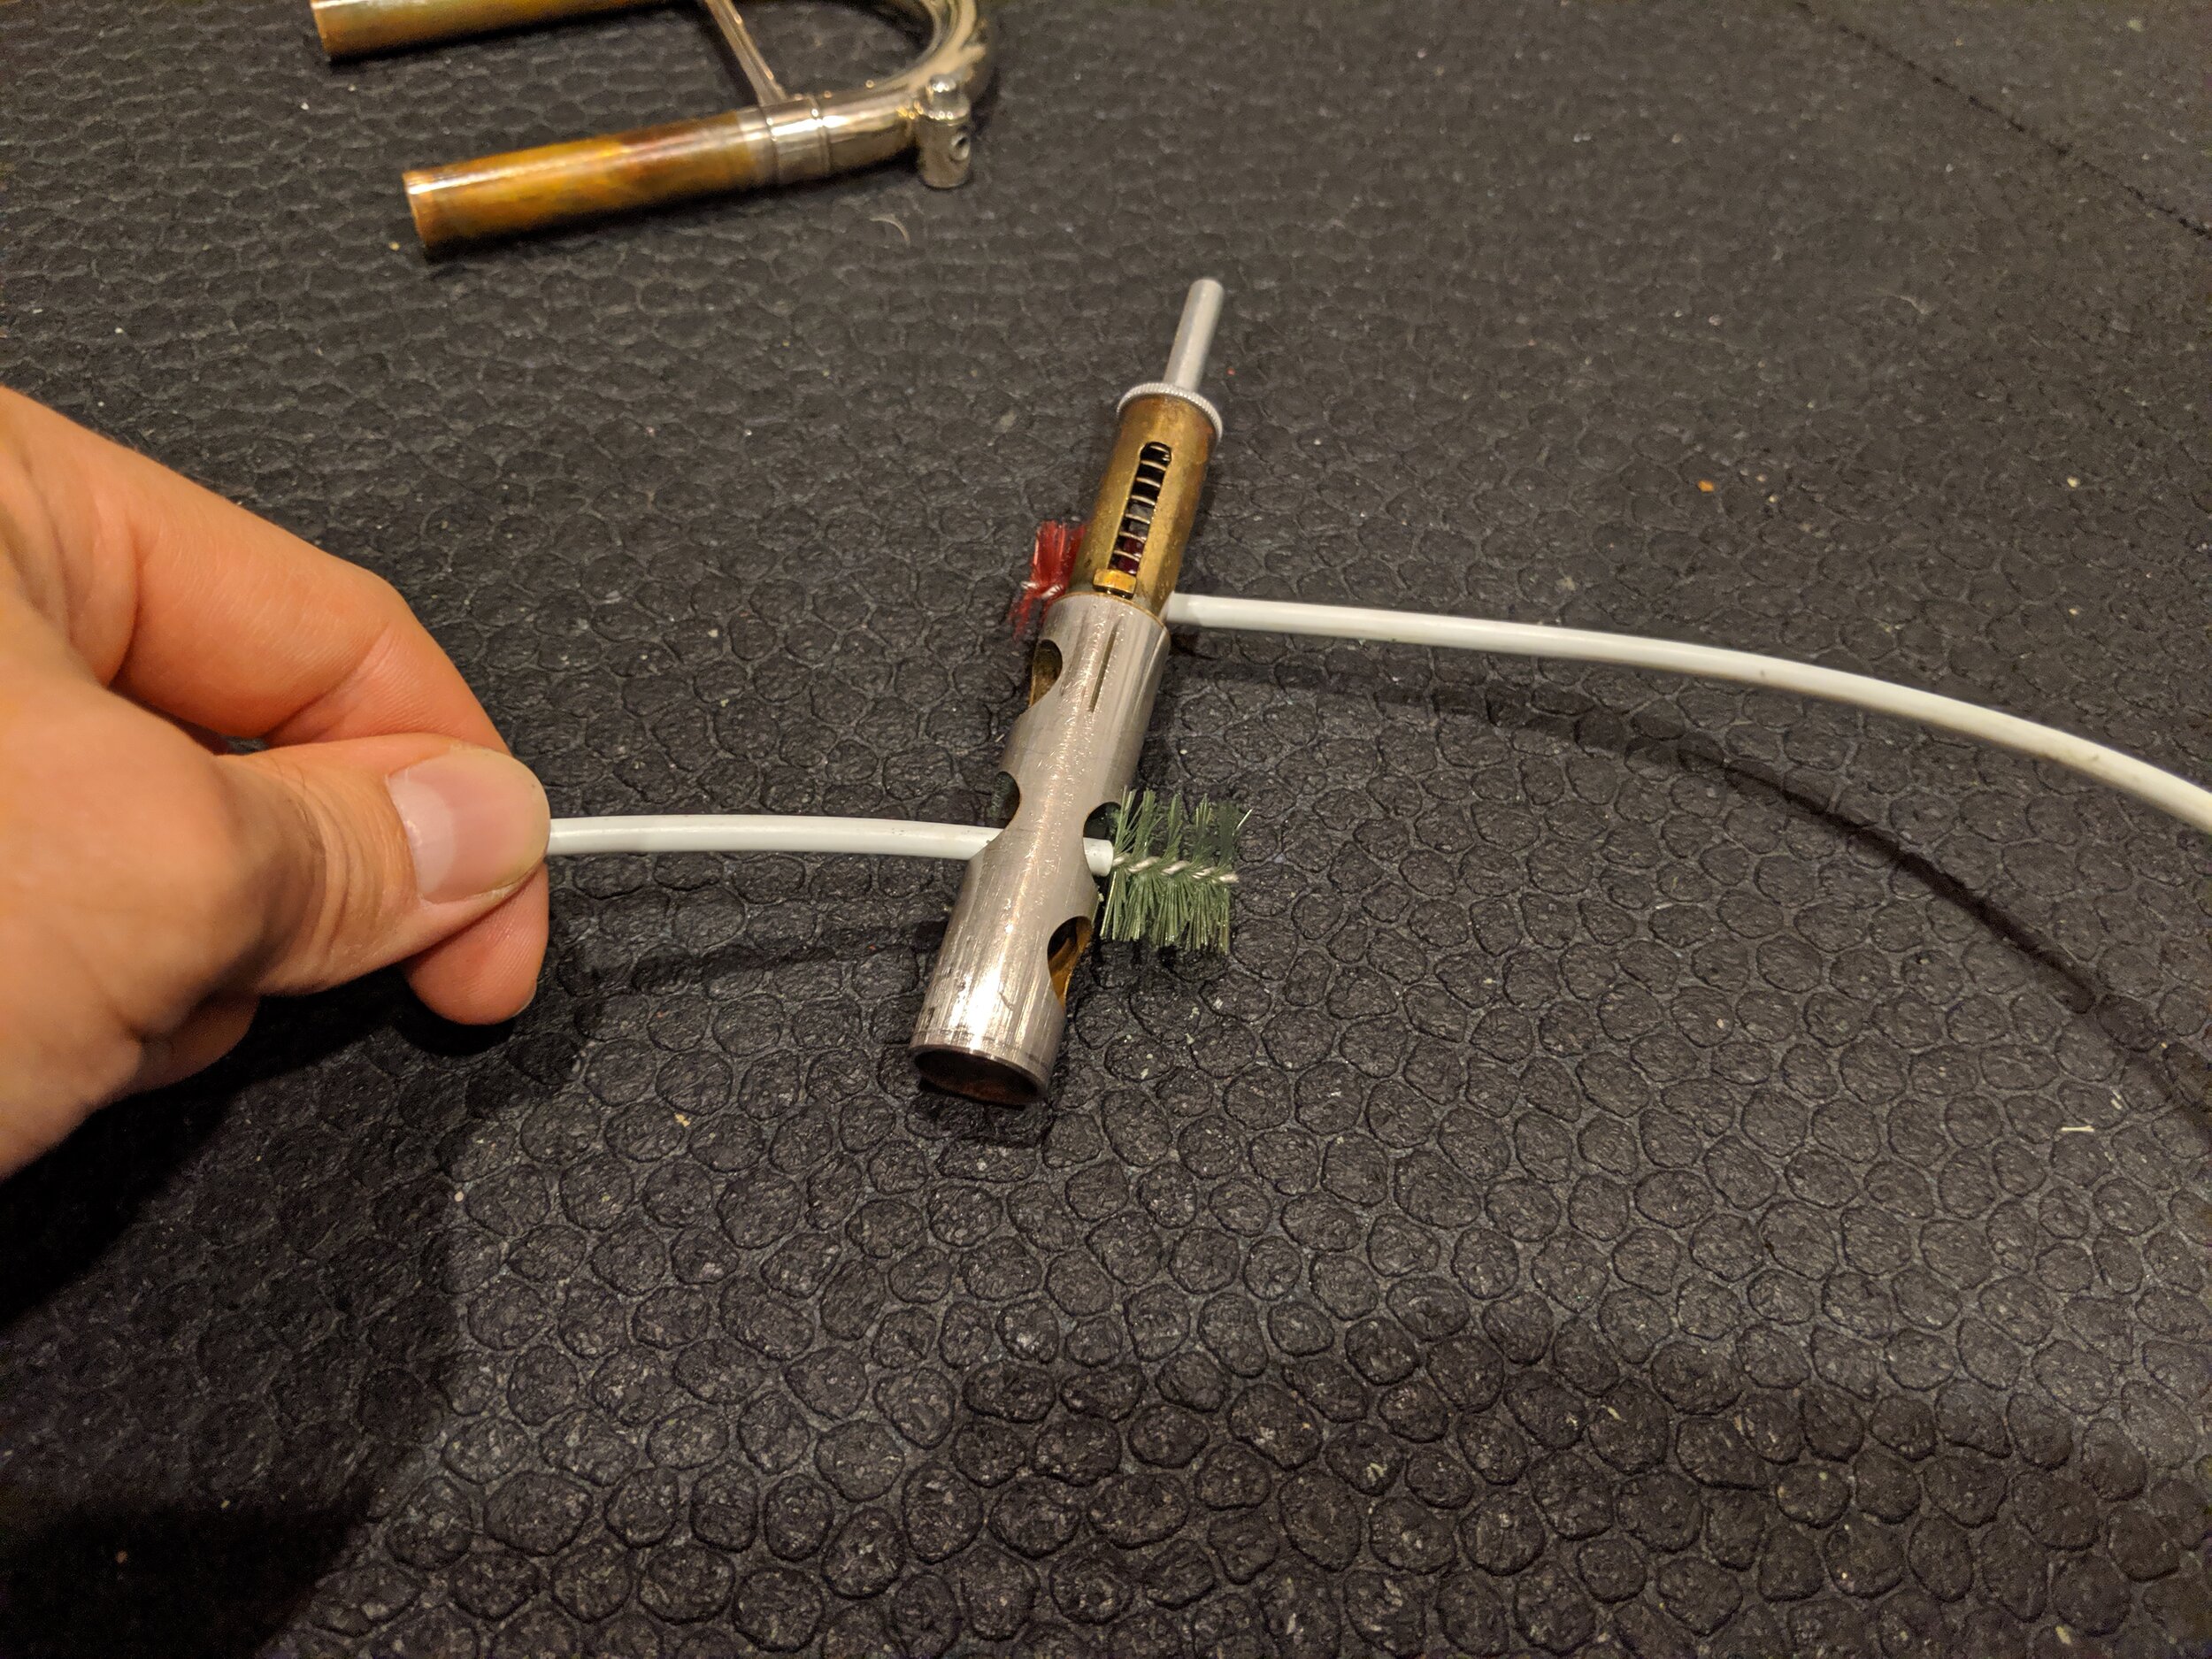
The snake brush is really just a small brush on each end of a long wire or coiled spring. It is particularly useful for cleaning through all the slides as it can bend and go through the entire length of them. The leadpipe can be cleaned with the snake brush as well. Though there are specialty brushes made specifically for the leadpipe, since the snake brush can also be used for this (and it works well), I don't see any real advantage and purchasing an additional tool. To clean the valves you should run the snake brush gently through each of the portholes and then rinse them out with the water. The surface of the valves should be cleaned off with a washcloth or rag.

Likewise, the inside of the valve casing can be cleaned with a washcloth or rag that has been rolled up. 

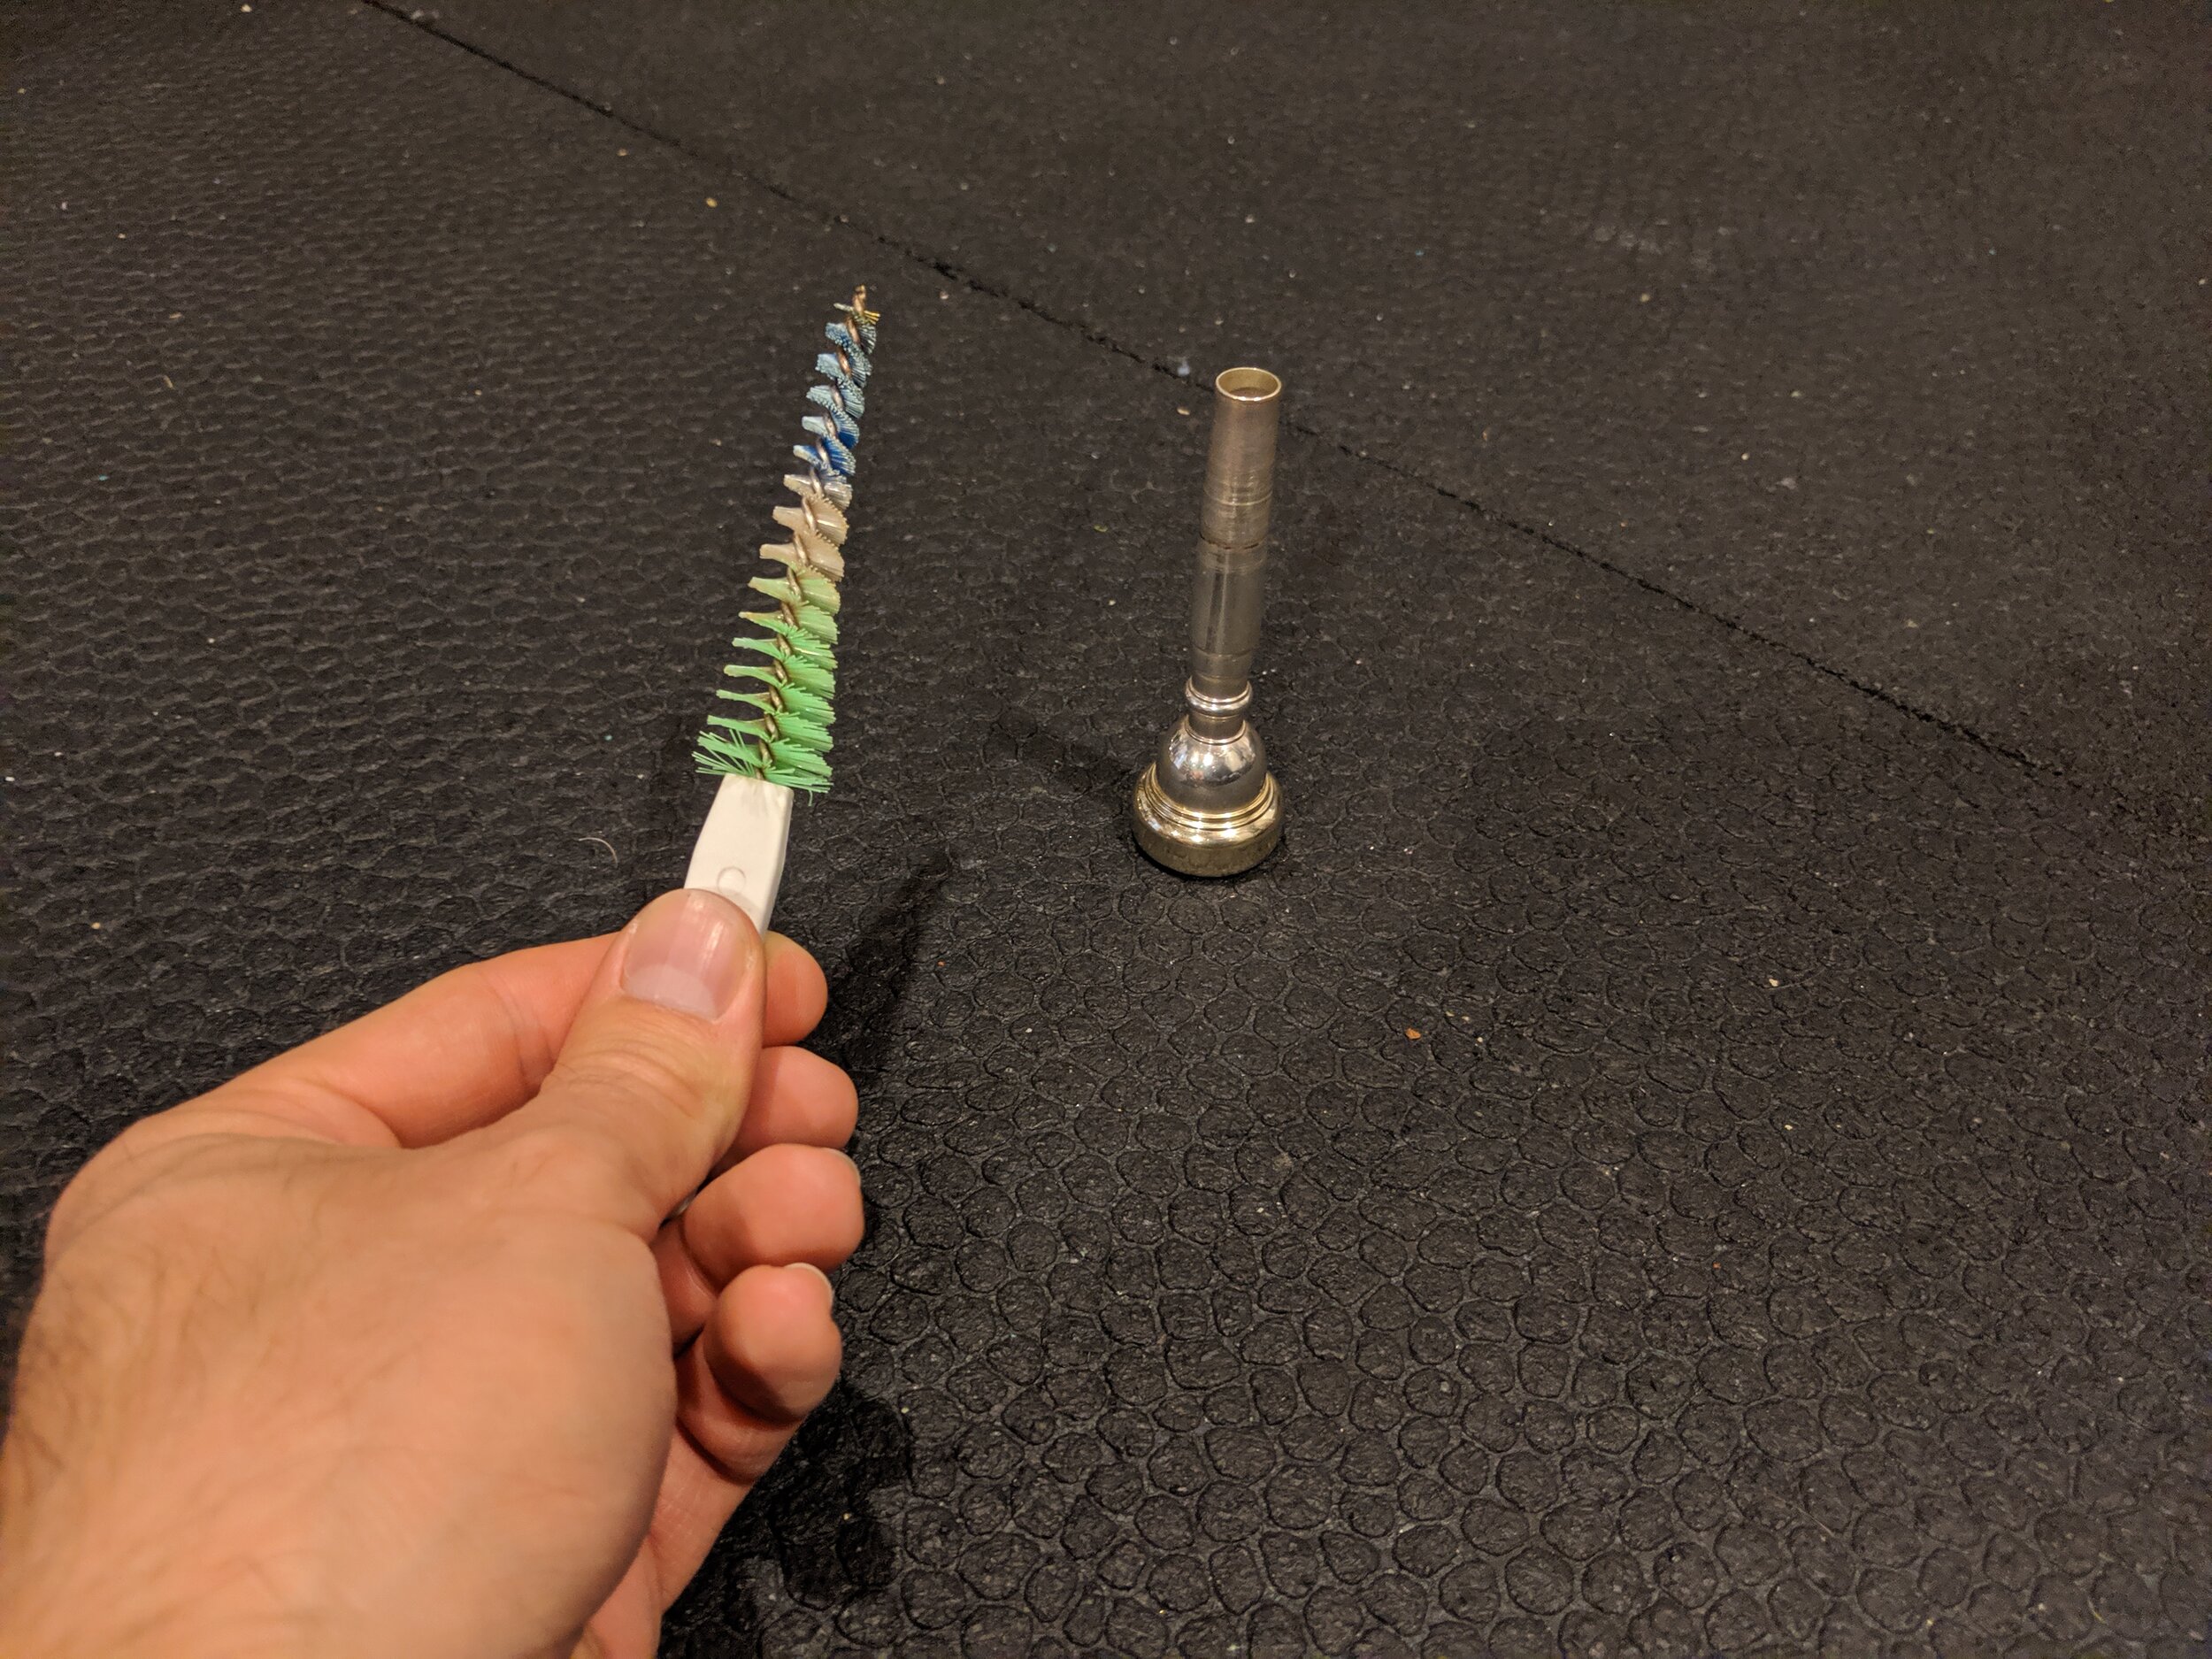
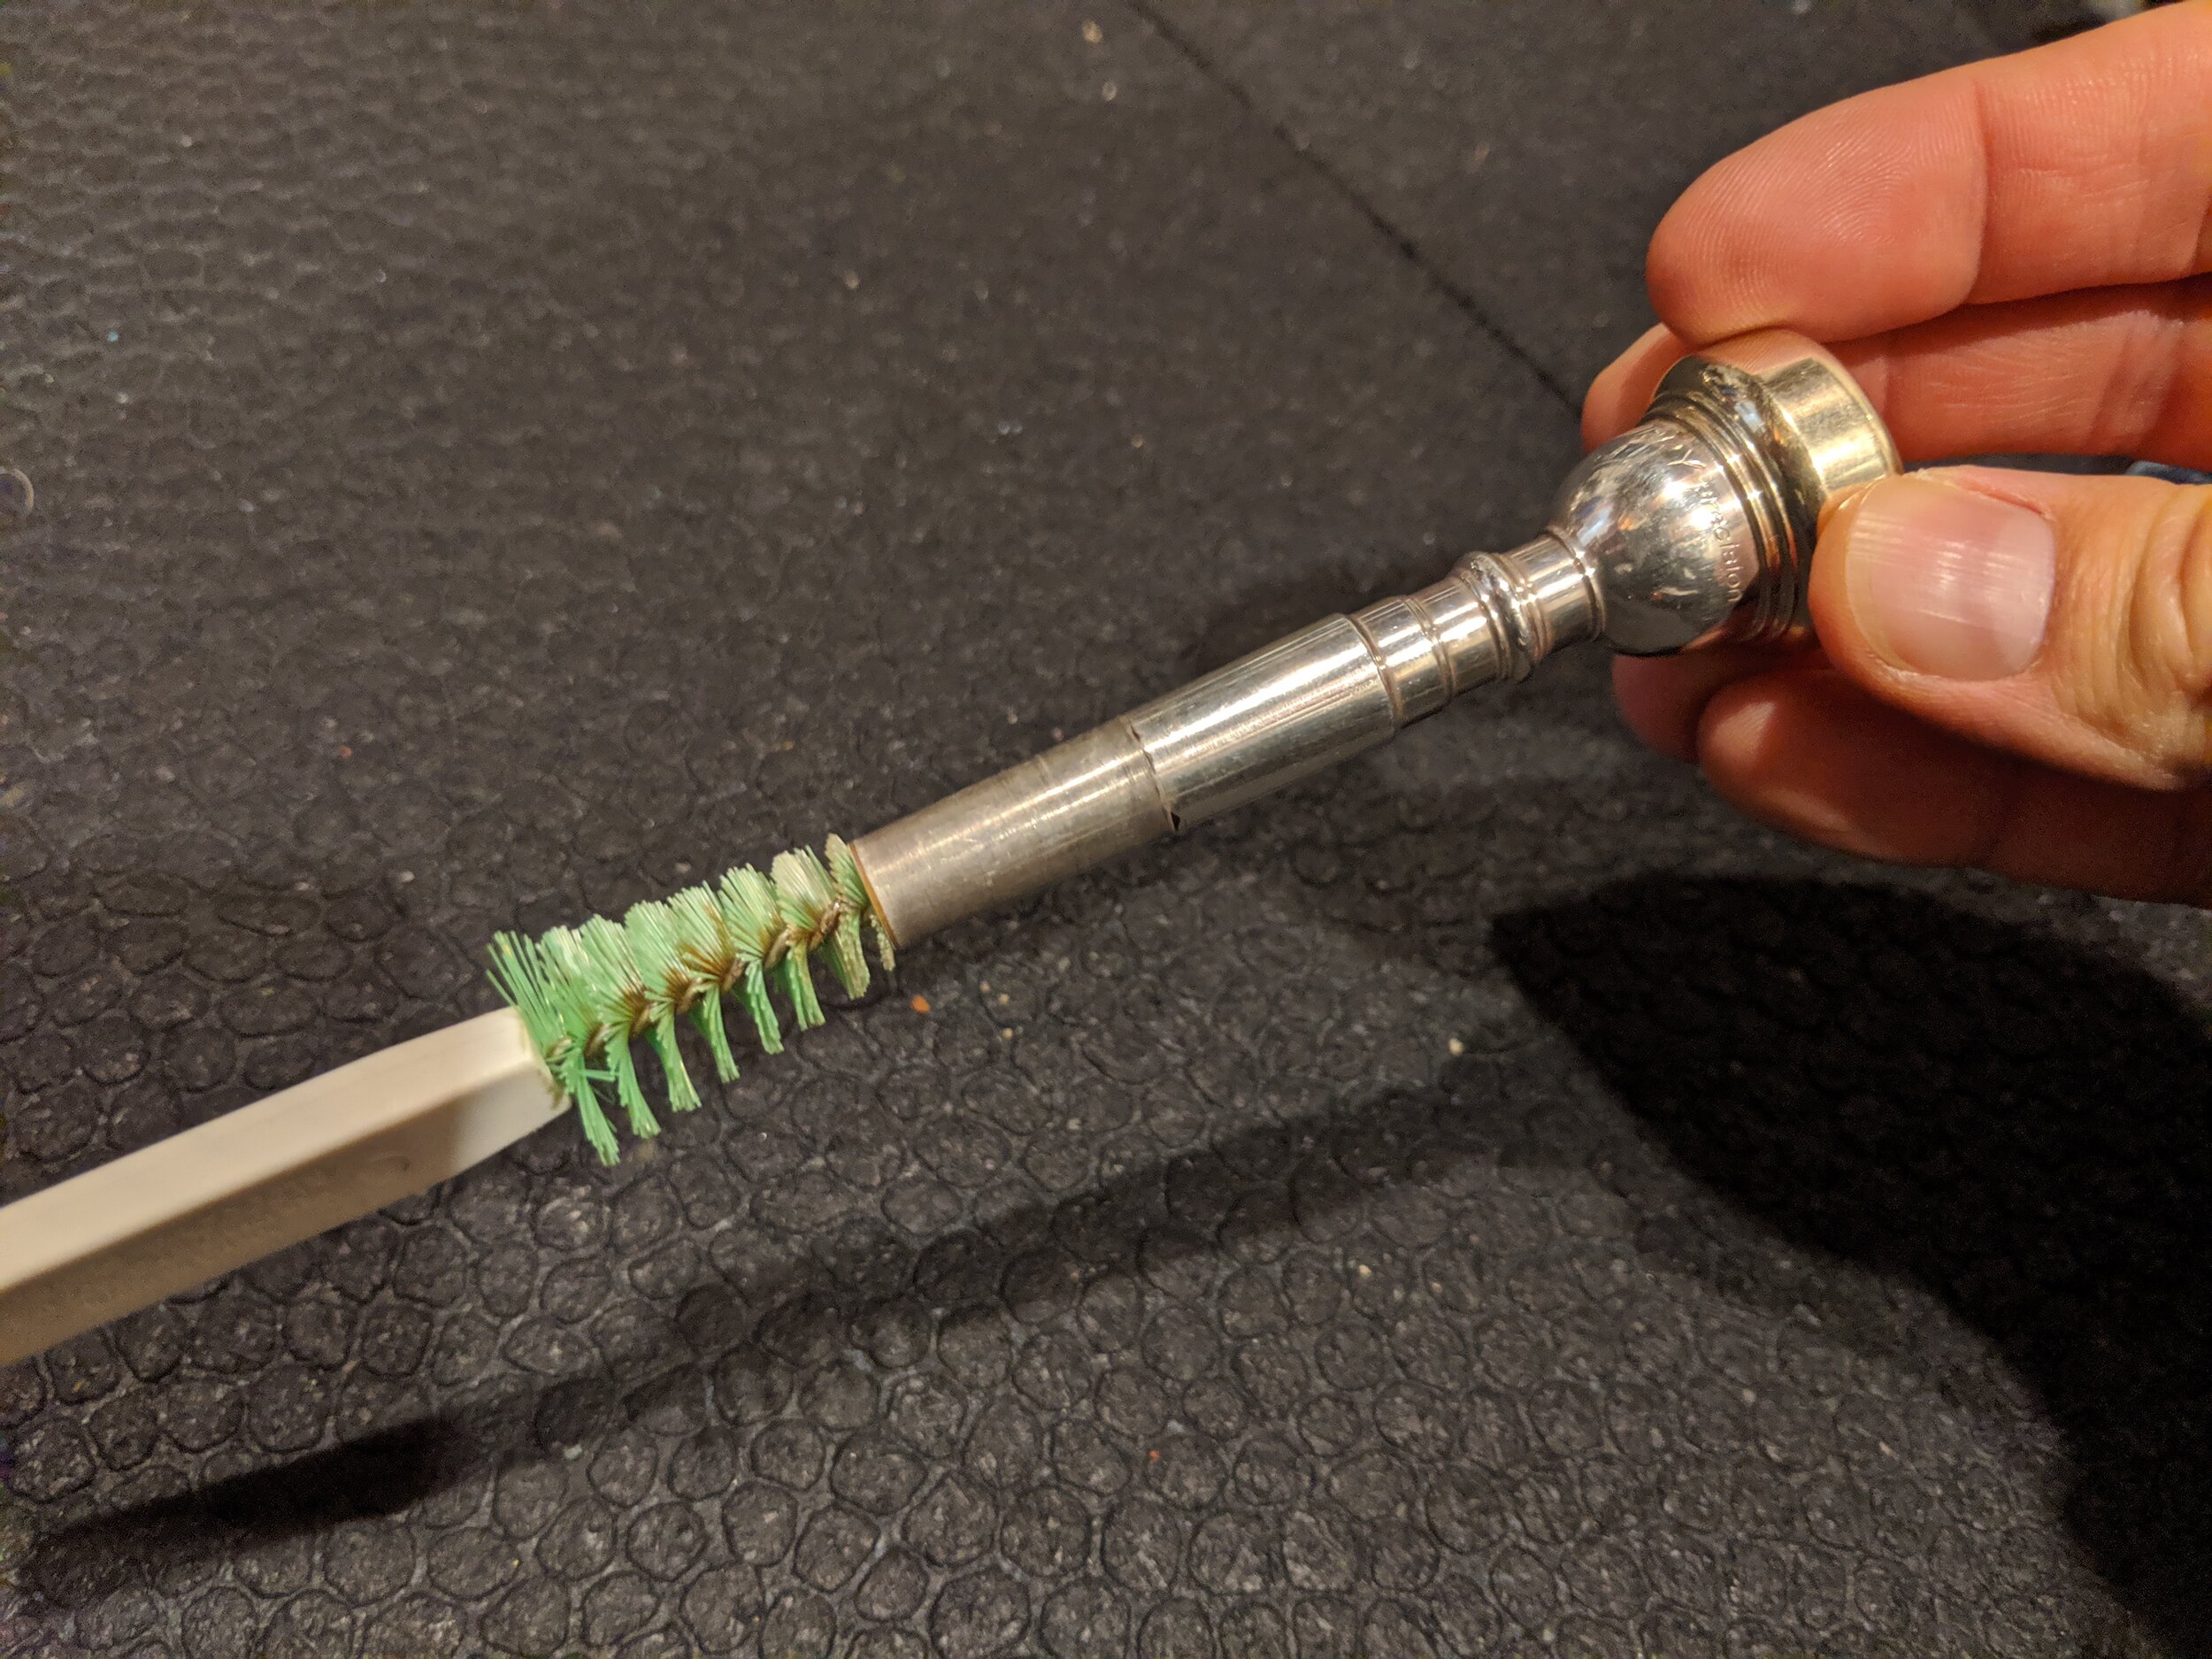
The mouthpiece brush is, as the name would indicate, for cleaning my mouthpiece. (There are also sanitizing sprays made for instruments that can and should be used intermittently between cleanings and especially while sick) The mouthpiece brush will likely only fit into the mouthpiece through the shank and not the cup. That is OK! After using the brushes to not lose any large bits of gunk, use your cup to run water through the mouthpiece and slides.

There are such things as valve casing brushes, and they do a good job of cleaning. The only caution when using one is that the center wire holding the bristles is usually made of a steel that is harder than the brass casings. This means that an over vigorous cleaning could have the potential for scratching the inside of your valve casing. This surface needs to remain absolutely smooth so that the piston valves can move uninterruptedly. Any scratches become both places to accumulate grime more quickly and depending on how deep the scratch is could have a burr on one side which could actually damage the valve itself. Though I personally have a valve casing brush, I almost never use it because I would rather be safe than sorry.

Once everything has been cleaned, rinsed (if you went for the bath), and dried it will be time to reassemble and re-lubricate all the slides and valves as we talked about above. Since there are a lot of small places for water to get trapped inside the trumpet, you may have some gurgling sounds when you start playing again after the bathing process. Don't worry, that is normal. You will just need to use your water key (“spit valve”) to remove the trapped water, probably a few times. Congratulations! You now have a clean trumpet.


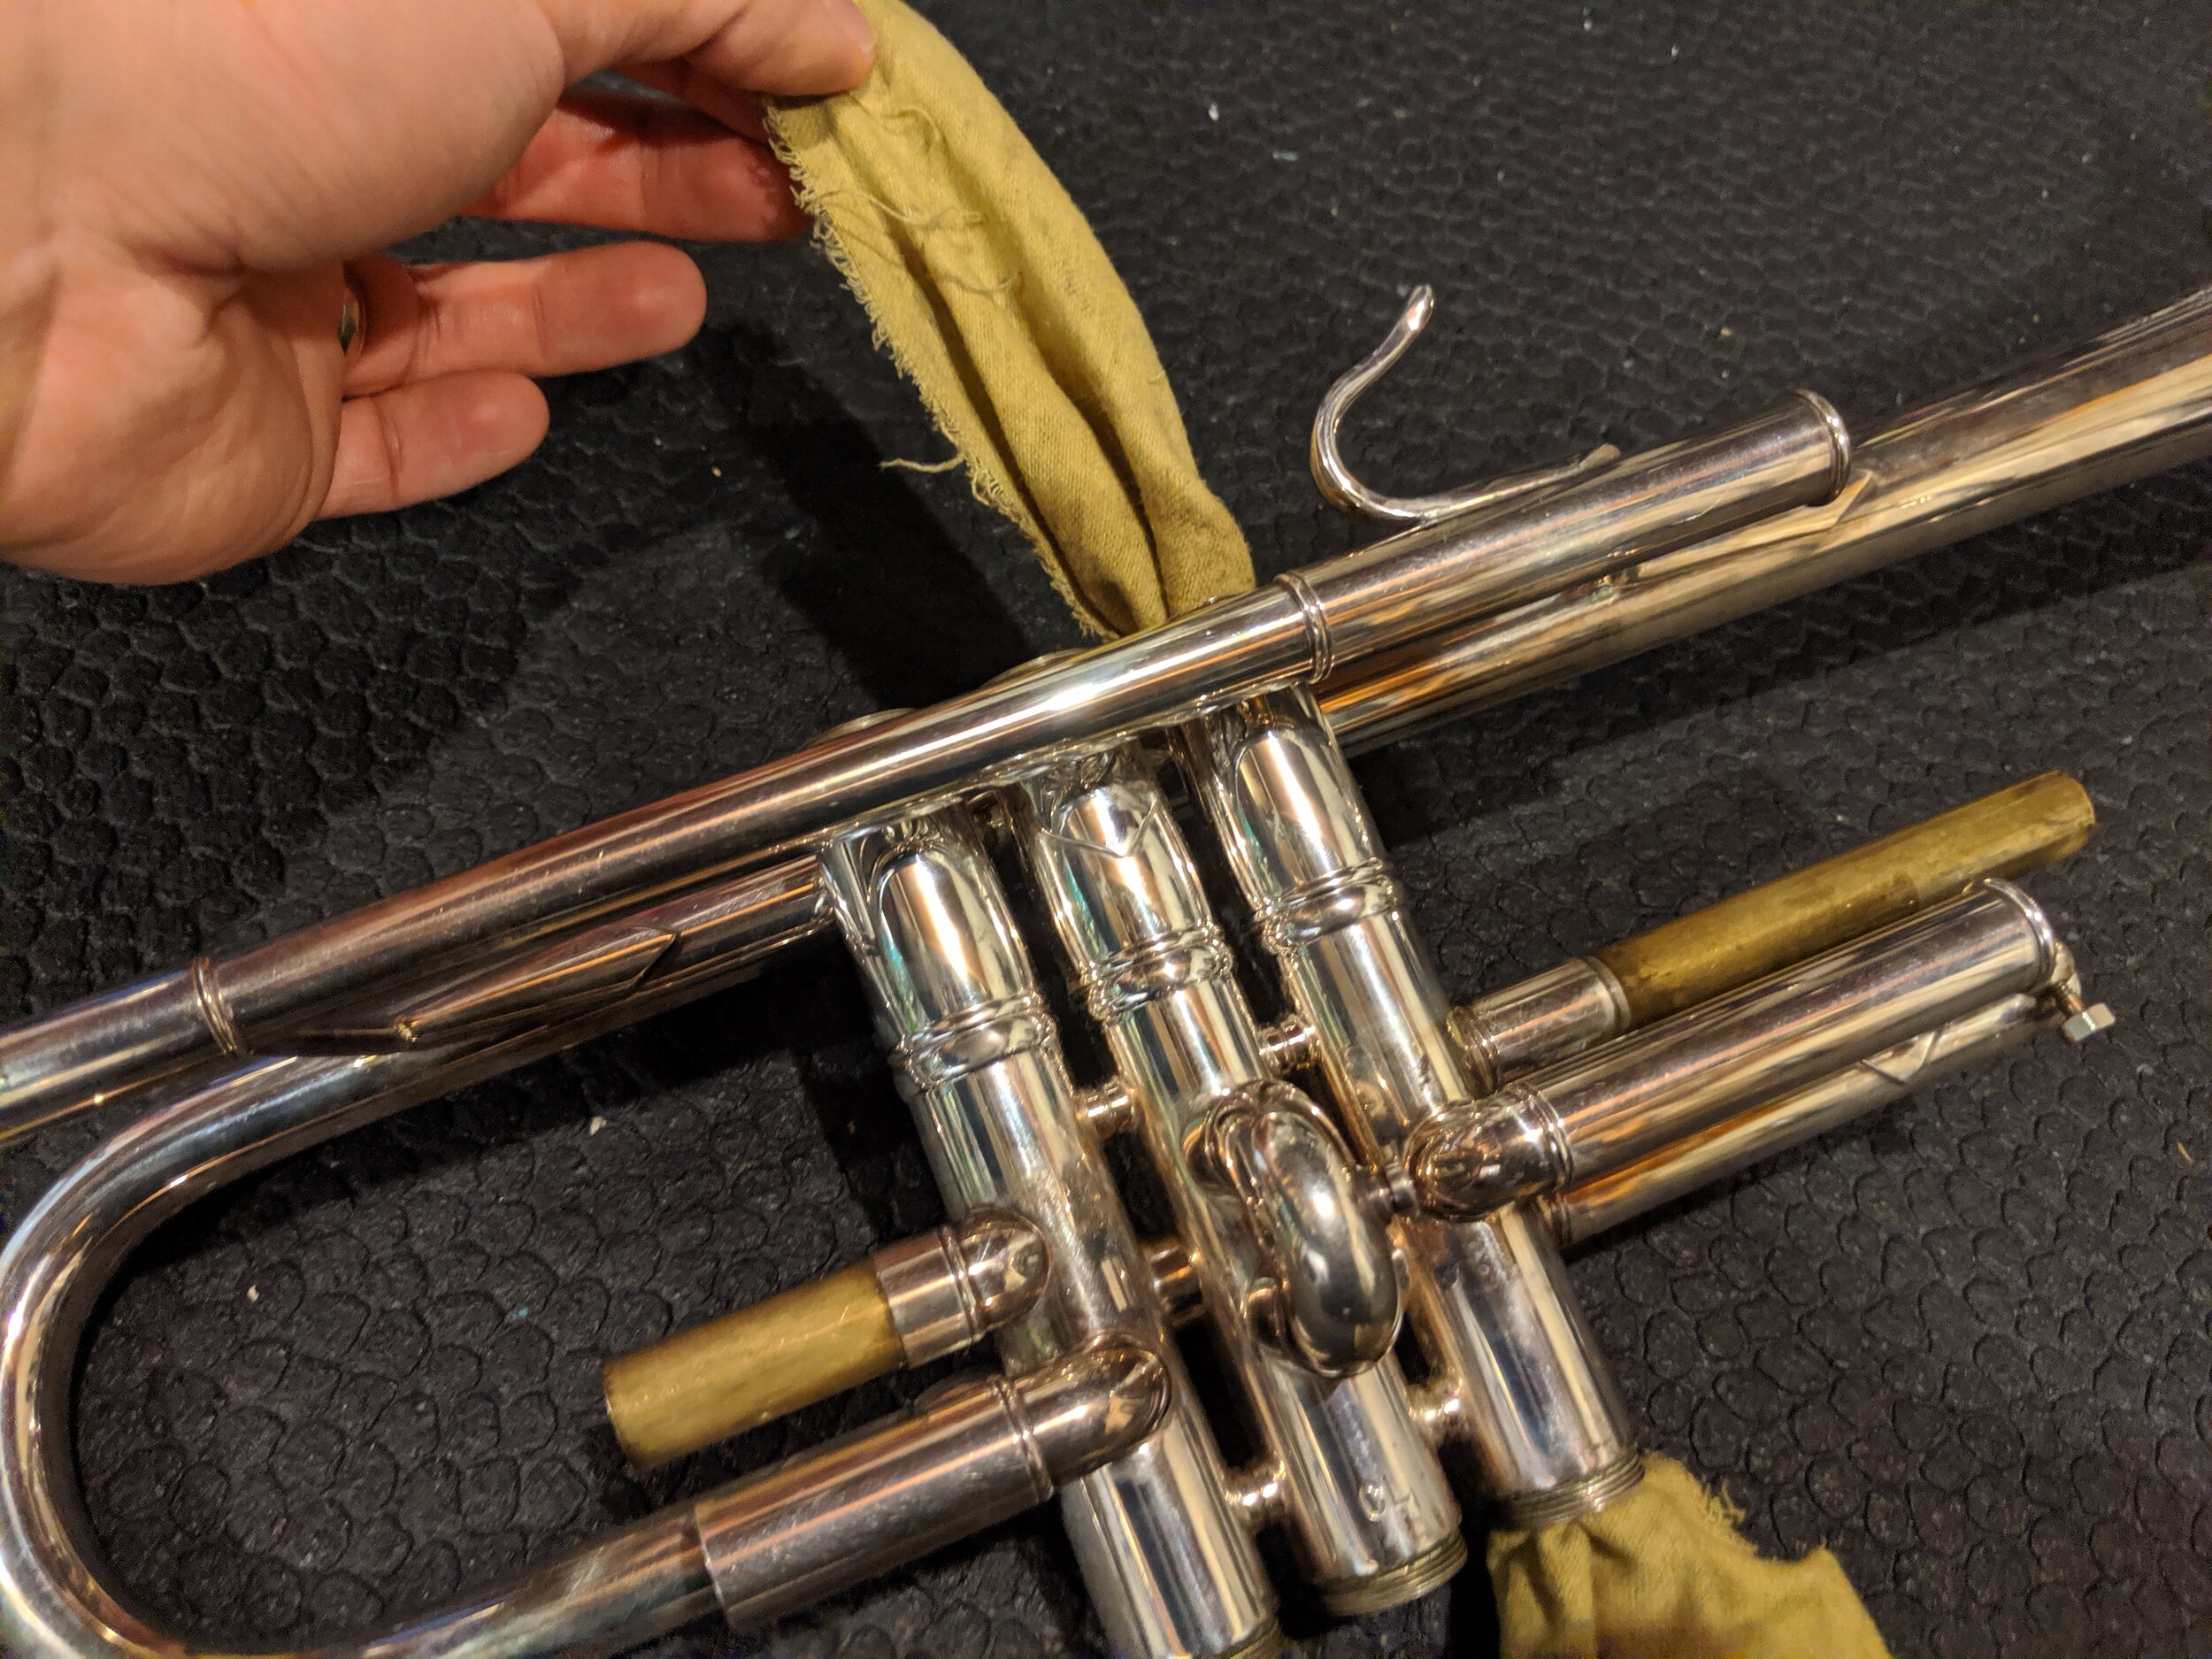
But wait! What about the outside of the trumpet? Well, that part’s super easy. If your trumpet has a lacquered finish (if it looks like brass, it’s probably lacquered), simply wipe it down with a soft cotton or microfiber cloth. Any gentle cleaner can help with this, including a spritz of plain old water. If your trumpet is silver plated, you can clean up fingerprints the same way, but to remove tarnish (where it’s turning brown, black, or even purple), you’ll need to apply a silver polish or use a cloth labelled specifically for silver. These cloths are super convenient, can be found at any reputable music store, and will last for many years. I’ve only purchased two in the past twenty or so years. The only bit of caution is that the silver cloths and silver polish often have a black powdery byproduct that can easily get on your clothes and will leave your hands covered as well, so gloves, an apron, or a smock may be a worthy investment.

Articulation: How Notes Start

Wesley Campbell

Articulation, on trumpet as well as in speech, is how we start each sound, or each note. The largest contrast in articulation is the difference between slurring and tonguing. Simply put, slurring is moving from note to note without interrupting the sound, while tonguing separates the notes with, you guessed it, the tongue. Sounds simple, right? Well, in some ways it is, but there are many variations to tonguing. Let’s take a closer look.

Slurring

Slurring is, generally speaking, easier to do well. This is because when you do it right, the trumpet does most of the work for you. Remember when you changed notes just by pressing the valves back in Changing Notes? Chances are, you were probably slurring. When reading music, you’ll know when you should be slurring by the indication of the aptly named “slur mark,” which is just a curved line connecting the notes that you won’t be tonguing.

The most important thing to remember when slurring is that you shouldn’t let up on the air you’re blowing. If you do, the motion of the valves can interrupt the sound and your next notes may not come out in time, or sometimes, at all! This is particularly important when slurring upward. In that case you could be moving up to the next harmonic and lowering it by using the valves. Those actions happening at the same time require solid air support. Keep the air moving!

Tonguing

Tonguing is the flip side of the articulation coin, but that doesn’t mean everything becomes opposite. Air for instance, still needs to move. In a perfect world, you would want to keep your air moving the same when tonguing as when slurring. That said, tonguing accelerates the air slightly at the beginning of each note, so you can get away with a bit less air. For that reason, it can sometimes feel easier to move notes while tonguing.

Now, what is the tongue actually supposed to do? Well, say “Ta-da!” That’s basically it. Both the “ta” and “da” are common articulations used in trumpet playing. The particular vowel sound you use… well, that gets trickier. Sometimes you’ll want an “ah,” sometimes an “ee,” sometimes an “oo.” The different vowel shapes will affect the tone you produce through your trumpet, so play around with them until you determine which one makes the sound that you want. In general if we see notes written without a specific articulation, we should probably use “ta” or something close to it. The most common specific articulation markings you’ll see are staccato, accent, marcato, and tenuto.

Staccato is the Italian word for “detached” and is indicated by a single dot above or below the note. This means the note should be separated from its surrounding notes, usually by shortening it slightly and making the front of the note a bit more pointed. To achieve this, simply tongue slightly harder and release the note (with your air) a little early. Think of how you might say “tut tut,” where the sound separates, and the second “t” in “tut” is more a stopping of air than an actual striking of the tongue (almost “tuh tuh”).

Accents are indicated with a symbol that is eerily similar to the “more than” symbol that you’ll find in math class. The good news in that association is that the accent symbol means the note needs more sound. Two ways to make the note stand out as louder are to either push more air or tongue harder. Incidentally, tonguing harder will in fact push more air. That’s why it’s the easier approach for most people. If tonguing harder is difficult, go for more volume through extra air for now. As this series progresses there will be more in-depth exercises for tonguing to help strengthen and refine articulation. But that’s getting ahead of myself.

Marcato, Italian for “marked,” is essentially a louder version of an accent. These should be louder and more forceful. This generally means having an even harder striking of the tongue. Imagine trying to spit across the Grand Canyon and you’ll get an idea of how much force the tongue should be using here. Depending on the music style and your musical director, marcato may also indicate that the note should be shorter, like an accented staccato. This is particularly true in jazz. The mark for a marcato is much like an accent that has been turned on its side, with the pointy end facing away from the note.

Tenuto, another Italian word, means “held” and is not technically an articulation, but an indicator of duration. A note with a tenuto marking, which is a simple horizontal line above or below the note, should be held for its entire value, connecting right up to the next note or rest. How we often achieve this on trumpet is by playing in a legato style. Legato is Italian (catching the pattern yet?) for tied together. In the most extreme, this would mean the notes have zero space between them. Slurring is the epitome of legato. That said, if a part is marked either with the word legato or tenuto markings on the notes and there is no slur marking, it should be assumed that you’ll need to tongue the notes very lightly. In this case, think of saying “da” rather than “ta.” Going to an even softer sound, you could try “na” or “la,” though those may take a lot of practice to use effectively.

These are not all of the articulations that we see in trumpet music, but they’re certainly the ones that we see first and most frequently. There are subtle variations that can be made on most articulations and even some markings that get stacked on top of each other! There are probably as many variations of articulations as there are sounds in speech. Practicing the different sounds will help put you in control of the trumpet so you can make it “say” anything you want.


Next time: a reader requested topic! Care and Maintenance of Your Trumpet

Music Reading Basics

Wesley Campbell

If you’re new to the trumpet, chances are, you’re also new to reading music. This article will get you started on how to read music, breaking it down into the two major components: notes and rhythms. If you already know how to read music, congratulations, you can skip this one (go practice!).


Notes

Trumpet music resides (with very few exceptions) on the treble clef. In music theory this is sometimes called a G clef, referring to the loop of the symbol wrapping on the line for G. Similarly, the bass clef is called an F clef, with dots surround the line for F, and the alto clef is called a C clef, with a sort of arrow forming on the line for C. Fortunately, we only need to worry about the treble clef. Each of these clefs, though, follows a similar setup of lines and spaces where the note can be placed. Knowing what lines and spaces mean will tell you the names of each note you encounter.

The lines on the treble clef, going from bottom to top, represent E-G-B-D-F. Most introductory music books use a mnemonic device to learn this (though I also recall simply drilling the letters in order over and over again in elementary school music class). The mnemonic I learned early on was “Every Good Boy Does Fine.” I generally like this one mostly because “fine” rhymes with “line,” so you know which thing you’re trying to remember. The spaces in the treble clef, again from bottom to top, are F-A-C-E. This one is easier to remember because it spells an actual word: face. “Face” which rhymes with “space.” Fine, line. Face, space. Easy, right? If in doubt, remembering even one line or space on the clef should be enough to figure out a note. This is because notes in music, moving upward, go alphabetically from A-G and then repeat. Assuming you know your ABCs, you’re all set.

But what about those notes outside the clef? Yes, most of our notes will be in the staff, but when we play high or low enough, we run out of room. The solution: ledger lines. Every other note moving outward from the clef gets a line through it as if the clef were continuing on. So, ledger lines above the staff, moving upward, are A-C-E-G and so forth (don’t worry, you’ll mostly only need the first two), and ledger lines below the staff, moving downward, are C-A-F (there are technically notes we can play below that (pedal tones), but that’s a whole different beast). Again, if you just go through the alphabet (A-G), figuring out the notes will become easy.

In addition to the, let’s call them “regular” notes, there are also notes referred to as accidentals. These are notes called sharps and flats, indicated by a proceeding symbol. The flat symbol (♭) lowers a written pitch by one half step. The note name would also get the word “flat” added to the end. So, an A with a ♭ in front of it is an A-flat. Following so far? Well, on the flip side of flats, are sharps. When the sharp symbol (♯) is written, the pitch goes up by one half step. So an A with a ♯ in front of it is an A-sharp (for various reasons, though, A-sharp is more commonly seen written as B-flat).

Applying what you just learned to the fingerings you learned in Changing Notes, we finally get to use… a fingering chart!

The first fingering chart you see is actually the very first fingering chart I ever had. My dad wrote it out for me the day we came home with my first trumpet (in the summer of 1996!). The style here shows the fingerings pictographically, with shaded valves pressed down, and the valves going 1, 2, 3 from the top down. The second fingering chart uses numbers to represent the fingerings instead of the shaded circles and covers what is often called the “full range” of the trumpet. We can definitely go beyond these notes (in BOTH directions), but don’t worry about that yet… Identifying the fingerings as numbers can be quite useful if you ever find need to write a quick (and hopefully occasional) reminder in your music to help you play the right note.


Rhythm

Now for the other part of music reading. Rhythm. If there’s one thing more important in music than notes, it’s rhythm. Don’t get me wrong here. Notes are super important. Let’s try a thought experiment, though, so you can see what I mean. Think of a song you really like. Now, think about that song with all the right notes, but a completely different rhythm (probably hard to do). On the flip side of that, imagine the song with all the right rhythms, but a completely different set of notes (this is particularly easy to imagine if you’ve ever heard a large group sing “Happy Birthday”). In most cases, getting the correct rhythm is going to result in a song being more recognizable versus just having the notes. You definitely want to have both, but if you don’t have the rhythm, it just won’t sound right.

That having been said, let’s look at how rhythm is written. To begin, we have to look at the time signature. This will be the foundation of our rhythm reading. The time signature indicates both how many beats are in the measure (the top number) and what type of note determines a beat (the bottom number). As the most common time signature is 4/4 (in fact, it’s also called “common time”), that’s where we’ll start. So, 4 beats to a measure is easy, and a quarter note (like the fraction 1/4) gets one beat.

Starting on the left, we have a whole note, which simply looks like an oval. The whole note gets 4 beats and is named for taking up a whole measure in 4/4 time (like I said, the most common time signature). In the following measure you’ll see the corresponding whole rest, which also takes up a whole measure (and looks like the profile of a hole in the ground: whole, hole), but this time a whole measure of silence. The next measure has the half note, which gets a stem added to the oval. It’s no surprise that the half note is half the length of the whole note, getting 2 beats. To fill the measure, we get its partner, the half rest (which kind of looks like a top hat: half, hat). After that, we get the quarter note and quarter rest (which looks like a squiggly backward 3). The quarter note and rest are, you guessed it, a quarter of the length of a whole note, so each gets 1 beat and takes 4 to fill the measure. To distinguish itself from the half note, the quarter note (and each note type after it) gets the oval filled in. You may have noticed by now that each new note is half the length of the one before it. Good catch. That pattern continues on for each new note length. Naturally, then the next measure contains the aptly named eighth note and eighth rest (looks like a fancy 7 to me), which gets an eighth of the length of the whole note: one half of a beat. You’ll notice that the eighth note looks like a quarter note with a flag to distinguish it. When an eighth note is placed individually, that flag falls toward the oval. When two or more eighth notes are placed consecutively, the flags combine into a beam, grouping them together. Each new note and rest after the eighth will follow this addition by gaining an additional flag or beam as you’ll see in our last measure with the sixteenth note and sixteenth rest. As a trumpet player, you will certainly at some point see sixteenth notes, and maybe down the road even thirty-second notes. There are even more (I’ve, unfortunately, had to play and count 128th notes on occasion), but it’s easy enough to figure out how long the notes are by simply dividing in half for each new flag.

This is by no means all there is to reading notes or rhythm. There are entire books and courses devoted to music reading. Hopefully, though, this will be enough to get you started on you journey. Now go find some music and try to play it On Your Own!

Changing Notes

Wesley Campbell

Now that you’ve played your first note(s) on trumpet, it’s time to play some more of them. By that I mean different notes. More of the same note is fine, too, but that’s working on endurance, and that’s a topic for a little bit later.

There are two main ways to change notes on the trumpet: changing valves and changing air. Note that I didn’t say lips. Yes, the lips will be involved. Yes, the lips will vibrate at a different frequency. BUT using the air to change the notes will allow you to play more notes sooner, and ultimately play more efficiently. We’ll get into that in a minute, so before I get too far ahead of myself, lets talk about the valves.

Using the valves on the trumpet is by far the easier way to change notes. As long as you’re playing an open note (that is, not pressing down any valves) you can instantly play more notes by pressing down valves. This way of changing notes lets the trumpet (and the nature of acoustics) do the work for you. So, how do the valves do that? Well, each valve (in the case of most trumpets, a piston) has precision machined holes in them to line up with specific tubing on the trumpet in two different positions: up and down. In the up position, airflow bypasses extra tubing and goes as directly as possible to the bell. In this manner, when all 3 valves are up (which we call an open note) the trumpet is at its shortest length. As the valves are pressed into the down position, airflow is diverted into the extra tubing attached to each respective valve. This lengthens the trumpet overall, making the sound automatically move lower in pitch (thanks resonance!).

The downside of trumpet valves (aside from the compromise tuning system… WAY too early for that topic, but we’ll get there) is that there are only 7 distinct combinations that create different lengths. Starting from open (everything up, notated on fingering charts as “0”) we move to pressing the second valve (often notated on fingering charts as “2”). This has the shortest extra tubing and lowers the pitch by a half step: the smallest increment in Western music (micro-tones are a thing that may or may not get covered by this author). If we approximate that that additional length gives you that half step, then we need twice that for a whole step. Good news! The tubing on the first valve is just about twice the length of the second. So, pressing down only the first valve (“1” on a fingering chart) will lower the sound a whole step from an open note. Let’s keep going. To go another half step (this interval of 3 half steps is called a minor third) you’ll need to find tubing about 3 times the length of the tubing on the second valve. If you’ve been keeping track, we can accomplish this by pressing down both the first and second valves together (“12” on most fingering charts). But wait! What about the third valve (you guessed it: fingering charts call that one “3”)? Well, the third valve actually is about 3 times the length of the second valve, so technically, pressing the third valve alone will give you almost the same length as pressing the first and second together. Most of the time it will be easier (from both a tuning perspective and that the ring finger is typically weaker than the others) to use the 1 & 2 valve combination rather than 3. That said, it’s important to keep that third valve in mind here as the next half step down (4 half steps now, called a major third) is accomplished by adding the second valve to the third (yep, “23”). Continuing on, we keep the third valve, but change from second to first (just like going from our first half step to the whole step), arriving just shy of what would be a five half step drop (called a perfect fourth). Notice I said “just shy.” Well, remember that side note about the compromise tuning system? Without going too much into it, just remember that the combination of first and third valves (“13”) is a little bit too short. This means the correct fingering is the combination of the first and third valves AND a slight (~quarter inch) extension of the third valve slide (you might remember from “Your First Notes” that I said you’d need that ring… this is why). One last valve combination! This time you get to press down all three (“123”). Now you’re 6 half steps down from that open note (called a tritone). This combination, like “13” is also too short, but even more so than before, requiring a much longer extension of that third valve slide (~one inch). You’ll want to check this against a tuner at some point as each trumpet will be ever-so-slightly different. Don’t worry too much about it now, though. We’ll cover tuning and tuners in-depth another time.

So, those are your seven different valve combinations: 0 (open), 2, 1, 12 (or 3), 23, 13 (with slide), and 123 (with more slide). But wait! If there are only seven combinations, how do we play more than seven notes? That’s where the changing air comes in. Back in the old days (think pre-1800), trumpets didn’t even have valves. These are now called natural trumpets or baroque trumpets, referring respectively to the natural harmonic series or the baroque musical period during which they were played (They actually are still played sometimes, and I have one. I think it’s awesome!) The only way these trumpets could change notes was to take advantage of harmonic frequencies and changing partials (a term brass players use for the different notes along the harmonic series) primarily by increasing or decreasing airspeed. And if they needed to play a note between two notes in the series, they’d have to change out a slide to make the entire trumpet a different key! Valves really simplified that process.

Harmonic Series.jpg

So lets talk about changing partials. The lips are involved, but air is much easier to think about (and control), so we’re going to focus on that first. Generally speaking, the faster air is moving through the trumpet, the faster the sound wave produced can vibrate. This means that faster air should equal higher notes. The flip side of that coin is that slower air will allow for lower notes. So far, we haven’t talked about what note you’re actually playing. That was deliberate. You’ll also notice that though I referenced fingering charts, I didn’t include one. Right now we’re focusing on how to play, not what to play. So, take a breath and play a note. Hold onto it, then try to speed up the air. A good way to do this initially is to think about blowing more air and playing louder. Try this out until you can get the note to change. It may take lots of tries, and that’s perfectly OK. Depending on what note you’re playing, the difficulty of changing notes can vary widely. Despite the notes being closer together as you go up (see the harmonic series above), it gets harder and harder to accurately change. Once you’ve figured out playing a higher note, or if you just want to try something different, try changing to a lower note. This will be a reverse process of playing higher. The air will need to slow down. To begin, try thinking of blowing less air, or playing quieter. Depending on what note you’re playing, you may not be able to go lower on an open note, so don’t be discouraged if it doesn’t happen. You may have to go up before you can go down (and vice versa).

Once you’ve started to get a feel for changing notes with your air, try out those fingerings from up above and see how the patterns work when starting from different open notes. Next time, we’ll look at figuring out specific notes and how to read music. For now, just have fun! Change notes, and try to make up a tune all on your own.

Your First Notes

Wesley Campbell

Holding the Trumpet

Before you can start playing your trumpet, you’ll need to know how to hold it. Though you might think this would be a straightforward matter, there is some debate as to what is the “correct” hand position. I feel that whatever fits your hand most comfortably while allowing free motion of the fingers is the correct position for you, which may be different from what is correct for someone else. Below are two of the most common left hand grips. Feel free to adjust depending on your hand size.

In both of these grips, you’ll put your thumb in the appropriately named thumb saddle, assuming your trumpet has one. Many student models don’t have a thumb saddle, so if you’re missing one, don’t worry about it. How your other fingers wrap around the valve section is where grips vary. Frankly, as long as you can grasp the trumpet, support its weight, and it’s comfortable, you’re good.

At some point it will become necessary to move the third valve slide using the ring. ALL trumpets should have a third valve slide ring of some manner, so if you’re missing this one, talk to your local band repair shop. Which fingers you use to move the slide is dependent on your hand size, shape, and strength. Personally, I have my ring finger in the ring (easy to remember), and move the slide by pushing the ring out with my middle finger or pulling it in with my ring finger. This works well for me, but you should use whatever works well for you.

For the right hand, start with your index (pointer), middle, and ring fingers resting on the first, second, and third valves respectively. The rest of the hand placement isn’t nearly as straightforward, and can be counter-intuitive. For instance, what should you do with your pinky? Despite the hook looking like your pinky should be in it, most teachers (myself included), will tell you to rest your pinky on top of that hook. Here’s why: if your pinky is in the hook, the movement of your ring finger will be restricted. On top of the hook, you can move your ring finger freely, with your pinky potentially moving along with it. That said, if you ever find it necessary to play with only one hand (e.g., while turning a page, changing a mute, or should you only have one hand), then you should make use of the hook to support the weight of the instrument.

Thumb placement in the right hand is also up for debate, but I recommend placing it between the first and second valve casings. This, like the pinky placement, is to allow for relaxed, free motion of your valve fingers. The palm may want to drift inward toward the trumpet in this position, though, so imagine having a small ball (like a racquetball, squash ball, or stress ball) in the palm of your hand to help arch your fingers into the correct position. If your hand gets to squished in, moving your fingers will become harder. Ease of movement is the name of the game here. This positioning will have you set up to press the valves down (more on that in a later article) with the tips of your fingers, rather than the pads. When speed becomes a relevant component, this will make things much easier.

Alternate placement for the thumb: If you find the above placement uncomfortable (for instance, if you have larger than average hands), try moving your thumb to the underside of the leadpipe on the outside of the valves (This position is also a useful alternative in combination with the pinky hook in the case of one-handed playing). Once again, whatever is most comfortable for you, while allowing free motion is the correct position for you.


Producing Sound

How does a trumpet make sound? It all starts with your lips. Essentially, the trumpet just transmits the vibrations from your lips to the bell, then those vibrations travel through the air as sound. The trumpet is just a type of speaker! Neat, huh? But how do you make your lips vibrate? Assuming you’ve never played trumpet before, I’d like to walk through a 4 step process to get your lips going. If you can already make a sound, this should be an easy refresher.

The first step is, as it should be, the easiest. It is also rather silly, but that’s ok, so are most musicians. To begin, relax the muscles in your face, keeping your lips together. Using very little effort to keep your lips together, blow air out through your mouth and let your lips separate and bounce off each other. This process is sometimes called loose lip buzzing. It is also called horse flapping, for its resemblance to how a horse flaps its lips. This will help to loosen up the muscles around your lips, increase blood flow, and get your lips accustomed to vibration, which will probably feel a little weird at first.

The second step can be called either firm lip buzzing or, more commonly, free buzzing. This time, use a good deal of effort to keep your lips together as you blow air. Think of making a continual “p” sound (similar to the tongue out “raspberry” sound). This will take more air than you might expect and may make you light-headed at first. If that happens, take a break and come back in a few minutes. Try holding onto one note as you get comfortable with this, then try changing notes up or down. At this point, don’t think too much about how it’s happening, just whether or not it is. Trust me, I’ll go into way too much detail on the mechanics of it in a later article.

The third step brings the mouthpiece into play. Buzzing on the mouthpiece will feel similar to free buzzing, but will require much less muscular effort, so if you were successful in step 2, step 3 should come easily. The basic setup will begin the same way, with a continual “p” sound to produce the note. The change, of course, is that the mouthpiece will be in your hand(s) and on your face. Your grip and mouthpiece placement will both affect the way the buzz happens, so let’s take a minute to learn the “correct” ways to do it.

Gripping the mouthpiece is far less complicated than gripping the trumpet, but as with many simple things, it is often overlooked. There are two ways that I favor as being “correct” when teaching mouthpiece buzzing. That’s not to say that other grips are wrong, but these are both geared toward avoiding excessive mouthpiece pressure (which can lead to some bad habits… more on that at a later time). If neither of these grips work for you, I encourage you to experiment and find one that does, but try to keep minimal pressure in mind as you do.

The first grip involves using your thumb and forefinger to grasp the shank (smooth part) of the mouthpiece. Your remaining fingers can stay up or down, whichever is more comfortable for you, so long as they remain relaxed. Don’t strain the fingers holding the shank. You only need to support the mouthpiece; don’t try to crush it!

The second grip uses all of your fingertips together. Bunch your fingers together as if making a hand puppet, then place both hands on the mouthpiece shank on opposite sides. Again, the grip should support the mouthpiece without straining.

Both of these grips, when done correctly, remove the ability to use excessive pressure when buzzing. Once you begin pressing the mouthpiece too hard into your lips, your fingers will slide up the shank toward the cup. Fingers in place: good. Fingers moving: bad. Again, we’ll talk more about mouthpiece pressure later, but for now, just try to keep it light.

Now, let’s talk about placement of the mouthpiece on the lips. Various method books over the years have given inconsistent advice over what is considered “proper” placement. Some recommend half top lip and half bottom lip, some dropping it lower for one-third top lip and two-thirds bottom, and others recommend the exact opposite. Placement from left to right is usually recommended as being centered, or at least very close to the center. So, what is correct? Whatever works for you! The fact of the matter is that each person’s embouchure (that’s the fancy music word for the setup of muscles around your lips that help you make your sound) is different and will require a slightly different setup. I don’t play strictly on center, myself, so what works for you may not be what works for me, and vice versa. Starting in the center (both up/down and left/right) is a good place to start, but you should experiment and find what placement works best for you. Find a place that, ideally, is both comfortable and easy to produce a sound.

Finally, we get to use the trumpet! If you’ve succeeded on steps 2 and 3, this should be a piece of cake. Similar setup, but less effort. Think of a “p” sound and blow into the mouthpiece (after you put it into the trumpet, of course). Congratulations! You (probably) just made a sound on your trumpet. If you didn’t, don’t worry. Try again. Use more air. Use less air. Relax your lips. Tighten them. Once you’ve got it, remember how it felt and try to do it again, and again, and again!

Next week, we’ll look at the different ways to change notes so we can start to make music. Now go play some Trumpet On Your Own.

Welcome to "Trumpet On Your Own!"

Wesley Campbell

Hello there! If you’re reading this, you probably either want to learn how to play the trumpet or how to play the trumpet better. Good news: this new series will help you do both. Bad news: it’s going to take effort on your part.

Trumpet On Your Own was originally conceived of as a method book that I began writing when I found myself constantly disappointed with the beginning methods used in band programs. To be fair, band methods have to try to teach ALL instruments at the same time, and that isn’t easy. What I wanted for my students was a book that really focused on just what was unique to the trumpet, but that also dug deeper into how (and just as importantly why) things work. By having a beginning method that focuses just on the instrument YOU play (which is, of course, trumpet, right?) there can be much more detail and, ideally, quicker progress.


This is not to say that this series is only for beginners. Yes, that was its original intent, but it will cover more than just how to play notes. It is also intended to teach you how to practice: a skill that too many teachers forget to teach and so many learners forget to learn. Hopefully, this will encourage you to become your own teacher (even if that puts me out of a job). It may be difficult at times, as we’re usually our own harshest critic, but learning to teach yourself will help you improve more quickly (at anything, really) and place you on a path of lifelong learning and improvement.

Keep an eye out for regular posts here as this series will cover a large amount of material. Hopefully as you follow along, you’ll find it easy enough to “Trumpet On Your Own.”